
The One Curry Method That Works with Any Curry Powder
Most curry recipes online hand you a single dish and send you on your way. You follow the steps, eat dinner, and start from zero the next time you want something different. This guide takes a different approach. Instead of one curry recipe, you are going to learn a repeatable method for how to make curry with curry powder that adapts to virtually any style, protein, or pantry situation.
The technique breaks down into three core skills: blooming spices in fat, layering aromatics in the right order, and building a sauce base that balances richness, acidity, and heat. Master those three moves and you can pivot from an Indian curry recipe on Monday to a Jamaican-style chicken curry on Wednesday without hunting for a new set of instructions.
Why Curry Powder Beats Starting from Scratch for Weeknight Meals
Sourcing, toasting, and grinding individual spices is rewarding when time allows. On a Tuesday night with 30 minutes on the clock, curry powder is the smarter play. It is not a compromise. It is a pre-balanced spice blend designed to deliver complex flavor in a single scoop.
Curry powder eliminates the guesswork of balancing turmeric, cumin, coriander, fenugreek, and chili from scratch, while still leaving room for you to customize heat, sweetness, and acidity to your taste.
Different types of curry powder exist for a reason. A Madras blend leans hot and punchy. A Japanese blend skews sweeter and milder. Choosing the right one, then treating it with proper technique, is what separates a flat, dusty-tasting sauce from something that rivals restaurant quality.
What You Will Learn in This Step-by-Step Method
Over the next seven steps, you will learn how to make curry from curry powder using a framework that covers powder selection, blooming technique, aromatic layering, liquid ratios, protein timing, and final seasoning adjustments. Each step builds on the last, giving you a collection of curry recipes you can remix endlessly rather than a single dish you will forget by next week.
Step 1 Pick the Right Curry Powder for Your Dish
Grabbing the first jar labeled "curry powder" off the shelf is a bit like picking a random bottle of wine for a dinner party. You might get lucky, or you might end up with something that clashes with everything on the table. The curry seasoning you choose shapes the entire personality of your dish, from color and heat to the aromatic backbone that lingers after each bite.
So what is curry powder made of? At its core, most blends share a common foundation: turmeric for golden color, coriander seeds for citrusy warmth, cumin for earthiness, fenugreek for slight bitterness and depth, and chili for heat. Beyond that base, the variations are enormous. Some blends fold in fennel, mustard seeds, cinnamon, cardamom, cloves, or even curry leaves. What is in curry powder depends entirely on the regional tradition it comes from and the maker's personal balance.
Madras vs Jamaican vs Japanese Curry Powder Differences
Think of each curry powder type as a different lens on the same concept. A Madras curry powder is a rich, versatile blend rooted in South India with a sweet-hot character thanks to ginger and cinnamon alongside a heavier dose of dried red chilies. It produces a deep reddish-gold sauce and works beautifully in coconut-based soups and stews. If you are following a red curry recipe that calls for powder rather than paste, Madras is often your closest match.
Generic yellow curry powder, the kind most common on supermarket shelves, traces back to British colonial attempts to replicate Indian flavors in a single jar. It is turmeric-forward, moderately warm, and mild enough for a yellow curry recipe or an all-purpose weeknight dinner. It will not blow anyone's head off, which makes it a safe starting point for families and beginners.
Jamaican curry powder takes a sharp turn. Allspice berries, native to Jamaica, define this blend with flavors reminiscent of cinnamon, nutmeg, and clove rolled into one. It typically contains fewer ingredients than Indian versions, leaning on turmeric, allspice, and scotch bonnet-level heat. Use it for curry chicken, goat, or as a rub for lamb.
Japanese curry powder is mild and slightly sweet, closer to the Madras end of the color spectrum but far gentler in heat. Fennel or anise seed and fenugreek are common additions, sometimes alongside mushroom powder for umami depth. It is designed for the thick, stew-like curries served over rice in Japanese home cooking.
Thai-style curry in powder form does exist, though pastes are more common. A red curry powder will include lemongrass, galangal, and makrut lime alongside standard spices, delivering a fragrant, herbaceous heat that pairs naturally with coconut milk.
| Type | Heat Level | Best Cuisine Pairing | Flavor Notes |
|---|---|---|---|
| Madras | Medium-Hot | South Indian, British-Indian | Warm, pungent, ginger-forward with chili kick |
| Generic Yellow | Mild | All-purpose, British-Indian | Turmeric-heavy, balanced, slightly earthy |
| Jamaican | Medium-Hot | Caribbean (chicken, goat, lamb) | Allspice-dominant, warm, aromatic |
| Japanese | Mild | Japanese stews, katsu curry | Sweet, subtle, umami undertones |
| Thai (powder form) | Medium | Thai coconut curries | Herbaceous, citrusy, lemongrass notes |
How Much Curry Powder to Use Based on Heat Preference
Quantity matters as much as type. A curry powder recipe that calls for a vague "sprinkle" leaves you guessing, so here are concrete numbers based on a single serving:
- Mild result: 1 tablespoon per serving. Good for kids, sensitive palates, or when you want spice flavor without burn.
- Medium result: 1.5 to 2 tablespoons per serving. The sweet spot for most adults who enjoy warmth without sweating.
- Hot result: 2 to 2.5 tablespoons per serving. Best with Madras or Jamaican curry powder where the chili content is already elevated.
Keep in mind that these numbers assume you are using the powder as your primary spice source. If you plan to layer in additional chili flakes or fresh chilies later, start at the lower end and adjust after tasting. A mild curry blend used generously can still deliver bold flavor without overwhelming heat, which is exactly why understanding your powder's profile before you start cooking saves you from mid-recipe panic.
With your curry powder selected and measured, the next question is what goes into the pan alongside it. The aromatics and base ingredients you pair with that powder determine whether your sauce tastes one-dimensional or layered with depth.
Step 2 Gather Your Aromatics and Base Ingredients
Every great curry shares the same DNA beneath its surface. Regardless of whether you are working with a Madras curry blend or a mild Japanese powder, the supporting cast of aromatics and base ingredients is what transforms dry spice into a rich, cohesive sauce. Think of your curry spices as the lead vocalist and these ingredients as the band backing them up.
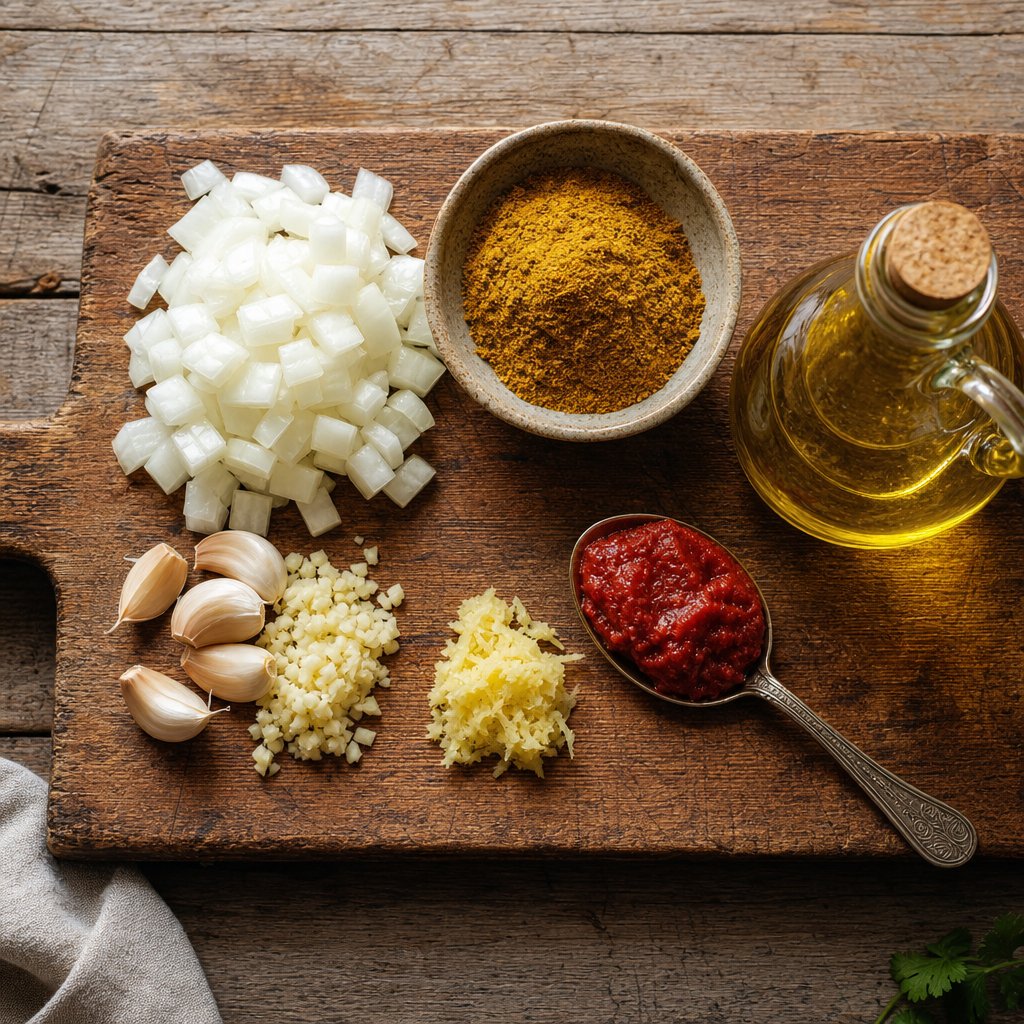
Essential Aromatics and Their Roles in Curry
Each aromatic in a curry plays a specific role. Onions provide natural sweetness and body once they break down during cooking. Garlic delivers pungent depth and savory backbone. Ginger adds brightness and a subtle heat that lifts the entire dish. Tomato paste concentrates umami and acidity into a small, powerful dose, essentially giving you tomato sauce from paste without the extra liquid diluting your curry too early. Oil or ghee acts as the medium that carries fat-soluble flavors from your spices into every bite.
Here are the base measurements for 4 servings:
- Aromatics: 2 medium onions (diced), 4 cloves garlic (minced), 1-inch piece fresh ginger (grated)
- Spices: 2 to 3 tablespoons curry powder (based on heat preference from Step 1), 1 teaspoon salt
- Fat: 3 tablespoons neutral oil, ghee, or coconut oil
- Tomato base: 2 tablespoons tomato paste
- Liquid: 400ml coconut milk, stock, or water (covered in Step 5)
- Optional flavor boosters: juice of half a lime or 1 teaspoon vinegar, fresh cilantro or curry leaves, pinch of sugar
Substitutions When You Are Missing an Ingredient
Real life rarely hands you a perfectly stocked pantry. The good news is that every core aromatic has a workable stand-in. If you are out of fresh ginger, a ginger paste substitute works well. Use 1 teaspoon of ginger paste in place of a 1-inch piece of fresh root, or reach for 1/4 teaspoon ground ginger powder when paste is also unavailable. The flavor will be slightly less vibrant, but it still delivers that characteristic warmth.
No fresh garlic? Use 1/2 teaspoon garlic powder per clove as a pinch substitute. For the tomato component, swap 2 tablespoons of paste for 1/4 cup canned crushed tomatoes, simmered a few extra minutes to cook off moisture. You can also convert tomato paste to sauce by thinning one part paste with one part water when a recipe calls for a lighter tomato presence.
If a recipe calls for chili paste and you only have curry powder and dried chili flakes, combine a teaspoon of flakes with a drop of oil as a quick chili paste substitute. Similarly, when you see a red curry paste substitute needed in a Thai-leaning dish, a tablespoon of Madras curry powder mixed with a teaspoon of lime juice and a pinch of sugar gets you surprisingly close to that sweet-sour-hot profile.
With your ingredients prepped and within arm's reach, the real magic begins the moment curry powder hits hot fat. That single step, blooming, is what separates a flat-tasting sauce from one with genuine depth.
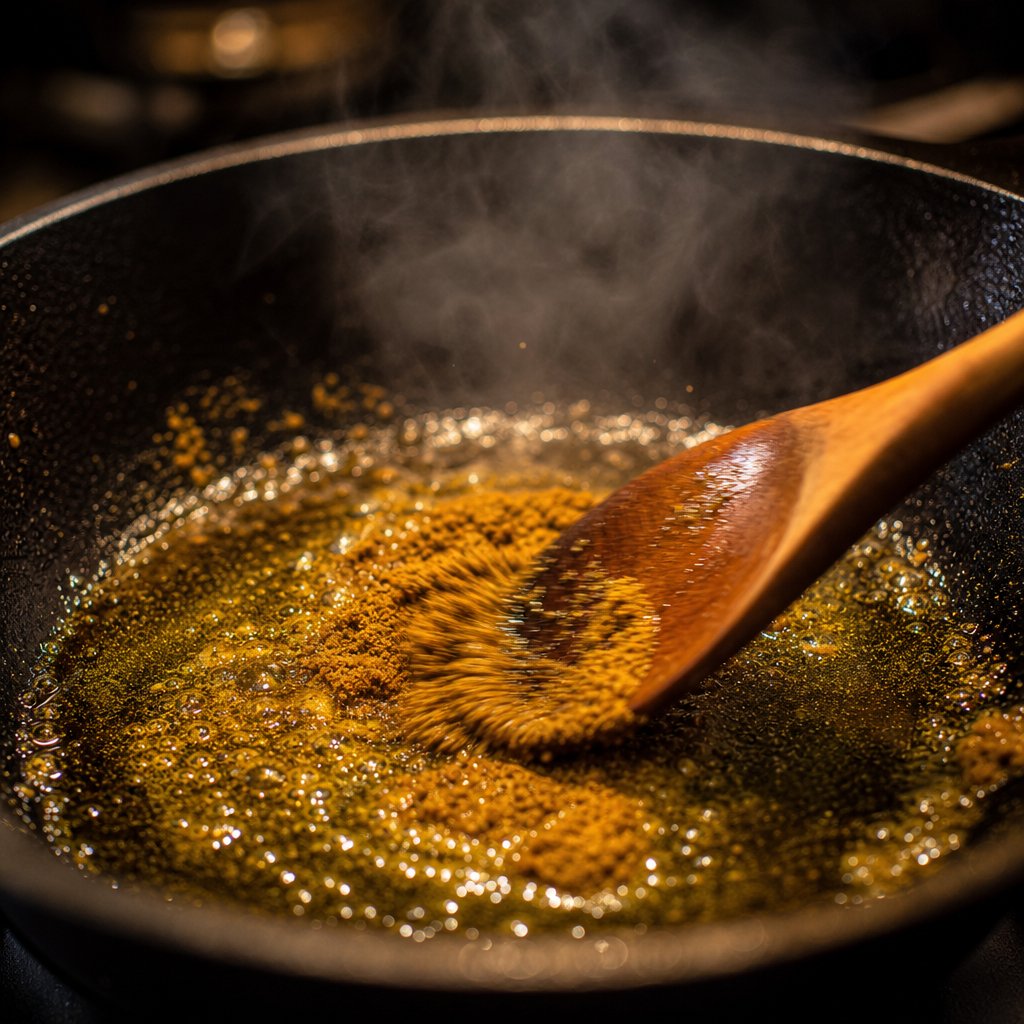
Step 3 Bloom Curry Powder in Hot Oil for Deep Flavor
Here is the step that separates a mediocre curry from one that fills the kitchen with aroma before you have even added liquid. Blooming, sometimes called tempering or tadka in Indian cooking, is the act of briefly frying your curry powder in hot fat. It takes under a minute, yet it fundamentally changes how your finished sauce tastes. If you have ever followed curry recipes with curry powder and ended up with something flat or gritty, skipping this step is almost certainly why.
The Science Behind Blooming Spices in Fat
Curry powder contains dozens of volatile aromatic compounds locked inside the cellular structure of each ground spice. Many of these compounds, the ones responsible for the warm depth of cumin and curry, the citrus brightness of coriander, the earthy punch of turmeric, are fat-soluble. They dissolve in oil far more readily than in water.
When ground spices hit hot fat, several things happen almost simultaneously. Heat ruptures remaining cell walls in the powder, releasing trapped flavor molecules. The oil extracts those fat-soluble compounds and holds them in suspension, which means they distribute evenly throughout your entire dish rather than sitting as undissolved particles on the surface. Maillard reactions also kick in, creating new, deeper flavor notes that did not exist in the raw powder.
The practical result? A curry using curry powder that has been bloomed tastes richer, more aromatic, and less bitter than one where the powder was simply stirred into liquid. The oil becomes a flavor vehicle, carrying your curry masala into every spoonful of sauce instead of leaving it concentrated in random pockets.
Timing Cues and Sensory Indicators for Perfect Blooming
Making curry with curry powder through proper blooming follows a tight sequence. Here is exactly how to execute it:
- Add 3 tablespoons of oil or ghee to your pan over medium heat. Wait roughly 30 seconds until the surface shimmers. A single drop of water flicked into the pan should sizzle immediately.
- Add your measured curry powder all at once. Stir constantly with a wooden spoon or spatula.
- Keep stirring for 30 to 60 seconds. Watch for the powder to darken slightly in color and listen for a gentle sizzle, not a harsh crackle.
- Use your nose as the primary timer. The moment you detect a warm, toasty, nutty aroma, you are done. Add your onions or next ingredient immediately to stop the cooking.
If your curry powder smells like toast, you are done. If it smells like smoke, start over.
That rule is non-negotiable. Burnt spices taste acrid and bitter, and no amount of coconut milk or sugar will rescue them. Scrape the pan, wipe it clean, and begin again with fresh oil and powder. It costs you two minutes and a tablespoon of spice. Serving a bitter curry costs you the whole meal.
Two common mistakes trip people up when making curry using curry powder this way. The first is cranking the heat too high. Ground spices scorch in seconds over high heat because they have so much surface area exposed. Medium heat gives you a comfortable window to react. The second mistake is using too little oil. The powder needs enough fat to coat every particle. If it looks dry and chalky in the pan rather than glossy and loose, add another tablespoon of oil. Dry powder cannot bloom properly because there is no medium to extract those fat-soluble flavors into.
Once you make a curry with curry powder using this technique even once, you will taste the difference immediately. The sauce will have a rounder, more integrated spice flavor rather than that raw, dusty edge that comes from dumping powder straight into simmering liquid. Blooming is the single highest-impact move in any curry using powder, and it takes less time than preheating your oven.
With your spices now activated and fragrant in the pan, the next layer goes in: aromatics, added in a specific order that builds flavor without burning a single clove of garlic.
Step 4 Layer Aromatics and Build the Sauce Base
Your bloomed spices are fragrant and ready. The pan is hot, the oil is infused, and the clock is ticking. This is where your curry sauce recipe truly takes shape. Layering aromatics in the correct sequence is how you build depth without burning delicate ingredients or leaving tougher ones undercooked. Get the order right and you end up with a complex, restaurant-quality base. Get it wrong and you are stuck with bitter garlic or crunchy onion chunks floating in an otherwise decent sauce.
So how do you make curry sauce with curry powder that actually tastes layered and rich? The answer is patience and sequence. Each ingredient enters the pan at a specific moment based on how long it needs to release its flavor and how much heat it can tolerate before turning unpleasant.
The Correct Order for Adding Aromatics
Think of this stage as building a house. Onions are the foundation, garlic and ginger are the walls, and tomato paste is the roof that seals everything together. Rushing any layer compromises the structure. Here is the exact sequence for how to make curry sauce from your bloomed spice base:
- Diced onions (8 to 10 minutes): Add your 2 medium diced onions directly into the bloomed curry powder. Stir to coat them in the spiced oil. Reduce heat to medium-low and cook, stirring occasionally, until they soften completely and turn a deep golden color. This slow breakdown releases natural sugars that form the sweet backbone of your sauce.
- Garlic and ginger (1 to 2 minutes): Push the onions to the edges of the pan and drop your minced garlic and grated ginger into the center where the heat is strongest. Stir constantly. You want fragrance, not color. The moment you smell that sharp, aromatic punch, move to the next step.
- Tomato paste (1 minute): Add 2 tablespoons of tomato paste directly to the pan. Stir it into the aromatics and press it against the hot surface. This brief contact caramelizes the sugars in the paste, developing a concentrated sweetness that anchors the entire tomato curry flavor profile.
- Deglaze with liquid (30 seconds): Pour in a splash of stock, water, or coconut milk, roughly 3 to 4 tablespoons. Scrape the bottom of the pan with your spoon to lift the fond, those browned bits stuck to the surface. This fond is pure concentrated flavor that dissolves back into your sauce.
Why does order matter so much? Onions contain a high water content and need extended heat to break down their cell walls, release moisture, and caramelize. Garlic, on the other hand, burns quickly due to its low sugar threshold and thin cell structure. Adding it too early means bitter, blackened bits by the time your onions finish cooking. Tomato paste needs direct contact with the hot pan surface to undergo caramelization. Buried under raw onions, it would simply steam and taste flat.
How to Know When Each Layer Is Ready
Your senses are more reliable than any timer here. Each stage has clear visual and aromatic signals that tell you when to move forward:
- Onions: They start opaque and firm. After 3 to 4 minutes they turn translucent and glassy. By 8 to 10 minutes they should be soft enough to smash with your spoon and golden at the edges. If you want a mild sauce with a sweeter base, push them to 12 minutes until they are deeply caramelized.
- Garlic and ginger: You will smell them before you see any change. A sharp, fragrant wave hits your nose within 30 seconds. The garlic should remain pale gold at most, never brown. Brown garlic tastes bitter and will throw off your entire blended curry.
- Tomato paste: It shifts from bright red to a darker, rust-colored tone. You may notice it sticking slightly to the pan. That is exactly what you want. The color change signals that sugars have caramelized and raw acidity has cooked off.
- Deglaze: The liquid should bubble immediately on contact and the pan bottom should look clean after scraping. If brown bits remain, add another splash and keep scraping.
At this point you have a concentrated, deeply flavored paste clinging to your aromatics. It smells incredible, but it is not yet a curry sauce. That transformation happens in the next step, when you choose a liquid base and let everything simmer into a unified, spoonable sauce.
Step 5 Choose Your Liquid Base and Simmer the Sauce
That concentrated aromatic paste in your pan is packed with flavor, but it needs a liquid to transform into an actual sauce. The liquid you choose here is not a neutral filler. It defines the entire character of your finished curry, shifting it from light and brothy to rich and velvety with a single decision. Imagine the same bloomed spices and caramelized onions taken in five completely different directions depending on what you pour into the pan.
How Each Liquid Base Changes Your Curry Character
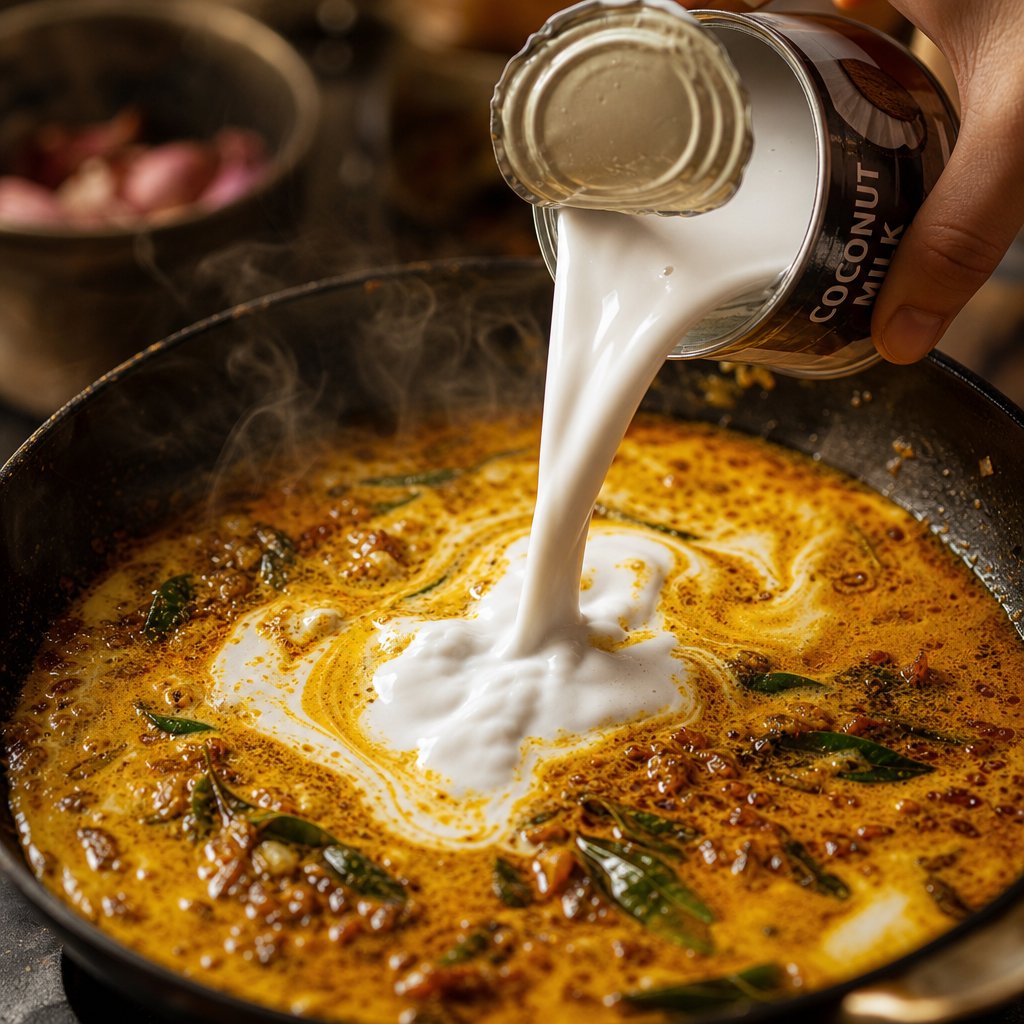
Coconut milk is the most popular choice for good reason. A full-fat can delivers a coconut curry sauce that is naturally sweet, creamy, and rich enough to coat proteins without feeling heavy. Chicken curry with coconut milk is a classic pairing because the fat tempers spice heat while adding a subtle tropical sweetness that rounds out sharper flavors. It works beautifully in Thai and South Indian styles where richness is the goal.
Yogurt takes the sauce in a completely different direction. It adds body and a tangy, slightly fermented edge that brightens spice-heavy dishes. North Indian curries have relied on yogurt for centuries, particularly in dishes like kadhi where the tang is the point. One important note: add yogurt at the end of cooking or temper it with a spoonful of hot sauce first. Boiling yogurt directly with acids and spices can cause it to curdle and split, leaving you with a grainy texture instead of a smooth simmer sauce.
Heavy cream or a cream sauce base produces the richest result, ideal for British-Indian restaurant-style curries like tikka masala. It lacks the sweetness of coconut and the tang of yogurt, offering pure richness instead. Stock, whether chicken or vegetable, adds savory depth without heaviness, making it the best option when you want a lighter, brothier curry that does not sit heavy after a big bowl. Plain water works in a pinch and lets the spices speak for themselves, though you will need to compensate with extra seasoning since water contributes no flavor of its own.
| Liquid Type | Flavor Profile | Best Curry Style | Richness Level |
|---|---|---|---|
| Full-fat coconut milk | Sweet, creamy, tropical | Thai, South Indian, chicken coconut curry | High |
| Yogurt | Tangy, bright, slightly sour | North Indian, kadhi, korma | Medium |
| Heavy cream | Rich, neutral, velvety | British-Indian restaurant style | Very High |
| Chicken or vegetable stock | Savory, light, clean | Japanese, everyday weeknight curry | Low |
| Water | Neutral | Any (requires extra seasoning) | None |
Curry Powder to Liquid Ratios for Perfect Consistency
Getting the ratio right prevents two common problems: a watery sauce with no spice presence, or a thick paste that tastes overwhelmingly strong. The baseline ratio is approximately 2 tablespoons of curry powder per 400ml of liquid for medium intensity. Scale up to 3 tablespoons if you want a bolder, punchier result, or drop to 1.5 tablespoons for a gentler background warmth.
For a chicken curry and coconut milk combination, the standard 400ml can is your built-in measuring tool. Two tablespoons of bloomed Madras powder into one can of coconut milk gives you a balanced coconut curry that is flavorful without being aggressive. If you are using stock or water, consider going slightly higher on the powder since those liquids contribute less inherent flavor to mask any raw spice edge.
Once your liquid is in the pan, bring everything to a gentle bubble over medium heat, then immediately reduce to low. Cook uncovered for 15 to 20 minutes, stirring occasionally. You are looking for the sauce to reduce and thicken naturally until it coats the back of a spoon. Drag your finger across the coated spoon. If the line holds without the sauce running back together, you are there.
If the sauce is still too thin after 20 minutes, you have two options. Continue simmering uncovered to evaporate more moisture, or mix 1 teaspoon of cornflour into 2 tablespoons of cold water and stir the slurry into the bubbling sauce. Using cornflour to thicken sauce works within 1 to 2 minutes and gives you precise control without altering flavor. Going the other direction is even simpler. If your sauce has reduced too far and looks more like a paste than a pourable curry, splash in a few tablespoons of stock or water and stir until you reach the consistency you want.
With your sauce simmered to the right body and flavor intensity, the final variable is what goes into it. The protein or vegetables you add, and exactly when you add them, determines whether they come out perfectly cooked or rubbery and overdone.
Step 6 Add Protein or Vegetables and Adapt Across Cuisines
Your sauce is simmered, glossy, and ready to receive whatever you want to cook in it. But timing is everything here. Drop shrimp in too early and they turn rubbery. Add potatoes at the end and they stay rock-hard. Each protein and vegetable has its own ideal entry point, and getting this right is the difference between a curry where everything is perfectly cooked and one where half the ingredients are overdone while the other half is raw in the center.
When to Add Different Proteins and Vegetables
The general rule is simple: the longer something takes to cook through, the earlier it goes in. Here is a breakdown by category:
- Chicken thighs (bone-in or boneless): Sear in a separate pan or the same pan before building your sauce. Get a golden crust on both sides, about 2 to 3 minutes per side. Then nestle the pieces into your simmering sauce and cook for 15 to 20 minutes until the internal temperature reaches 165°F (74°C). Searing first locks in juices and adds fond to the pan, which deepens your curry chicken flavor considerably.
- Shrimp or prawns: Add during the final 4 to 5 minutes of cooking. They curl into a C-shape and turn pink when done. Anything beyond that and they become tough and chewy.
- Tofu (firm or extra-firm): Press, cube, and pan-fry until golden before adding to the sauce in the last 5 to 8 minutes. This gives the exterior texture to hold up against the liquid without disintegrating.
- Chickpeas (canned): Drain, rinse, and add with your liquid base. They need 15 to 20 minutes of simmering to absorb the sauce flavors fully.
- Root vegetables (potato, sweet potato, carrot): Cut into 2cm cubes and add at the same time as your liquid. They need the full 15 to 20 minute simmer to soften through. RecipeTin Eats recommends simmering covered for 15 minutes until potatoes are soft, then uncovering to thicken the sauce.
- Hardy vegetables (cauliflower, bell pepper, green beans): Add 8 to 10 minutes before serving so they soften but retain some bite.
- Leafy greens (spinach, kale): Stir in during the final 1 to 2 minutes. They wilt almost instantly and overcook just as fast.
If you want to learn how to make vegetable curry with real depth, the key is staggering your additions. Start with dense root vegetables when the liquid goes in, add mid-cooking vegetables like cauliflower halfway through, and finish with delicate greens right before serving. This layered approach means every component hits the bowl at its peak texture.
Adapting the Base Method Across Indian, Jamaican, and Thai Styles
Here is where the universal method pays off. Every step you have learned so far, blooming, layering aromatics, choosing a liquid, and timing your protein, stays the same. The only variables that shift are the type of curry powder, the liquid base, and the finishing touches. A classic Indian chicken curry recipe uses Madras powder bloomed in ghee, yogurt or tomato-based sauce, and bone-in thighs simmered until tender. This is essentially a murgh curry recipe stripped to its core technique.
Cooking Indian chicken curry this way gives you the same depth you would get from a traditional recipe with a dozen individual spices, because the blooming and layering steps do the heavy lifting. Swap the powder to Jamaican, switch the liquid to stock with a splash of coconut milk, and you have a jamaican curry chicken recipe built on the exact same foundation. Caribbean curries often marinate the protein in the powder first, so toss your chicken pieces with a tablespoon of Jamaican curry powder and salt for 30 minutes before searing if you want that extra layer of flavor.
For a Thai-style coconut vegetable curry, use Thai curry powder (or Madras as a substitute), full-fat coconut milk as your liquid, and load up on vegetables rather than meat. Finish with fresh basil and a squeeze of lime instead of cilantro.
| Cuisine Style | Curry Powder | Liquid Base | Protein | Garnish |
|---|---|---|---|---|
| Indian (murgh style) | Madras | Yogurt + crushed tomato | Bone-in chicken thighs | Fresh cilantro, ginger julienne |
| Jamaican | Jamaican (allspice-heavy) | Chicken stock + splash of coconut milk | Chicken pieces, marinated | Scotch bonnet, thyme sprigs |
| Thai-style coconut | Thai powder or Madras | Full-fat coconut milk | Mixed vegetables or shrimp | Thai basil, lime wedge |
Notice the pattern. You can make Indian chicken curry on Monday, pivot to a Jamaican version on Thursday, and serve a coconut vegetable curry on Sunday, all without learning a new technique. The method is the constant. The variables are just flavor decisions you make before you turn on the stove.
With your protein cooked through and your vegetables tender, the curry is nearly done. What separates a good bowl from a great one comes down to those final adjustments: a squeeze of acid here, a pinch of salt there, and knowing exactly how to fix it when something tastes slightly off.
Step 7 Season, Troubleshoot, and Serve with Confidence
Your curry is simmered, your protein is cooked through, and the kitchen smells incredible. But tasting straight from the pot often reveals that something is slightly off. Maybe it is flat, maybe it is too sharp, or maybe it just needs a nudge in one direction. This final step is where good curry becomes great curry, and it takes less than two minutes.
Grab a spoon, taste, and ask yourself four questions: Is it salty enough? Is there brightness? Does it feel balanced or one-note? Is the heat where I want it? Each answer points to a specific fix.
Final Seasoning Adjustments and Fixes for Common Problems
Salt is always the first lever to pull. A curry that tastes "fine but boring" almost always needs more salt. Add a pinch, stir, taste again. Repeat until the spice flavors suddenly pop into focus. Acid comes next. A squeeze of lime juice or a teaspoon of lemon juice cuts through richness and lifts the entire dish, especially in coconut-based sauces that can lean heavy. Sweetness, whether a pinch of sugar, a spoonful of coconut cream, or a drizzle of honey, rounds out sharp edges from tomatoes or overly aggressive chili. For more heat, stir in chili flakes or thinly sliced fresh chili in the final minute.
When something goes wrong, here is your quick-reference troubleshooting list:
- Too bland: Add salt first. Still flat? Squeeze in lime juice and stir in half a teaspoon of garam masala off the heat for instant aroma.
- Too thin or watery: Simmer uncovered for 10 to 15 minutes to reduce, or stir in a cornflour slurry (1 teaspoon cornflour mixed into 2 tablespoons cold water).
- Too thick: Splash in warm stock, water, or coconut milk a tablespoon at a time until you reach a pourable consistency.
- Too spicy: Stir in coconut cream, yogurt, or a pinch of sugar to temper the heat. Adding a squeeze of lime also helps redirect the palate away from pure burn.
- Too acidic or sour: Balance with a pinch of sugar or an extra tablespoon of coconut milk to soften the sharpness.
- Tastes one-dimensional: Bloom a teaspoon of cumin seeds in a small spoonful of hot ghee and pour it over the finished curry as a final tadka.
Serving Ideas and How to Store Leftover Curry
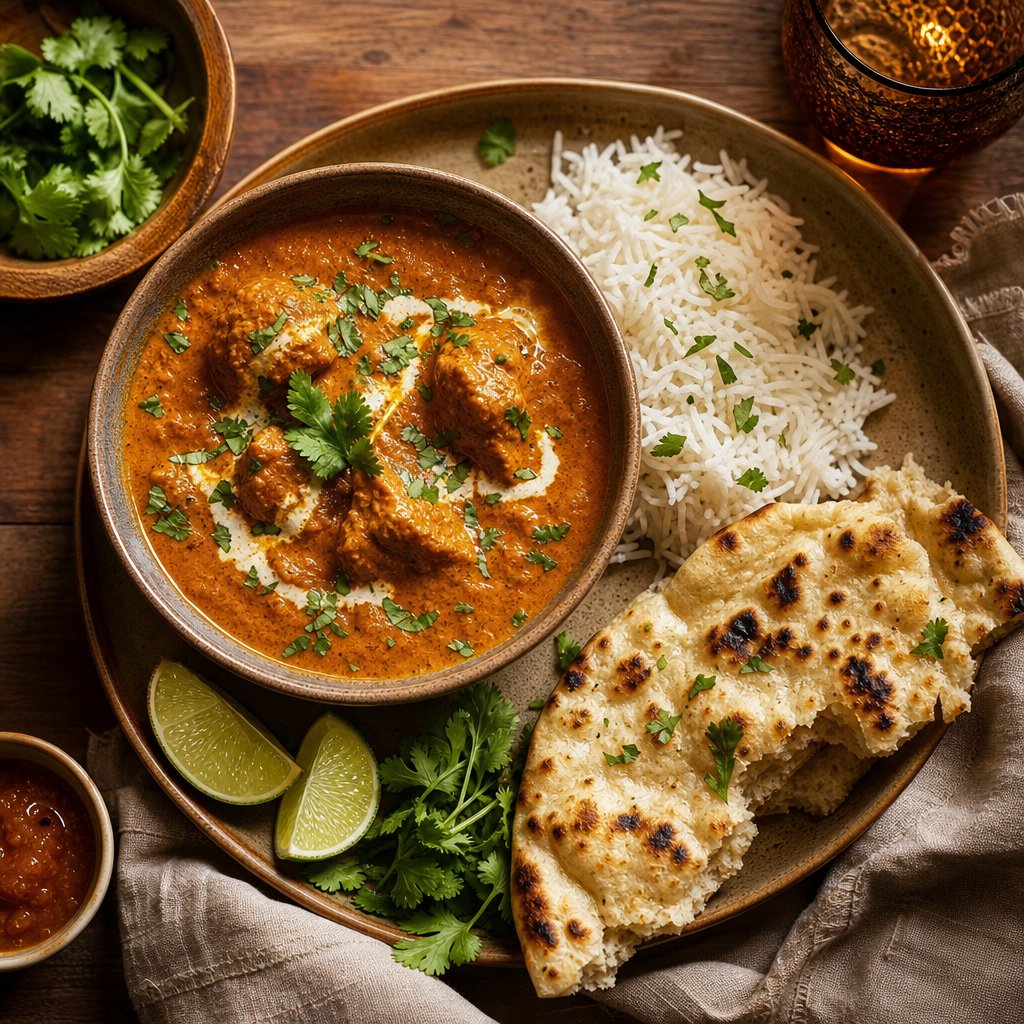
The classic pairing is curry and rice, and for good reason. Steamed basmati or jasmine rice absorbs sauce beautifully and provides a neutral canvas that lets the spice work shine. Chicken curry rice is a complete weeknight meal that needs nothing else on the table. For variety, try curried rice by stirring a teaspoon of curry powder into your cooking water, giving the grain itself a golden hue and subtle warmth that complements the sauce rather than competing with it.
Beyond standard curry rice recipes, consider serving your creation as a curry bowl with toppings: a handful of fresh cilantro, sliced avocado, pickled onions, a soft-boiled egg, and a drizzle of yogurt. Naan and curry is another timeless combination, especially when you want something to scoop and tear rather than eat with a fork. Roti, paratha, or even crusty sourdough all work when flatbread is not available.
Leftover curry actually improves overnight. As the sauce cools, fat-soluble flavor compounds from your spices continue dissolving into the oil and liquid, creating a deeper, more unified taste by the next day. Store leftovers in an airtight container in the fridge for up to 3 to 4 days. Reheat gently on the stovetop over low heat, adding a splash of water or stock if the sauce has thickened. For longer storage, freeze portions in sealed containers for up to 3 months and thaw overnight in the fridge before reheating.
A final note for entrepreneurial readers: if this method has you thinking about developing your own signature curry powder blend or turmeric-based supplement for commercial sale, the leap from kitchen experiment to market-ready product is shorter than you might expect. OEM/ODM manufacturers like ZhuFeng specialize in custom powder and granule formulations, offering scalable production that helps nutrition brands and private label sellers turn a recipe concept into a packaged product without building their own facility.
Whether you plate it as rice and curry for a quiet weeknight or build an elaborate curry bowl for weekend guests, the method stays the same. Bloom first, layer with patience, simmer with intention, and season at the end. That is the whole system, and it works every single time.
Frequently Asked Questions About Making Curry with Curry Powder
1. Do you need to cook curry powder before adding liquid?
Yes, blooming curry powder in hot oil for 30 to 60 seconds before adding any liquid is the single most important step for deep flavor. Heat activates fat-soluble compounds in the ground spices, releasing aromatic molecules that distribute evenly throughout the sauce. Skipping this step often results in a flat, gritty, or bitter-tasting curry because raw powder never fully integrates into the liquid base.
2. What is the best curry powder to liquid ratio?
The baseline ratio is 2 tablespoons of curry powder per 400ml of liquid for medium intensity. For a bolder result, increase to 3 tablespoons per 400ml. For a gentler background warmth, reduce to 1.5 tablespoons. These ratios work across coconut milk, stock, yogurt, and cream bases, though lighter liquids like water or stock may benefit from slightly more powder since they contribute less inherent flavor.
3. Can I use curry powder instead of curry paste?
Absolutely. Curry powder works as a paste substitute when combined with a small amount of acid and sweetness. For Thai-style dishes calling for red curry paste, mix 1 tablespoon of Madras curry powder with a teaspoon of lime juice and a pinch of sugar. The result is not identical to a wet paste but delivers a similar sweet-sour-hot profile that works well in coconut milk-based curries.
4. How do I fix a curry that tastes bland or flat?
Start by adding salt in small pinches until the spice flavors sharpen into focus. If it still tastes one-dimensional, squeeze in fresh lime or lemon juice to add brightness. A half teaspoon of garam masala stirred in off the heat provides instant aromatic lift. For richness, swirl in a spoonful of coconut cream or butter. These adjustments take seconds but transform a mediocre curry into a balanced, layered dish.
5. What is the difference between Madras and regular yellow curry powder?
Madras curry powder is a South Indian-style blend with higher chili content, ginger, and cinnamon, producing a medium-hot, reddish-gold sauce with warm, pungent depth. Generic yellow curry powder is turmeric-forward and milder, designed as an all-purpose blend with moderate warmth. Madras suits bold coconut curries and spice-forward dishes, while yellow works better for families, beginners, or recipes where gentle background flavor is preferred.