Why Making Your Own Protein Powder Is Worth the Effort
Ever flipped over a protein powder tub and felt like you needed a chemistry degree to decode the ingredient list? Maltodextrin, artificial flavors, sucralose, silicon dioxide — the list goes on. If you have wondered whether you can you make your own protein powder using real, recognizable foods, the answer is a straightforward yes. And the reasons to try go well beyond ingredient snobbery.
Learning how to make your own protein powder puts you in full control of what fuels your body. This guide walks you through a simple "build your own blend" framework — choosing base proteins, combining them for a complete amino acid profile, adding flavor, and storing the finished product. Think of it as a recipe you customize to your exact goals and dietary needs.
Why Skip the Store-Bought Tub
The motivation usually falls into three buckets. First, ingredient transparency. Sports nutrition specialists recommend protein powders with short ingredient lists — three to five items ideally — and warn against fillers like maltodextrin that add empty carbs. Making a natural protein powder at home guarantees you hit that standard every time. Second, cost savings. Whole seeds, oats, and legumes bought in bulk cost a fraction of branded supplements per serving. Third, allergen control. When you make your own protein powder, you sidestep common triggers like dairy, soy, or tree nuts without paying a premium for specialty products.
What to Expect From Homemade vs Commercial Powder
Here is where honesty matters. Commercial isolates concentrate protein to roughly 80-90% by weight through chemical extraction and filtration. Homemade blends grind whole foods — seeds, grains, legumes — that naturally contain fiber, healthy fats, and carbohydrates alongside their protein. The result is a whole-food powder that typically delivers 40-60% protein by weight. That is not a flaw; it is a feature. Those extra nutrients slow protein absorption and support gut health, which research from Harvard's School of Public Health links to more efficient protein use by the body.
A typical homemade serving needs to be physically larger — around 40-50g of powder — to match the 20-25g of protein found in a standard commercial scoop. Plan your portions accordingly, and you will get the same muscle-supporting benefit from an easy protein powder you actually trust.
So how do you make your own protein powder that delivers real results? It starts with understanding what commercial products actually contain — and which parts of that process you can replicate in your kitchen.
Step 1: Understand What Protein Powder Is Made Of
You know the end goal — a scoopable powder that boosts your protein intake. But what is protein powder made out of at the molecular level, and how does a factory version differ from something you grind in your kitchen? Understanding the gap between commercial processing and home preparation helps you set the right expectations for texture, protein density, and how you will use your finished blend.
Concentrates, Isolates, and Whole-Food Powders Explained
Not all protein powders are created equal. The supplement industry categorizes them into three broad types based on how much processing the raw ingredient undergoes.
A protein concentrate retains a moderate amount of fat and carbohydrates alongside the protein. Whey concentrate, for example, contains up to 80% protein by weight, with the remaining 20% split between carbs, fats, and lactose. It undergoes filtration to boost protein content but stops short of stripping everything else away.
A protein isolate takes purification further. Additional filtration steps — like microfiltration or ion exchange — remove nearly all fat and carbohydrates, pushing protein concentration to 90% or higher. The trade-off is a higher price tag and a more processed end product.
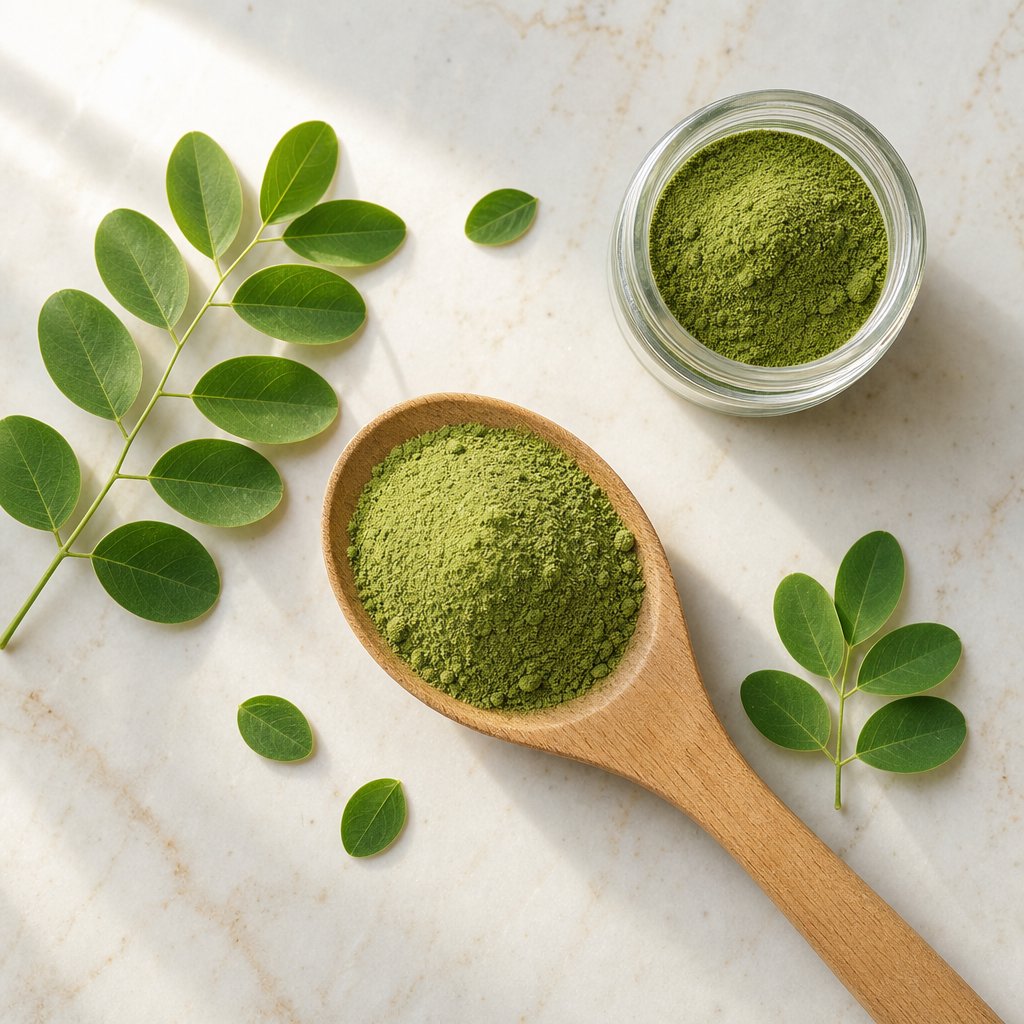
A whole-food powder is where homemade blends live. Instead of extracting protein from its natural matrix, you grind the entire food — hemp seeds, pumpkin seeds, lentils, oats — into a fine powder. Protein content lands between 40-60% because fiber, healthy fats, and starches remain intact. This is what you are replicating when you make protein powder at home, and it is the most minimally processed option available.
| Feature | Protein Concentrate | Protein Isolate | Whole-Food Powder |
|---|---|---|---|
| Protein percentage | 60-80% | 90%+ | 40-60% |
| Processing level | Moderate (filtration, drying) | High (microfiltration, ion exchange, spray drying) | Minimal (grinding, sifting) |
| Fiber and fat content | Low to moderate | Very low | Moderate to high |
| Typical use case | General supplementation, shakes | Lean muscle goals, lactose-sensitive users | Whole-food nutrition, cooking, homemade blends |
How Commercial Protein Powder Gets Made
Wondering what is protein powder made from at the factory level? The journey from raw ingredient to shelf-ready tub involves several industrial steps that your kitchen simply cannot replicate — and that is perfectly fine.
For whey-based powders, the process starts during cheese production. Liquid whey is drained from the curds, pasteurized, and sent through filtration systems that strip away fats, lactose, and carbohydrates. The concentrated liquid then goes through spray drying — a technique that atomizes the liquid into tiny droplets inside a heated chamber, evaporating moisture almost instantly and leaving behind a fine, shelf-stable powder.
Plant-based commercial powders follow a parallel path. Peas, rice, or hemp seeds are milled, then subjected to wet fractionation or enzymatic hydrolysis to separate protein from starch and fiber. The isolated protein slurry is filtered, concentrated, and spray-dried into powder form. These extraction techniques are what push commercial products to those 80-90% protein concentrations.
Your homemade version skips the extraction step entirely. Instead of chemically separating protein from the whole food, you grind protein-rich ingredients into a powder and use them as-is. The ingredients for protein powder in your kitchen are the same raw foods — seeds, grains, legumes — that factories start with. You just keep everything the food naturally contains rather than isolating a single macronutrient.
This distinction matters for practical reasons. Commercial processing creates powders that dissolve almost invisibly in water because the fiber and fat have been removed. Whole-food powders blend best with smoothies, oatmeal, or baked goods where a slightly thicker texture is welcome rather than problematic. Knowing how protein supplements are made at scale helps you appreciate both what you gain (whole-food nutrition, zero additives) and what you trade away (ultra-fine dissolvability, maximum protein density per gram) when creating protein powder at home.
With this foundation in place, the practical question becomes: what equipment do you actually need to turn whole seeds and grains into a smooth, scoopable powder?
Step 2: Gather the Right Equipment
You do not need a lab full of specialized machinery to make protein powder at home. A few well-chosen tools — most of which are already sitting in your kitchen — handle the job. The real difference between a gritty, clumpy result and a smooth, scoopable powder comes down to how you grind and how you store.
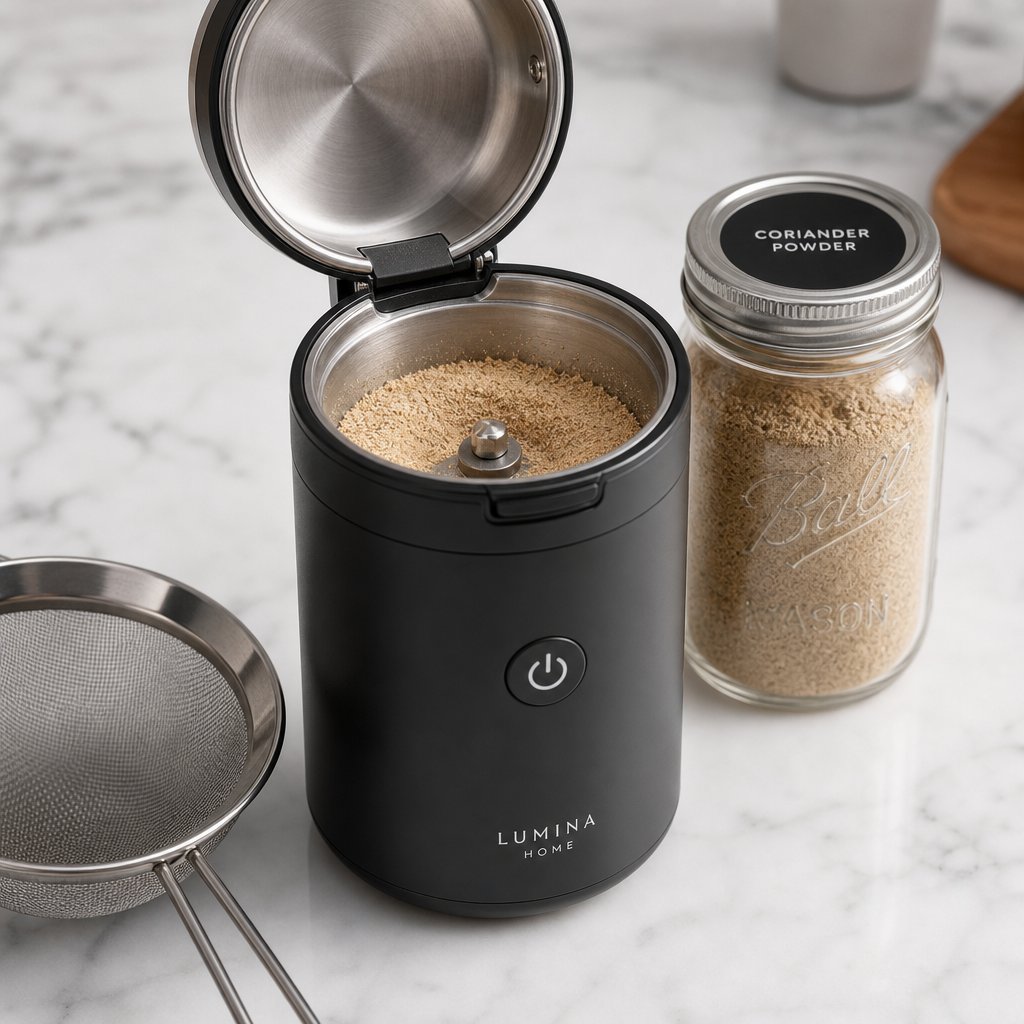
Grinders and Blenders for Fine Powder Texture
Imagine dropping a handful of pumpkin seeds into a standard countertop blender. You hit pulse a few times, peek inside, and find half the seeds still whole while the rest have turned into uneven chunks. Standard blenders struggle with dry ingredients because their blade design creates a vortex meant for liquids — dry seeds and grains just pack under the blade or bounce around the jar without breaking down evenly.
A high-speed electric spice grinder solves this problem. These compact units use blade speeds and bowl shapes optimized for dry ingredients, reducing seeds, nuts, and grains to fine powder in 10 to 20 seconds. Testing by Allrecipes found that electric spice grinders with 200-watt motors consistently broke down everything from peppercorns to hazelnuts into uniform powder — exactly the performance you need for protein preparation. A blade-style grinder works best here because it pulverizes ingredients rather than cracking them between burrs, which tends to produce a coarser, less mixable result.
For larger batches, a food processor with an S-blade handles higher volumes but typically produces a slightly coarser grind. You can still use one to make protein powder — just plan on a longer processing time and a sifting step afterward. High-performance blenders with dedicated dry-grains containers offer another option; their reverse-vortex blade design pushes dry ingredients away from the blades to prevent packing, which standard blender jars cannot do.
One critical technique regardless of your tool: pulse rather than running continuously. Extended grinding generates heat through friction, which can release oils from seeds and nuts and turn your powder into a paste. Short bursts of 3-5 seconds with brief pauses keep temperatures low and your powder dry.
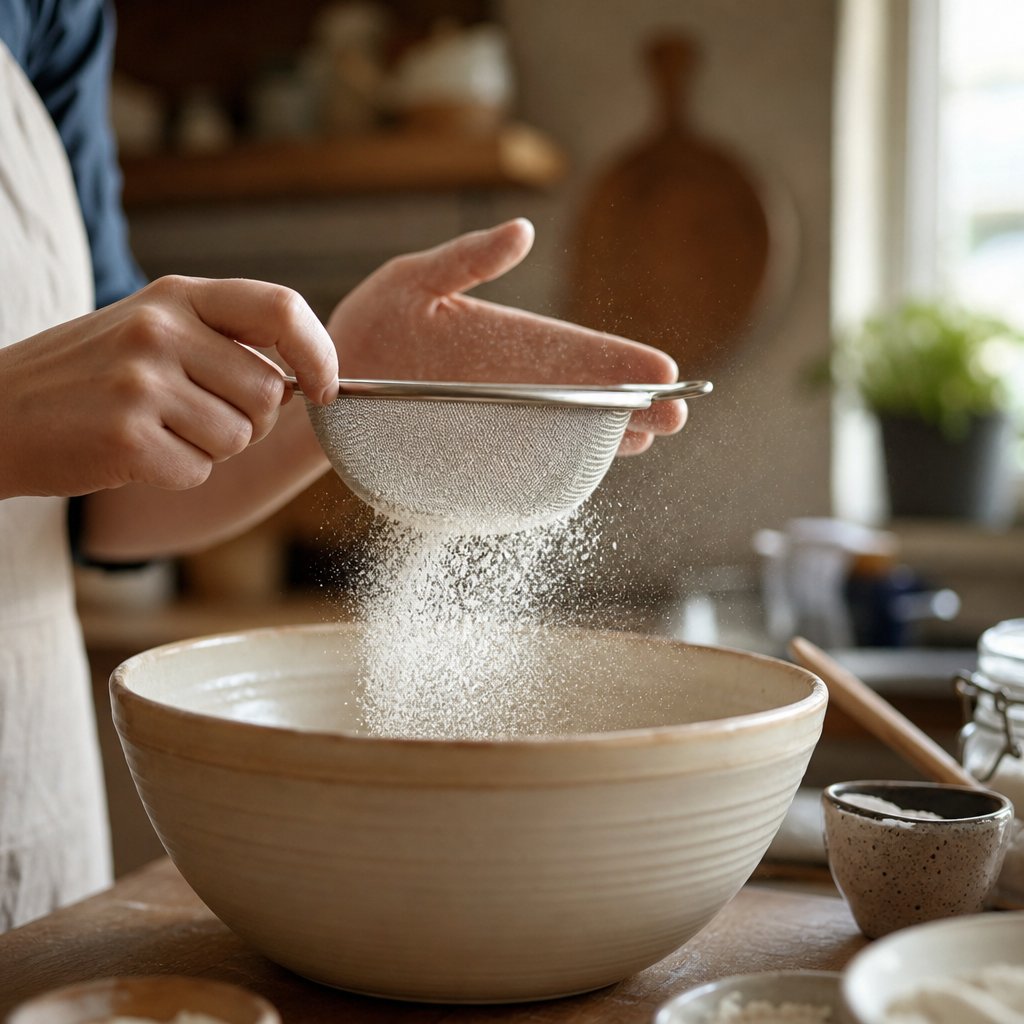
Sifting and Storage Tools You Already Own
Even the best spice grinder leaves behind a few coarse particles. A fine-mesh strainer — the same one you use for sifting flour or draining pasta — catches those larger pieces so you can re-grind them separately. This single step dramatically improves the final texture and mixability of your blend.
Storage matters just as much as grinding when creating protein powder. Whole-food powders contain natural oils and fiber that degrade faster than commercial isolates when exposed to air, light, or moisture. Food preservation experts recommend airtight containers stored in cool, dark spaces for maximum shelf life — and the same principle applies here.
Here is everything you need to get started:
- Electric spice or coffee grinder (blade-style) — your primary tool for grinding small batches of seeds, nuts, and grains into fine powder
- Food processor (optional) — useful for processing larger volumes or pre-chopping harder ingredients before fine grinding
- Fine-mesh strainer or sifter — removes coarse particles after grinding so you can re-process them for uniform consistency
- Mason jars or airtight glass containers — protect your finished powder from moisture and air; choose a jar size that matches your batch volume to minimize empty headspace
- Vacuum-seal bags (optional) — extend shelf life to 1-2 months for high-fat blends containing seeds or nuts
- Measuring spoons and a kitchen scale — essential for how to prepare protein powder with consistent ratios batch after batch
- Labels and a marker — powders look alike once ground, so date and label every container
Can standard kitchen equipment handle the job for most people? Absolutely. A $30-40 electric spice grinder, a mesh strainer, and a few mason jars are all you need to start. Upgrading to a high-performance blender with a dry-grains container makes sense only if you plan to produce large batches weekly or want to grind tougher ingredients like dried lentils into ultra-fine flour.
With your equipment lined up, the next decision shapes everything about your powder's nutritional profile: which protein-rich whole foods go into the blend.
Step 3: Pick Your Base Protein Sources
Every homemade blend starts with a decision: which high protein seeds, grains, or legumes form the foundation? The ingredient you choose as your primary base determines the protein density, flavor direction, and allergen profile of your entire powder. A secondary base then fills nutritional gaps — adding complementary amino acids, extra fiber, or a smoother texture.
Think of it like building a house. Your primary base is the structural frame (highest protein per gram), and your secondary base is the insulation that rounds out performance. The table below compares the top candidates side by side, but first, here is what each category brings to the mix.
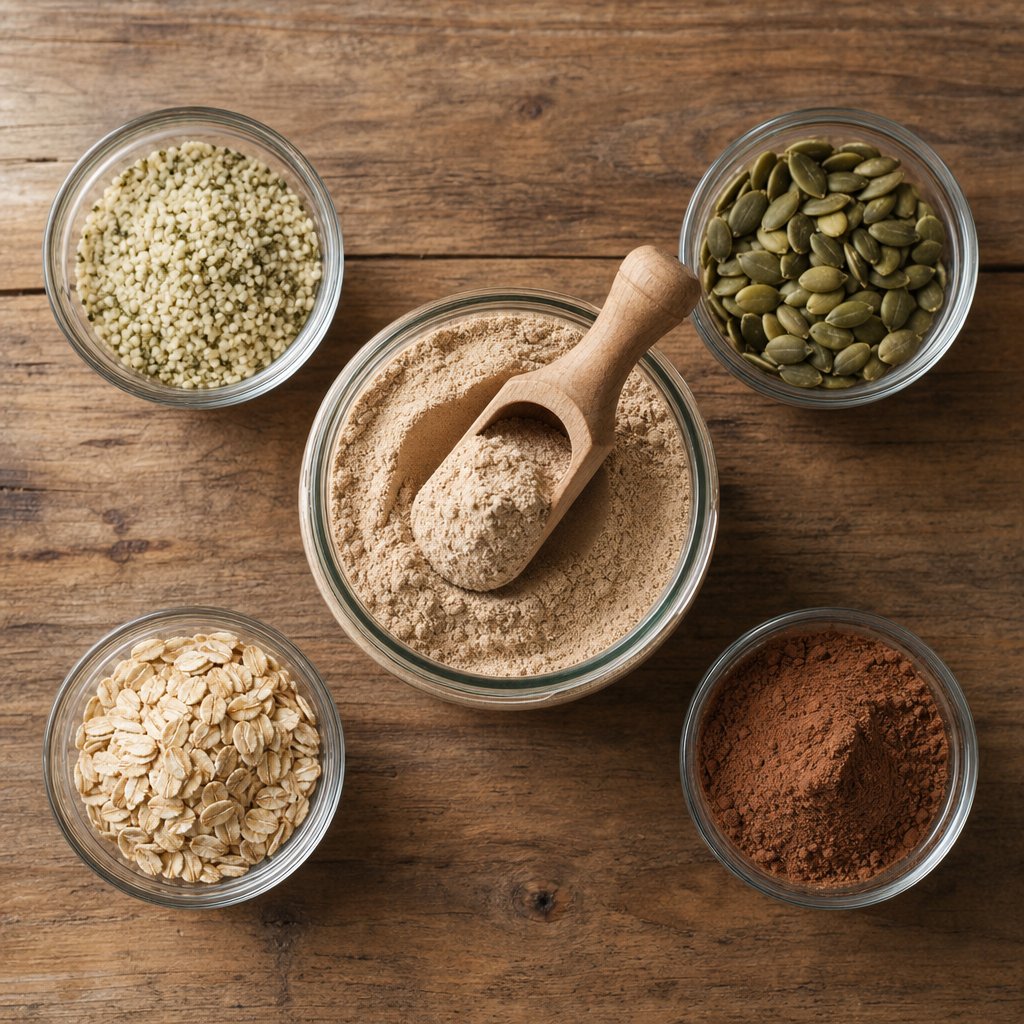
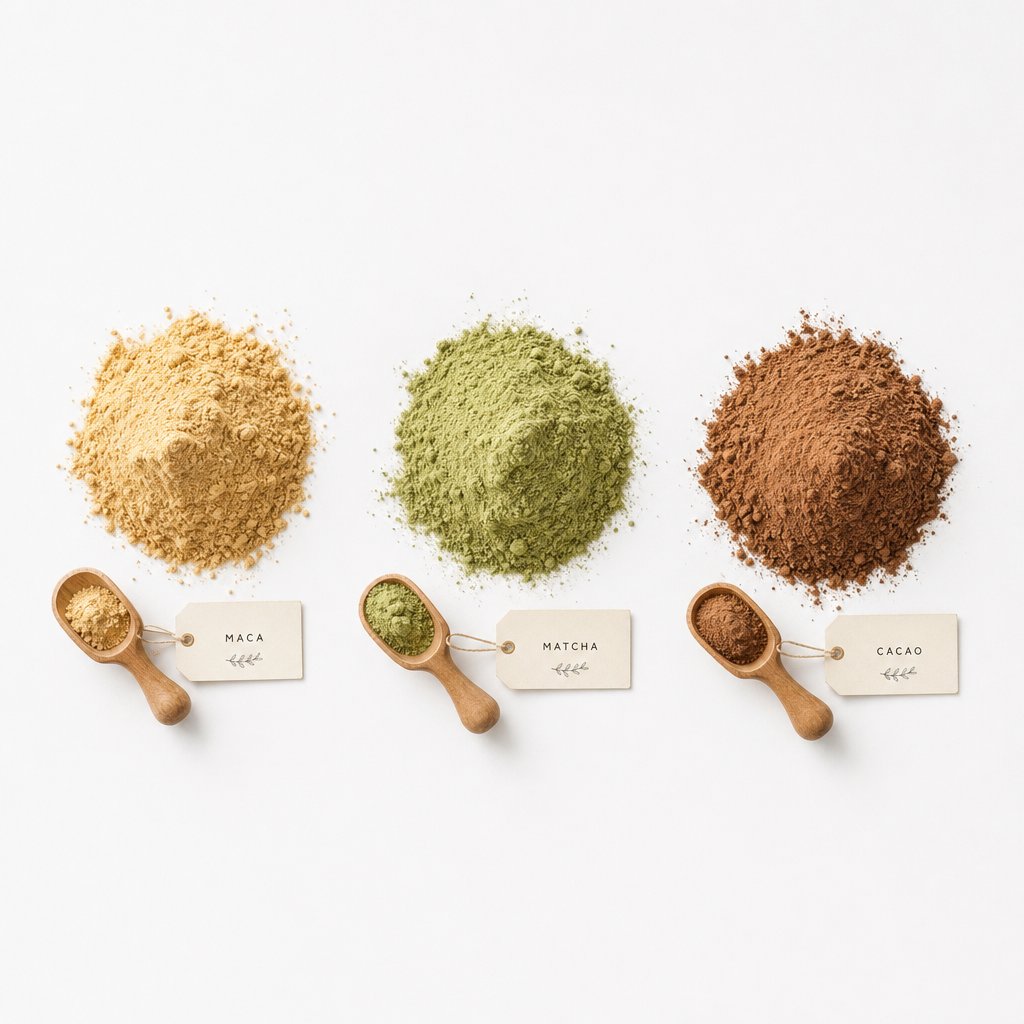
Seed and Nut-Based Protein Sources
Seeds are the workhorses of non dairy protein powders. They grind easily, pack serious nutrition into small volumes, and most are free from the top allergens that make commercial powders problematic for sensitive users.
Hemp hearts — the shelled inner kernel of the hemp seed — deliver roughly 10g of protein per 30g serving, making them one of the most protein-dense seeds available. What do hemp seeds taste like? They carry a mild, slightly nutty flavor with earthy undertones — subtle enough to disappear into smoothies but distinctive enough to notice in plain water. Hemp hearts protein is also complete, meaning it contains all nine essential amino acids your body cannot produce on its own. Look for organic hemp seeds to avoid pesticide residues, since hemp is a bioaccumulator that absorbs compounds from its growing soil. Hemp seed recipes often pair them with cocoa or berries, which complement that earthy baseline well.
Pumpkin seeds (also sold as hulled pepitas) come in close behind at about 9g of protein per 30g. They grind into a slightly coarser powder than hemp but offer more fiber — roughly 2g per ounce compared to hemp's 1g. Their flavor leans savory and lightly sweet, which works well in unflavored blends. Pumpkin seed protein powder has become increasingly popular in commercial plant-based products for exactly this reason: neutral taste, strong protein content, and an excellent magnesium profile.
Sunflower seeds are the budget-friendly option. At around 6g of protein per 30g, they trail hemp and pumpkin in density but cost significantly less in bulk. They grind smoothly and have a mild, slightly buttery taste. The main caution: sunflower seeds are higher in omega-6 fatty acids, so they work best as a secondary base rather than the dominant ingredient.
Grain and Legume-Based Protein Sources
Grains and legumes bring different strengths to the blend — higher carbohydrate content for energy, excellent grindability into ultra-fine flour, and amino acid profiles that complement seeds perfectly.
Oat flour (ground from rolled oats) provides about 4g of protein per 30g alongside 2g of fiber and slow-digesting carbs. It grinds into a silky powder that improves the texture and mixability of seed-heavy blends. Oats are not a protein powerhouse on their own, but they act as an excellent secondary base that smooths out grittiness.
Peanut flour (defatted) is a protein monster — roughly 15g per 30g serving — because the fat removal concentrates the protein fraction. It adds a familiar roasted flavor that pairs naturally with cocoa or vanilla. The obvious trade-off: peanut is a top allergen, so this ingredient limits who can use your blend.
Rice protein (ground from sprouted brown rice) offers about 7g of protein per 30g with a very neutral, slightly sweet taste. It blends invisibly into other ingredients and is one of the most hypoallergenic options available — free from gluten, dairy, soy, and nuts.
Dried lentil flour delivers approximately 8g of protein per 30g and brings iron and folate along for the ride. Red lentils grind more easily than green or brown varieties. The flavor is mildly earthy, and the powder dissolves well in liquids.
Nonfat milk powder is the highest-protein option for those who tolerate dairy — about 10g per 30g — and it dissolves almost instantly in liquid. It works as a primary base for anyone not seeking a strictly plant-based blend.
| Ingredient | Protein per 30g | Grindability | Flavor Notes | Allergen Flags | Best Paired With |
|---|---|---|---|---|---|
| Hemp hearts | ~10g | Excellent — grinds fine in seconds | Mild, earthy, slightly nutty | None (top-8 free) | Pumpkin seeds, cocoa, oats |
| Pumpkin seeds (hulled pepitas) | ~9g | Good — slightly coarser than hemp | Lightly sweet, savory | None (top-8 free) | Hemp hearts, rice protein, cinnamon |
| Sunflower seeds | ~6g | Good — smooth grind, watch for oil release | Mild, buttery | None (top-8 free) | Oats, lentil flour, vanilla |
| Oat flour | ~4g | Excellent — silky fine powder | Neutral, slightly sweet | Gluten (cross-contact risk) | Any seed base, peanut flour |
| Peanut flour (defatted) | ~15g | Pre-ground — ready to use | Roasted, nutty | Peanut | Cocoa, oats, rice protein |
| Rice protein | ~7g | Excellent — very fine, powdery | Neutral, mildly sweet | None | Pea or lentil flour, hemp hearts |
| Dried lentil flour | ~8g | Good — red lentils grind finest | Mildly earthy | None (top-8 free) | Rice protein, pumpkin seeds |
| Nonfat milk powder | ~10g | Pre-ground — instant dissolve | Creamy, slightly sweet | Dairy | Oats, peanut flour, vanilla |
A practical starting point: choose one primary base from the top three protein-density options (peanut flour, hemp hearts, or nonfat milk powder) and one secondary base that adds a complementary nutrient or improves texture (oats for smoothness, lentil flour for iron, rice protein for hypoallergenic versatility). This two-ingredient foundation gives you a balanced powder before you even think about flavor additions.
Protein density alone does not tell the full story, though. Each of these ingredients carries a different amino acid profile — and the way you combine them determines whether your finished powder delivers complete protein or leaves gaps that limit muscle synthesis.
Step 4: Combine Ingredients for a Complete Amino Acid Profile
Picking high-protein ingredients is only half the equation. The other half? Making sure those ingredients cover all nine essential amino acids your body cannot manufacture on its own. Skip this step, and your homemade vegan protein powder might deliver plenty of total protein grams while still leaving your muscles short on the specific building blocks they need to recover and grow.
Complete Protein Through Smart Ingredient Pairing
Your body builds muscle from amino acids — nine of which are classified as essential because you must get them through food. Most animal proteins contain all nine in adequate amounts, which is why they are called "complete." Most plant sources, however, run low on at least one. Grains like rice are too low in lysine to qualify as complete on their own, while legumes and beans are high in lysine but fall short on methionine. Seeds tend to be strong in methionine but variable in lysine.
The fix is straightforward: combine two or more plant sources whose strengths cover each other's gaps. Nutrition researchers at Massachusetts General Hospital confirm that pairing beans, lentils, or peas with whole grains, nuts, or seeds creates complete protein combinations. You do not even need to eat them in the same meal — consuming complementary sources throughout the day works — but blending them into a single powder makes the math effortless.
Here are the core pairing principles for protein supplement recipes:
- Seeds + Legumes — hemp or pumpkin seeds (high methionine) paired with lentil flour (high lysine)
- Grains + Nuts — oat flour (low lysine) paired with peanut flour (high lysine)
- Rice + Pea — rice protein (high methionine, low lysine) paired with pea protein or lentil flour (high lysine, lower methionine)
Can a homemade blend truly deliver complete protein? Yes — as long as you pair at least one lysine-rich source with a methionine-rich source. Hemp seeds and chia seeds are already considered complete proteins individually, so any blend built on a hemp base starts with a strong foundation.
Three Blend Formulas for Different Goals
Knowing how to make protein powder at home for muscle gain, fat loss, or general wellness comes down to adjusting the ratio of base protein, complementary protein, and fiber source. Each formula below uses a 2:1:0.5 framework — two parts primary protein, one part complementary protein, half a part fiber or texture enhancer.
- Muscle-Building Blend — 2 parts hemp hearts + 1 part peanut flour (defatted) + 0.5 parts oat flour. This combination delivers roughly 10-12g of protein per 40g serving with a complete amino acid profile. The peanut flour adds concentrated protein density, making this competitive with some of the best protein powders for muscle gain — minus the artificial additives. Ideal for post-workout protein shakes, plant based or otherwise.
- Low-Carb / Keto-Friendly Blend — 2 parts pumpkin seeds + 1 part hemp hearts + 0.5 parts ground flaxseed. High in healthy fats, minimal carbohydrates, and rich in fiber to support satiety. If you have been searching for the best keto protein powder without seed oils or maltodextrin, this vegan protein powder recipe fits the bill at roughly 9-10g protein per 35g serving.
- Plant-Based All-Rounder Blend — 2 parts hemp hearts + 1 part lentil flour + 0.5 parts chia seeds. Balanced macros, complete amino acids, and a generous fiber boost from both the lentils and chia. This is the most versatile of the three vegan protein powder recipes — smooth enough for smoothies, neutral enough for baking, and nutritionally rounded for daily use.
Each formula is a starting point. Adjust ratios based on your taste preferences and macro targets, then lock in your favorite combination as your go-to batch recipe. The protein content math is simple: add up the protein-per-30g values from the ingredient table in the previous section, multiply by your chosen ratio, and divide by total serving weight.
A complete amino acid profile gets you the nutritional foundation. The next layer — flavor and texture — determines whether you actually enjoy drinking your blend every day or let it collect dust in the pantry.
Step 5: Add Natural Flavors and Texture Enhancers
A nutritionally complete blend means nothing if every sip makes you wince. Flavor is what separates a powder you use daily from one that sits forgotten behind the oat milk. The good news: you can make your own protein drink taste exactly the way you want — rich and chocolatey, warm and spiced, or completely neutral for cooking versatility — using whole-food additions that add nutrition rather than empty calories.
The smartest approach is to start with a protein powder without flavor. Keep your base blend unflavored, then portion out smaller amounts and experiment with additions incrementally. This way, one batch of base powder can become chocolate for morning smoothies, cinnamon-vanilla for oatmeal, and plain for savory recipes like pancakes or energy bites. You never commit the entire jar to a single flavor you might tire of.
Natural Sweeteners and Flavor Additions
Commercial powders rely on artificial sweeteners to hit that candy-like taste with zero calories. Your home made protein shake can achieve pleasant sweetness using ingredients that bring actual nutritional value to the glass.
For zero-calorie sweetness, stevia extract (derived from the Stevia rebaudiana plant) is 200-400 times sweeter than table sugar with a glycemic index of zero. Only a tiny pinch is needed per serving — start with 1/16 teaspoon and adjust upward. Some people detect a mild bitter or licorice-like aftertaste at higher concentrations, so restraint pays off. Monk fruit extract offers a similar zero-calorie, zero-GI profile at 150-200 times the sweetness of sugar, often with a cleaner finish than stevia. Date powder adds gentle sweetness plus fiber and potassium, though it contributes about 15 calories per teaspoon — a worthwhile trade-off for those who prefer no sugar protein powder alternatives that still taste naturally sweet.
Beyond sweeteners, flavor additions transform your blend into something you genuinely look forward to. Here are the best options grouped by profile:
- Sweet flavors: Dark cocoa powder (1-2 tbsp per serving — adds rich chocolate depth with only 10-20 calories and a dose of antioxidants), vanilla powder or scraped vanilla bean (1/2-1 tsp — warm, familiar sweetness with negligible calories), powdered peanut butter (1 tbsp — roasted nuttiness with about 25 calories and 3g extra protein)
- Earthy flavors: Matcha green tea powder (1/2-1 tsp — subtle vegetal sweetness plus caffeine and L-theanine for calm focus), raw cacao nibs ground fine (1 tbsp — deeper, less sweet chocolate character than cocoa)
- Spiced flavors: Ground cinnamon (1/2-1 tsp — warming sweetness with zero calories and blood sugar support), chai spice blend of cinnamon, cardamom, ginger, and clove (1/2-1 tsp — complex warmth), ground ginger (1/4 tsp — bright heat)
- Neutral additions: No flavoring at all — ideal for using protein powder in cooking where savory or sweet recipes call for a protein boost without competing flavors
A practical tip from experienced home blenders: mix your flavoring additions into 6 scoops (roughly 180g) of base powder at a time. This gives you enough volume to test the flavor across several servings without wasting ingredients if the ratio needs tweaking. Cocoa and matcha are the most forgiving — they taste good even when slightly over-measured. Cinnamon and spice blends, on the other hand, can overwhelm quickly, so start conservative.
Texture Enhancers for Smooth Mixing
Ever stirred homemade powder into water and watched it float on top in stubborn clumps? Whole-food powders lack the emulsifiers and instantizing agents that make commercial products dissolve on contact. Texture enhancers bridge that gap, helping your natural protein shakes mix smoothly without a gritty finish.
Ground flaxseed is the most versatile option. When it contacts liquid, it forms a mild gel that binds particles together and creates a smoother mouthfeel. It also contributes omega-3 fatty acids and about 1.5g of fiber per tablespoon. Add 1-2 teaspoons per serving to your dry blend. One note: ground flax can go rancid quickly due to its oil content, so grind whole seeds fresh or store pre-ground flax in the refrigerator.
Psyllium husk powder absorbs up to ten times its weight in water, creating a gel-like consistency that prevents separation and adds body to shakes. Use sparingly — 1/4 to 1/2 teaspoon per serving is enough. Too much turns your drink thick and gelatinous. Psyllium also adds soluble fiber, which supports digestion and keeps you feeling full longer.
Xanthan gum is the most potent thickener in this category. A tiny amount — 1/8 teaspoon per serving — mimics the smooth, slightly creamy texture of commercial shakes by suspending particles evenly throughout the liquid. It contributes no flavor, no calories, and no macronutrients. The downside: some people experience digestive discomfort with regular use, and too much creates an unpleasant gummy texture. Think of xanthan gum as a precision tool — effective in micro-doses, problematic in excess.
For the best results when mixing, blend your powder with liquid in a shaker bottle or blender rather than stirring with a spoon. The mechanical action breaks up clumps far more effectively than any additive alone. Texture enhancers improve the experience, but they work best as a complement to proper mixing technique — not a replacement for it.
Flavor and texture decisions are personal. Dial them in over a few batches, and you will land on a combination that makes your protein powder with few ingredients taste better than anything off a store shelf. The real test comes next: grinding, sifting, and storing your finished blend so it stays fresh and consistent from the first scoop to the last.
Step 6: Blend, Sift, and Store Your Powder Properly
You have your ingredients selected, your ratios mapped out, and your flavor additions ready. The difference between a smooth, scoopable DIY protein powder and a clumpy, oily mess comes down to technique during these final steps. Rushing the grind or skipping the sift will undo all the planning you have done so far.
The Grinding and Sifting Process
If you have ever ground nuts too long and watched them turn into nut butter, you already know the enemy: heat. Friction from continuous blade spinning raises the temperature inside your grinder, melting the natural fats in seeds and nuts until they release oil and clump into paste. The solution is patience and short bursts. Here is how to make homemade protein powder with a consistently fine, dry texture:
- Dry your ingredients thoroughly. Spread seeds, oats, or lentils on a baking sheet and leave them at room temperature for a few hours, or toast lightly at 150°F (65°C) for 10 minutes. Even small amounts of residual moisture cause clumping during grinding and shorten shelf life later.
- Grind in small batches. Fill your spice grinder no more than half full. Smaller loads let particles circulate freely around the blade, producing a more uniform particle size with less effort. Overfilling traps ingredients under the blade where they compact rather than break down.
- Pulse in 2-3 second bursts. Hit the button, release, shake the grinder gently to redistribute contents, then pulse again. Aim for 8-12 pulses per batch with 5-10 seconds of rest between rounds. This prevents heat buildup and keeps oils locked inside the seed structure rather than coating the powder.
- Sift through a fine-mesh strainer. Dump each ground batch into a fine-mesh strainer positioned over a large bowl. Gently shake or tap the sides to pass the fine powder through while catching coarser particles on top.
- Re-grind the coarse leftovers. Collect whatever remains in the strainer and run it through the grinder for another round of pulses. Most batches need only one re-grind to achieve a consistent, flour-like texture.
- Combine all ground ingredients in a large bowl. Once every component has been ground and sifted individually, pour them together and whisk for 30-60 seconds to distribute ingredients evenly throughout the blend.
This process works for any homemade protein powder recipe regardless of which base ingredients you chose. The key principle stays the same: small batches, short pulses, sift, repeat. A protein powder recipe homemade from whole foods will never reach the talcum-fine consistency of a spray-dried isolate, but this method gets you close enough that the powder mixes smoothly into shakes and baked goods without grit.
Storage Methods and Shelf Life
Commercial protein powders last 12-18 months because the extraction process removes the fats and moisture that cause spoilage. Your whole-food powder still contains those natural oils — especially if your recipe for homemade protein powder features hemp hearts, pumpkin seeds, or flaxseed — so storage decisions directly affect how long your batch stays fresh.
Follow these guidelines to protect your protein powder DIY project from going rancid or stale:
- Airtight containers are non-negotiable. Mason jars with sealed lids or containers with silicone-gasket closures block moisture and oxygen. Squeeze out excess air before sealing, or drop in a food-safe oxygen absorber for extra protection.
- Store in a cool, dark location. A pantry shelf away from the stove or a kitchen cabinet that does not receive direct sunlight works well. Heat and light accelerate fat oxidation — the process that turns oils rancid and gives powder a stale, bitter taste.
- Refrigerate high-fat blends. Any blend where seeds or nuts make up more than half the total volume benefits from refrigeration. The cold slows enzymatic activity and oxidation significantly.
- Realistic shelf life: 2-4 weeks at room temperature for most blends; 1-2 months refrigerated; up to 3 months frozen in vacuum-sealed bags. Blends built primarily on defatted peanut flour, oat flour, or rice protein last longer at room temperature because their fat content is lower.
Signs your powder has turned: a sharp or paint-like smell (rancid oils), visible moisture or clumping that was not there before, or a noticeably bitter taste. When in doubt, make smaller batches more frequently rather than one large batch that sits for weeks. Learning how to make protein powder at home is as much about freshness discipline as it is about the recipe itself.
A well-ground, properly stored powder is ready to use — but how much should you actually scoop into your shaker? The answer is not as simple as mimicking the serving size on a commercial tub, and getting it wrong means either under-dosing your protein or choking down an uncomfortably thick shake.
Step 7: Calculate Serving Sizes and Troubleshoot Common Issues
A standard commercial scoop delivers 25-30 grams of protein in roughly 30-35 grams of powder. That near 1:1 ratio exists because isolates strip away almost everything except protein. Your whole-food blend works differently. With protein making up 40-60% of the total weight, you need a physically larger serving — typically 45-60 grams of powder — to hit that same 20-25g protein target. That is not a design flaw. It just means your scoop looks bigger, and your shake will be slightly thicker and more filling thanks to the fiber and healthy fats riding along.
So how much is one scoop of protein powder when you are working with a homemade blend? Forget the tiny scooper that came with your old tub. The industry standard scoop holds approximately 30 grams, which works perfectly for concentrated isolates but undersells your whole-food powder. You will likely need 1.5 to 2 level scoops (or about 3-4 heaping tablespoons) to reach the protein equivalent of a single commercial serving. A kitchen scale removes all guesswork — weigh your serving once, note the volume it fills in your scoop or measuring cup, and use that visual reference going forward.
How to Calculate Your Blend's Protein Per Serving
You do not need a nutrition lab. You need basic arithmetic and the labels from your ingredient packages. Here is the framework:
- List each ingredient and its proportion in your blend. For example, if your recipe uses 2 cups hemp hearts, 1 cup lentil flour, and 0.5 cups chia seeds, convert those to a ratio — 4 parts hemp, 2 parts lentil, 1 part chia.
- Find the protein per gram for each ingredient. Check the nutrition label. Hemp hearts typically list about 10g protein per 30g serving, which equals 0.33g protein per gram of powder. Lentil flour runs about 8g per 30g (0.27g/g), and chia seeds about 5g per 30g (0.17g/g).
- Calculate the weighted average. Multiply each ingredient's protein-per-gram by its proportion in the blend, then add the results. Using the example above: (4/7 x 0.33) + (2/7 x 0.27) + (1/7 x 0.17) = 0.19 + 0.08 + 0.02 = 0.29g protein per gram of blend.
- Determine your serving size. If you want 20g of protein per serving, divide 20 by your protein-per-gram figure. In this case: 20 / 0.29 = roughly 69g of powder per serving.
That 69g serving might sound like a lot, but consider the context. A half cup of most homemade protein powder weighs between 55-70 grams depending on ingredient density — so you are looking at roughly 1/2 cup protein powder in grams terms for a full protein serving. For reference, 21g to tbsp conversions vary by powder density, but most whole-food blends measure about 7-8 grams per level tablespoon. Three tablespoons gets you approximately 21g of powder, which in our example blend delivers about 6g of protein — useful for a light boost in oatmeal or baked goods rather than a full post-workout serving.
Quick tip: if you want protein powder with highest protein density from a homemade blend, lean heavily on defatted peanut flour (50% protein by weight) or nonfat milk powder (35% protein by weight) as your primary base. These ingredients shrink your required serving size closer to commercial territory — around 40-50g for 20g of protein.
Wondering what to mix protein powder with when your serving is this large? Smoothies are your best friend. Blend your powder with 8-12 ounces of liquid — milk, plant milk, water, or juice — plus frozen fruit or a banana. The blender breaks up any thickness, and the fruit masks the volume. You can also split your daily protein across two smaller servings: one in a morning smoothie and one stirred into afternoon oatmeal or yogurt. And yes, you can cook protein powder into recipes like pancakes, muffins, and energy bars without damaging the protein — heat does not destroy amino acids at normal baking temperatures (up to 350°F/175°C).
Fixing Clumping, Grittiness, and Bitter Taste
Even with solid technique, problems crop up. Maybe your powder clumps into rocks after a week in the pantry. Maybe it feels like sand on your tongue. Maybe it tastes like you are drinking lawn clippings. Each issue has a specific cause and a targeted fix.
| Problem | Likely Cause | Fix |
|---|---|---|
| Clumping in storage | Moisture absorption or high fat content causing particles to stick together | Add 1-2 tablespoons of rice flour or arrowroot starch per cup of blend — these act as anti-caking agents that absorb moisture. Store in airtight containers with a food-safe silica gel packet. |
| Clumping when mixed with liquid | Powder added before liquid, or stirred rather than shaken/blended | Always add liquid first, then powder. Shaking vigorously for 60-90 seconds or using a blender breaks up clumps far better than a spoon. Ice cubes in a shaker bottle act like a mixing ball. |
| Gritty or sandy texture | Insufficient grinding time or coarse particles passing through the sieve | Grind longer in smaller batches (fill grinder only 1/3 full). Switch to a finer mesh strainer — look for 60-mesh or higher. Re-grind any particles that do not pass through on the first sift. |
| Bitter or grassy taste | Too high a ratio of hemp seeds or chia seeds, which carry earthy, slightly bitter compounds | Reduce hemp to no more than 40% of your total blend. Add 1-2 tablespoons of cocoa powder or 1/2 teaspoon of vanilla per serving to mask bitterness. A pinch of stevia also counteracts bitter notes. |
| Powder floats on liquid and will not incorporate | Whole-food powders lack the lecithin and instantizing agents used in commercial products | Add 1/2 teaspoon of sunflower lecithin per serving to your dry blend — it acts as a natural emulsifier. Alternatively, what do you mix protein powder with for best results? Use a blender rather than a spoon, and choose thicker liquids like plant milk or smoothie bases over plain water. |
| Oily residue or paste forming | Over-grinding seeds released their natural oils | Grind in shorter pulses (2-3 seconds max). Let the grinder rest 10 seconds between pulses. If paste has already formed, mix in a tablespoon of oat flour or rice flour to absorb the oil and restore powder consistency. |
| Powder goes rancid quickly | High-fat seeds (hemp, flax, sunflower) oxidize when exposed to air and warmth | Refrigerate immediately after grinding. Use vacuum-sealed containers. Make smaller batches (1-2 weeks' supply) rather than large ones. Add a pinch of vitamin E powder as a natural antioxidant. |
Most issues trace back to one of two root causes: moisture management or fat content. Blends heavy in seeds need colder storage and anti-caking agents. Blends built on defatted flours (peanut flour, oat flour, rice protein) are far more forgiving — they resist clumping, grind easily, and last longer at room temperature. If troubleshooting becomes a recurring headache, shifting your ratio toward lower-fat bases often solves multiple problems at once.
One more practical note on measuring: 1 cup protein powder grams will vary depending on your specific blend's density. Seed-heavy powders tend to weigh 110-130g per cup, while flour-based blends pack tighter at 120-140g per cup. Weigh your blend once with a kitchen scale, note the cup-to-gram conversion, and write it on your storage container's label. This saves you from recalculating every time you scoop.
For most home users, these calculations and fixes are all you need to maintain a reliable, cost-effective protein source. But there is a point where kitchen-scale production hits a ceiling — whether that is consistency batch to batch, protein verification through lab testing, or simply the volume you need. Recognizing that boundary is just as important as knowing how to work within it.
Step 8: Know When to Scale Beyond Your Kitchen
Homemade protein supplements work beautifully for daily personal use, meal prep flexibility, and full ingredient control. But they are not the right solution for every situation or every person. Being honest about those limits helps you decide whether your kitchen setup is enough — or whether your recipe deserves a bigger stage.
When Homemade Is Enough and When It Is Not
If you are a recreational gym-goer, a home cook looking to boost protein in meals, or someone managing food sensitivities on a budget, a homemade protein supplement covers your needs completely. You control the ingredients, you know exactly what goes in, and you save money batch after batch.
The ceiling appears in a few specific scenarios. High-performance athletes who need precise macros verified by third-party lab testing cannot rely on kitchen-scale math alone — a 5% variance in protein content per serving matters when nutrition is periodized around training blocks. People with severe time constraints who need grab-and-go convenience may find the grinding, sifting, and short shelf life impractical week after week. And anyone requiring clinical-grade allergen-free processing — think celiac disease or severe nut allergies — needs the kind of dedicated-facility manufacturing that eliminates cross-contamination risk entirely.
There is also a third category: readers who have perfected a blend they love and wonder whether other people would buy it. If you have figured out how to make protein supplement formulas that taste great and deliver solid nutrition, the leap from personal recipe to sellable product is smaller than you might think.
Turning Your Recipe Into a Market-Ready Product
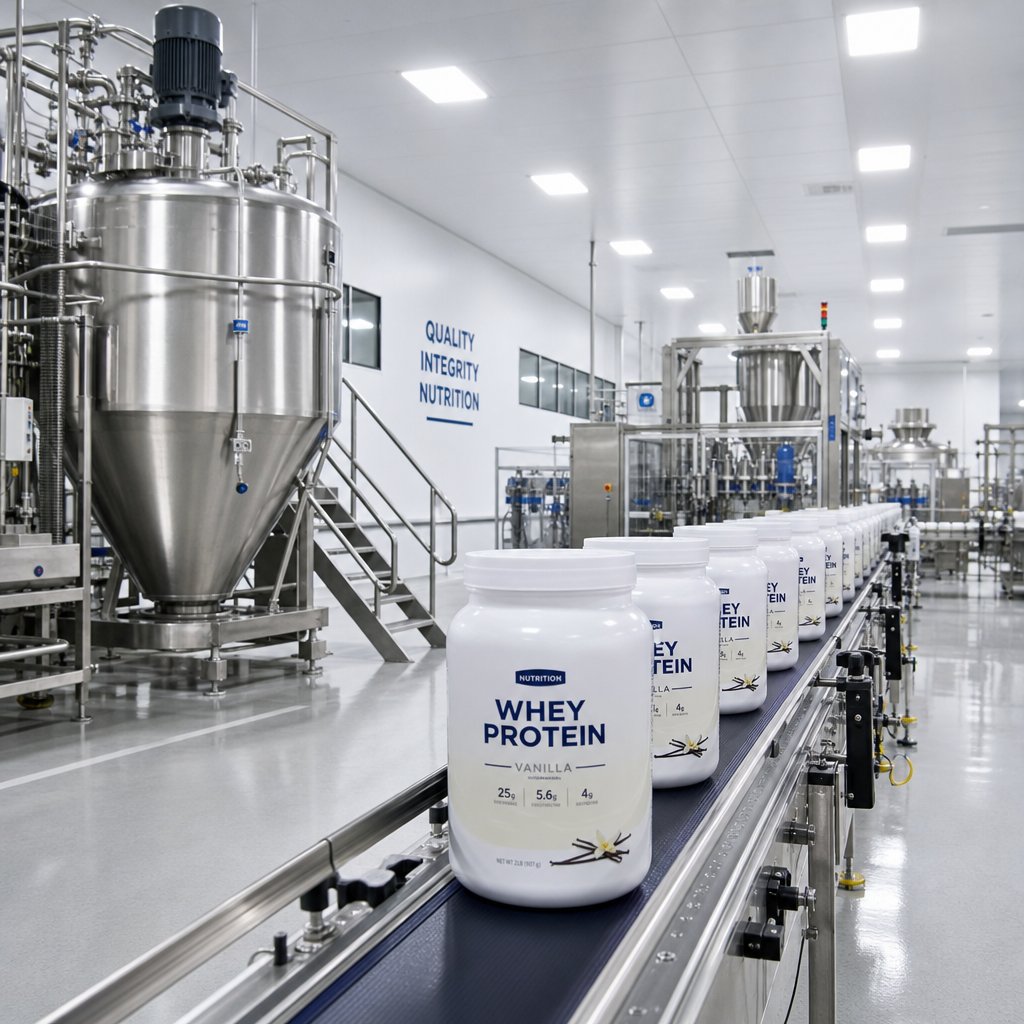
Scaling from a mason jar to a retail shelf introduces challenges your kitchen cannot solve — batch consistency across hundreds of units, verified nutritional labels, food safety compliance, and packaging that protects shelf life during shipping. This is where OEM/ODM manufacturing partners come in.
These contract manufacturers specialize in taking a formula you have developed and producing it at commercial scale with professional-grade quality control. For anyone looking to create your own protein powder brand, a manufacturing partner typically handles:
- Formulation optimization — refining your homemade ratios for consistent texture, mixability, and protein density at production scale
- Nutritional testing — third-party lab verification of protein content, amino acid profile, and micronutrient levels for accurate labeling
- Regulatory compliance — ensuring your product meets FDA, EU, or other regional requirements for supplement labeling and health claims
- Flexible product formats — producing your formula as powder/granules, single-serve sachets, or even alternative formats like capsules or gummies
- Scalable batch production — manufacturing runs from small pilot batches (for market testing) to full-scale production as demand grows
Companies like ZhuFeng offer OEM/ODM health food manufacturing with customized formulation services and flexible formats — particularly relevant if your goal is to build your own protein powder line in powder or granule form. Their model lets you maintain creative control over your recipe while offloading the production complexity that makes kitchen-to-market transitions difficult.
Not everyone who learns how to make your own protein supplement will want to launch a brand. But knowing the path exists reframes the entire exercise. Your kitchen is a formulation lab. Every batch you tweak, every flavor ratio you dial in, every texture problem you solve — that is product development. Whether you keep it personal or scale it into something bigger, the skills are the same. The only difference is volume.
Frequently Asked Questions About Homemade Protein Powder
1. Is homemade protein powder as effective as store-bought?
Homemade protein powder delivers effective protein for muscle recovery and daily nutrition, though it works differently than commercial isolates. Whole-food blends provide 40-60% protein by weight compared to 80-90% in isolates, meaning you need a larger serving size (45-60g) to match the 20-25g protein in a standard commercial scoop. The trade-off is worthwhile for many people because whole-food powders retain fiber, healthy fats, and micronutrients that support digestion and more efficient protein utilization by the body. For recreational athletes and general health goals, homemade blends perform well. High-performance athletes needing lab-verified precise macros may benefit from commercial options or working with an OEM manufacturer like ZhuFeng to produce a professionally tested formula based on their homemade recipe.
2. What are the best ingredients for homemade protein powder?
The highest-protein options for homemade blends include defatted peanut flour (15g protein per 30g serving), hemp hearts (10g per 30g), nonfat milk powder (10g per 30g), pumpkin seeds (9g per 30g), and dried lentil flour (8g per 30g). The best approach combines a primary base with the highest protein density and a secondary base that provides complementary amino acids or improved texture. For example, pairing hemp hearts with lentil flour creates a complete amino acid profile, while adding oat flour improves mixability. Choose allergen-free seeds like hemp and pumpkin if you need to avoid dairy, soy, or nuts.
3. How long does homemade protein powder last?
Shelf life depends on your blend's fat content and storage method. Seed-heavy blends (hemp, pumpkin, flax) last 2-4 weeks at room temperature and 1-2 months refrigerated. Lower-fat blends built on defatted peanut flour, oat flour, or rice protein last longer at room temperature because they resist oxidation. Vacuum-sealed bags can extend freshness up to 3 months in the freezer. Always store in airtight containers in cool, dark locations. Signs of spoilage include a sharp or paint-like smell from rancid oils, unexpected clumping from moisture absorption, or a noticeably bitter taste. Making smaller batches more frequently is the safest strategy.
4. How do you make homemade protein powder taste good?
Start with an unflavored base blend and add flavor incrementally in small portions. Dark cocoa powder (1-2 tablespoons per serving) is the most forgiving addition, providing rich chocolate flavor with minimal calories. Vanilla powder, cinnamon, and matcha green tea are other popular options. For sweetness without sugar, use a tiny pinch of stevia or monk fruit extract. Ground flaxseed or a small amount of xanthan gum improves texture and mouthfeel. The key technique is mixing flavoring into about 180g of base powder at a time so you can test across several servings without committing your entire batch to one flavor profile.
5. Can you turn a homemade protein powder recipe into a commercial product?
Yes, transitioning from kitchen recipe to retail product is achievable through OEM/ODM manufacturing partners. These companies take your developed formula and handle formulation optimization for production scale, third-party nutritional testing for accurate labeling, regulatory compliance with FDA or EU standards, flexible format production (powder sachets, bulk containers, or even capsules and gummies), and scalable batch runs from pilot testing to full production. Companies like ZhuFeng specialize in customized health food manufacturing with powder and granule formats, making them a natural fit for entrepreneurs who have perfected a homemade blend and want professional-grade consistency, verified nutrition claims, and market-ready packaging.