Why Homemade Cacao Powder Beats Store-Bought
Imagine cracking open a jar of powder you made yourself, from actual cacao beans, and catching a wave of deep, complex chocolate aroma that no supermarket tin has ever delivered. That is the payoff of learning how to make cacao powder at home. You control the roast level, the fat content, and the freshness, which means you also control the flavor and nutritional density of the final product.
Commercial producers roast at high temperatures and strip out most of the cocoa butter for shelf stability. The result is convenient but nutritionally diminished. Home processing at gentler temperatures preserves more of the flavonoids and antioxidants that make cacao a functional food. According to Simple Mills, raw cacao powder contains nearly double the fiber, iron, magnesium, and protein compared to standard cocoa powder.
The full bean-to-powder journey moves through eight phases: sourcing beans, fermenting, drying, roasting, cracking and winnowing, grinding into liquor, separating cocoa butter, and milling the pressed cake into fine powder. Sounds complex? You do not need to start from scratch. Three entry points let you jump in at your comfort level:
- Whole cacao pods (full control, longest timeline)
- Pre-fermented, dried beans (skip fermentation, still roast and process yourself)
- Purchased cacao nibs (fastest route to homemade powder)
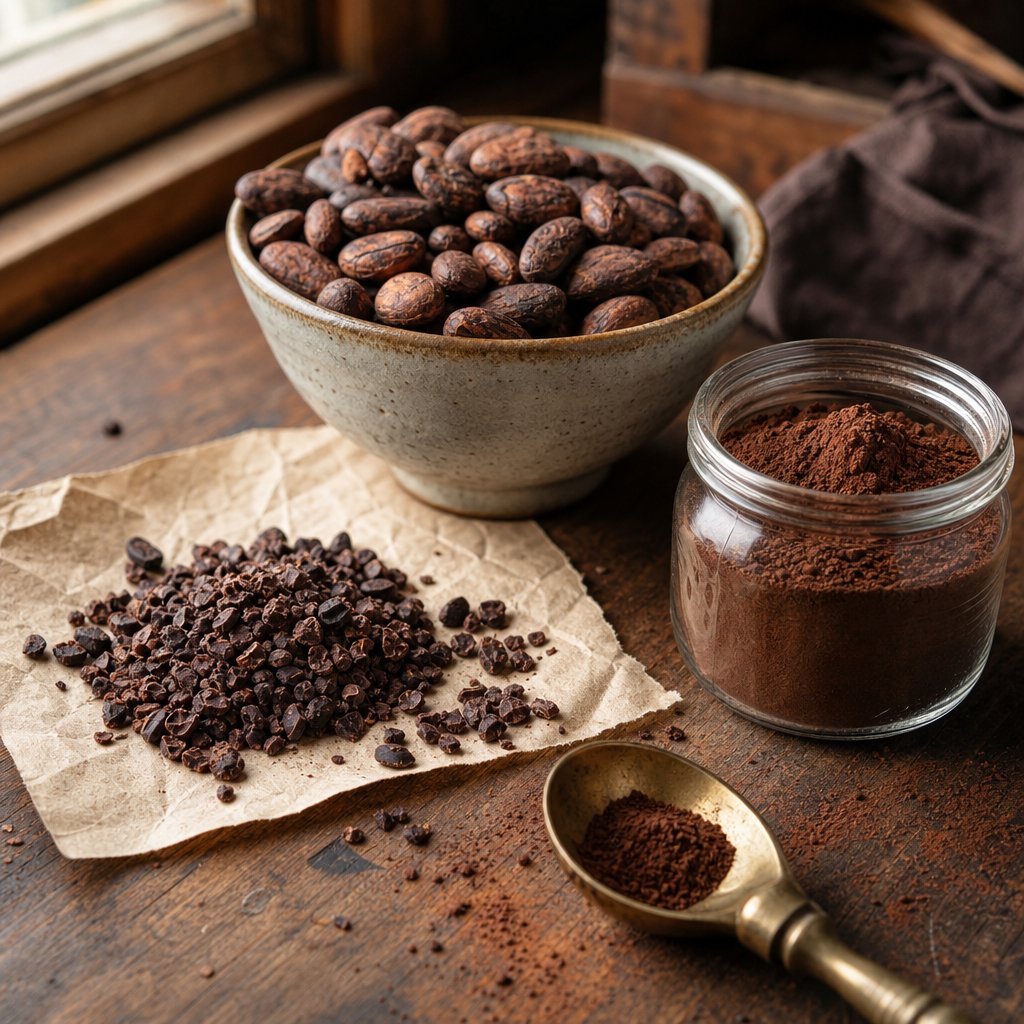
When comparing cacao powder vs nibs, the difference is simply processing stage. Nibs are cracked bean pieces with full fat intact, while powder has most of that fat removed. Understanding cocoa nibs vs cocoa powder helps you decide where to enter the process.
Cacao Powder vs Cocoa Powder and Why It Matters
The terms get tossed around interchangeably, but they describe different products. Cacao powder is made by cold-pressing raw or minimally heated beans, preserving more antioxidants and a bolder, earthier flavor. Cocoa powder comes from beans roasted at 250 to 350 degrees Fahrenheit before pressing, which mellows bitterness but reduces antioxidant content. When you learn how to make cocoa powder or cacao powder at home, you choose exactly where on that spectrum your product lands by adjusting roast temperature or skipping roasting entirely.
What You Will Need Before Starting
Knowing how to prepare cocoa from raw beans requires patience more than professional equipment. Here is what you will need, organized by phase:
- Roasting: standard oven or convection oven, sheet pans, thermometer (30 to 45 minutes active time)
- Cracking and winnowing: rolling pin or mallet, hair dryer or fan, bowls (20 to 30 minutes per batch)
- Grinding: food processor, coffee grinder, or dedicated cacao grinder (15 to 40 minutes depending on equipment)
- Pressing: cheesecloth, DIY press, or hydraulic press for fat separation (30 minutes to several hours)
- Storage: airtight glass jars, cool dark space or freezer
Total time from dried beans to finished powder runs roughly three to five hours for a small batch, spread across a single day. Skill level is beginner-friendly, especially if you start from purchased nibs. The real learning curve lives in the fat-separation step, which is where understanding how cacao powder is made diverges from simply grinding nibs into a coarse meal.
The quality of your finished powder, however, begins long before any equipment gets involved. It starts with the beans themselves.
Step 1 - Source and Select the Right Cacao Beans
Every cocoa seed carries a genetic blueprint that determines the flavor ceiling of your finished powder. You can nail every processing step perfectly, but if you start with low-grade beans, the result will taste flat. Choosing the right cacao beans for chocolate or powder production is the single decision that shapes everything downstream.
All commercial cacao comes from one species, Theobroma cacao, but the genetic diversity within that species is enormous. Think of it like wine grapes: the same plant family, wildly different results in the glass. Three main varieties dominate the market, and each one steers your powder toward a distinct flavor profile.
How Bean Variety Shapes Your Final Powder
When deciding what to do with cacao beans, variety selection is your first creative choice. Criollo beans produce a milder, more complex powder with floral and fruity undertones and very low bitterness. They are also the rarest, making up roughly 1-5% of global production. Forastero accounts for about 80-85% of the world's cocoa bean cacao supply. It delivers a stronger, more bitter punch that works well in baking and bold drinking chocolate. Trinitario, a natural hybrid of the two, balances Criollo's nuance with Forastero's resilience and yield.
| Variety | Flavor Notes | Bitterness Level | Availability | Best Use for Powder |
|---|---|---|---|---|
| Criollo | Floral, fruity, nutty | Low | Very rare (1-5% of supply) | Premium drinking chocolate, ceremonial cacao |
| Forastero | Bold, earthy, straightforward | High | Widely available (80-85%) | Baking powder, industrial recipes |
| Trinitario | Complex, balanced, slightly fruity | Medium | Moderate | Versatile all-purpose powder, specialty blends |
Origin matters too. Peruvian beans tend toward subtle earth and fruit, Ecuadorian beans carry floral "Arriba" aromas, and Madagascar beans often surprise with bright citrus notes. If you are exploring cacao bean recipes for the first time, trying small batches from two or three origins teaches you more than committing to a single source.
Signs of Quality When Buying Cacao Beans
Can you eat raw cocoa beans straight from the bag? Technically yes, but the real question is whether those beans are worth processing. Here is what to look for when purchasing:
- Uniform size: consistent beans roast evenly, preventing some from burning while others stay underdeveloped.
- No visible mold: white or green fuzz signals improper drying or storage. Discard the entire batch.
- Pleasant fermented aroma: properly fermented beans smell faintly acidic and chocolatey, not musty or ammonia-like.
- Cut-test appearance: slice a few beans open. A deep brown, fissured interior indicates successful fermentation. Purple or slate-gray interiors mean under-fermentation.
For sourcing, specialty importers and direct trade suppliers offer the highest quality. They provide transparency about fermentation methods, origin, and farmer relationships. If you are wondering what to do with cocoa beans from a bulk agricultural supplier, expect less traceability and simpler flavor profiles suited to large-scale production rather than artisan powder.
With quality beans secured, the next challenge is coaxing out their hidden flavor potential, a transformation that begins not with heat, but with microbiology.
Step 2 - Ferment and Dry Your Cacao Beans
Microbiology does the heavy lifting here. Unfermented cacao beans taste flat, astringent, and nothing like chocolate regardless of how well you roast them. Fermentation creates the chemical precursors, specifically free amino acids and reducing sugars, that roasting later assembles into the hundreds of volatile compounds we recognize as chocolate flavor. Skip this step, and roasting has nothing to work with.
Understanding how is cacao processed at origin helps you replicate the same transformation at home. The journey from cocoa fruit to chocolate flavor begins the moment beans are piled together and microbes start converting pulp sugars into acids and heat.
Fermentation Science and Small-Batch Methods
Fermentation unfolds in three overlapping microbial phases. During days one and two, yeasts consume pulp sugars and produce ethanol, carbon dioxide, and heat. Temperatures climb from ambient (around 25 to 27 degrees Celsius) to 35 to 40 degrees Celsius. From days one through three, lactic acid bacteria overlap with yeast activity, converting sugars into lactic acid that influences the smoothness of your final powder's flavor.
The critical phase arrives on days two through six. When you turn the bean mass and introduce oxygen, acetic acid bacteria oxidize ethanol into acetic acid, generating intense heat that peaks at 45 to 50 degrees Celsius. This heat and acidity kill the bean embryo, rupturing cell membranes and mixing previously separated proteins, polyphenols, and enzymes. The result? Aspartic endoproteases cleave storage proteins into free amino acids like leucine and alanine, the exact inputs the Maillard reaction needs during roasting. Simultaneously, polyphenol oxidase reduces bitterness and astringency by up to 80 to 90 percent.
For small batches, you have two main approaches to process cacao at home:
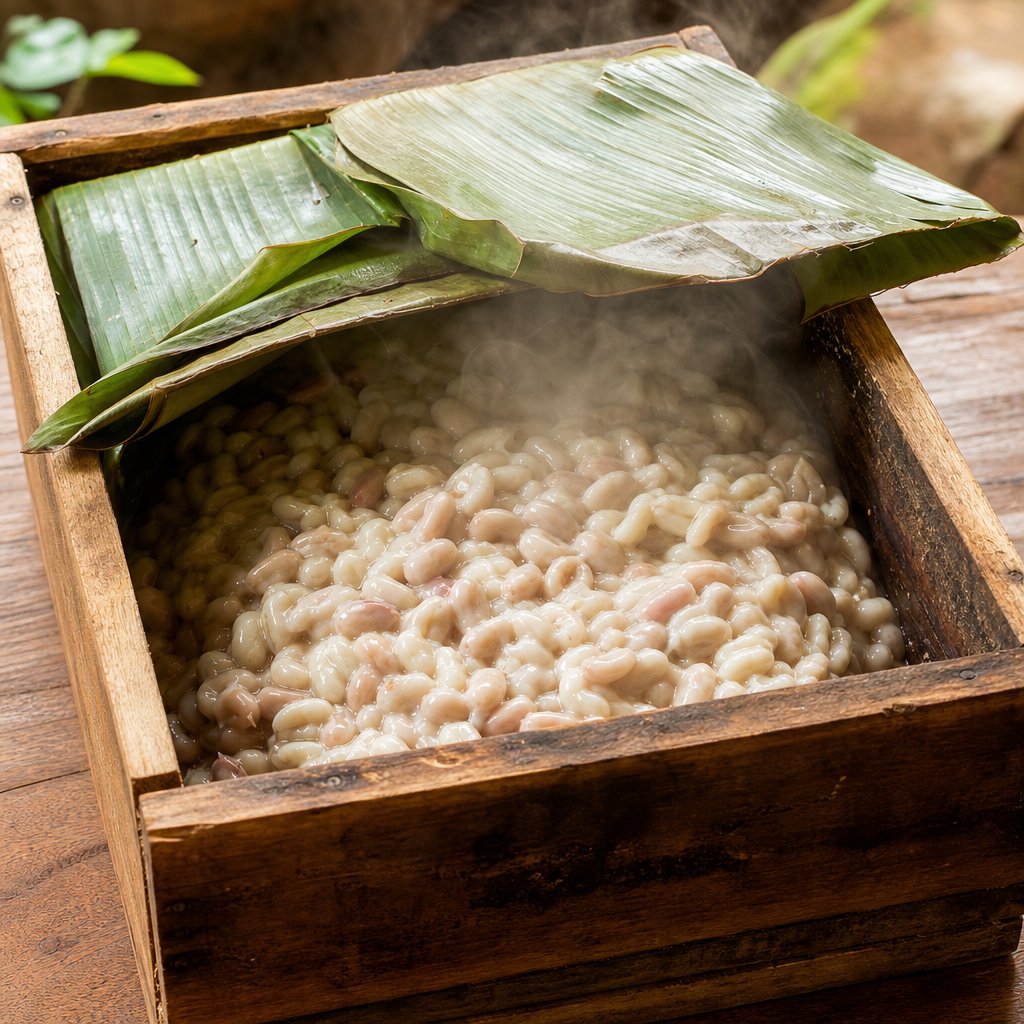
- Box fermentation: use a small insulated wooden box or an igloo cooler lined with banana leaves. HAA Chocolate in Hawaii uses this method, noting that the cooler walls carry microbial memory from past ferments that encourages healthy cultures.
- Heap fermentation: pile beans on banana leaves and cover them. Less uniform than boxes, but simpler to set up. Requires a minimum mass of around 300 kilograms for proper heat generation, making it less practical for home producers.
Duration depends on bean variety. Criollo beans ferment in just two to four days due to their lower polyphenol content. White beans (pure Criollo) finish in two to three days. Forastero needs five to seven days in boxes to achieve adequate browning and bitterness reduction. Turn the mass at days three, five, and seven to introduce oxygen and ensure even fermentation.
How do you judge completion? Perform a cut test. Slice ten to twenty beans lengthwise. At least 75 percent should show brown, fissured cross-sections. Purple or slate-colored interiors indicate under-fermentation. Black or putrid-smelling beans signal over-fermentation and should be discarded. Well-fermented beans carry aromas of berries, raisins, and a vinegary tang, a signature of healthy transformation.
Drying Techniques and Food Safety Considerations
Freshly fermented beans hold roughly 60 percent moisture. To understand how is cacao made shelf-stable, you need to bring that number down dramatically. Drying is not just preservation. It is a continuation of flavor development. Acids inside the beans keep transforming until they evaporate, so drying speed directly shapes your powder's taste profile.
Target moisture content for safe storage: 6 to 8 percent. Above 8 percent risks mold growth. Below 5 percent damages the bean structure and creates brittleness that complicates later processing.
Two methods work for home producers learning how to process cacao beans through the drying stage:
- Sun drying: spread beans in thin layers on wire mesh racks or clean trays. Takes one to four weeks depending on climate and humidity. Slower drying allows more volatile acids to evaporate, producing mellower, less acidic powder. This is the preferred method for quality-focused producers.
- Dehydrator drying: set temperature between 40 and 50 degrees Celsius (104 to 122 degrees Fahrenheit). Faster than sun drying, typically finishing in two to four days. Traps more acid inside the bean, creating brighter, fruitier notes. Useful in humid climates where sun drying risks mold.
Food safety demands attention throughout. Mold prevention starts with adequate airflow. Never stack beans too deep, and stir them daily to prevent moisture pockets. In humid environments above 70 percent relative humidity, a dehydrator is safer than sun drying. Discard any batch showing visible mold, ammonia-like odors, or slimy texture. The acidic nature of fermented pulp naturally inhibits most mold, but contamination from dirty tools, soil contact, or husk fragments can override that protection.
When you know how to prepare cacao through proper fermentation and drying, you have completed the biological phase of flavor creation. The beans are now stable, aromatic, and loaded with Maillard precursors waiting to be unlocked. That unlocking happens through heat, and the temperature you choose determines whether your powder tastes like delicate single-origin chocolate or bold, roasty baking cocoa.
Step 3 - Roast Beans to Develop Deep Flavor
Heat transforms fermented cacao from a sour, astringent seed into something recognizably chocolatey. Roasting is where the Maillard reaction finally fires, combining the free amino acids and reducing sugars created during fermentation into over 600 simultaneous chemical reactions that produce the aromatic compounds we associate with chocolate. At the same time, volatile acetic acid from fermentation evaporates, reducing sharpness and balancing the flavor profile. This is the decisive step in turning cocoa beans into chocolate flavor, and the temperature you choose shapes everything about your finished roasted cacao powder.
For home producers, a standard kitchen oven delivers excellent results. You do not need industrial equipment. What you do need is variety-specific guidance, because Criollo, Trinitario, and Forastero beans respond to heat very differently.
Temperature and Timing by Bean Variety
Delicate Criollo beans carry fewer polyphenols and thinner cell walls, so they require lower temperatures and longer roast times to avoid burning their subtle floral notes. Forastero beans, packed with robust tannins and higher bitterness, tolerate and even benefit from higher heat that drives off harsh compounds. Trinitario sits between the two, rewarding moderate temperatures with balanced complexity.
Here is how to prepare cocoa powder with the right roast for each variety:
| Bean Variety | Temperature Range | Duration | Best End Use for Powder |
|---|---|---|---|
| Criollo | 115-130°C (239-266°F) | 25-30 minutes | Drinking chocolate, ceremonial cacao, smoothies |
| Trinitario | 120-135°C (248-275°F) | 20-25 minutes | All-purpose powder, specialty baking, hot chocolate |
| Forastero | 135-150°C (275-302°F) | 15-20 minutes | Bold baking powder, brownies, dark chocolate recipes |
Spread beans in a single layer on a sheet pan so air circulates evenly. Preheat your oven fully before placing the tray inside. Stir or shake the beans every five to seven minutes to prevent hot spots. A practical home roasting guide from Chocolats du Monde recommends turning beans three to four times during the process and notes that beans must reach at least 100°C for 40 minutes to ensure proper sterilization.
Origin also fine-tunes your approach. Ecuadorian Nacional beans respond well to lighter roasts around 120 to 130°C, preserving their signature floral "Arriba" aroma. Ghanaian Forastero benefits from a higher profile at 135 to 145°C. Madagascar beans, with their bright acidity, often need progressive roasting that starts low and ramps up gradually to avoid scorching their citrus notes.
Light Roast vs Dark Roast for Different End Uses
How is cocoa powder made to taste so different across brands? Roast level is the primary variable. A lighter roast preserves more of the bean's natural polyphenols and antioxidant activity, while a darker roast develops deeper, more caramelized flavors at the cost of some nutritional content.
Research published in Heliyon found that oven roasting at controlled temperatures (180°C for 5 to 10 minutes in their study) preserved polyphenol content and antioxidant activity with no significant reduction compared to unroasted dried beans. Traditional high-heat roasting at 200 to 220°C, however, caused significant polyphenol loss and lipid oxidation. The takeaway for home producers: gentler, longer roasts protect the health benefits that make roasted cocoa worth the effort.
Practical implications for how is cocoa powder produced at home:
- Light roast (115-130°C): retains maximum flavonoids and antioxidants. Produces a brighter, fruitier powder ideal for health-focused smoothies, raw desserts, and drinking chocolate. Color stays lighter brown.
- Medium roast (130-140°C): balances nutrition and flavor development. Good all-purpose roasted cacao powder for both drinking and baking. Rich brown color with moderate bitterness.
- Dark roast (140-155°C): maximizes Maillard and caramelization reactions. Produces deep, bold, roasty flavors suited to brownies, cakes, and recipes where chocolate needs to punch through butter and sugar. Darker color, lower antioxidant retention.
You will know your roast is progressing correctly by watching for three indicators. First, shells begin to crack and separate from the nib, making a faint popping sound similar to popcorn. Second, the color shifts from grayish-brown to a warm, even brown. Third, the aroma transitions from sharp and vinegary to rich and unmistakably chocolatey. If you smell anything burnt or acrid, the beans have gone too far.
What about skipping roasting entirely? Raw cacao powder is a legitimate option. Unroasted beans retain the highest possible antioxidant levels and produce a powder with earthy, slightly acidic, and astringent characteristics. The tradeoff is that you lose the deep chocolate flavor that Maillard reactions create, and the powder may carry more residual acetic acid from fermentation. If you choose the raw route, ensure your beans were properly fermented and dried to at least 100°C during drying for food safety, or source beans from suppliers who guarantee pathogen-free processing.
Whether you roast light, dark, or not at all, the beans emerging from your oven are still whole. They are encased in papery shells that need to come off, and the nibs inside still hold their full fat content. Cracking those shells open and grinding the nibs into a smooth liquor is where the process shifts from flavor development to physical transformation.
Step 4 - Crack, Winnow, and Grind Into Cacao Liquor
Roasted beans still wear a papery shell called the husk. It contributes nothing to flavor and creates a dusty, fibrous texture if it ends up in your grinder. Removing it cleanly is the gateway to grinding cacao nibs into the smooth liquor that eventually becomes powder. The process splits into two distinct actions: cracking the shell open, then winnowing the lightweight husk fragments away from the heavier nib pieces.
Winnowing Methods for Clean Nib Separation
Cracking is straightforward. Place cooled roasted beans inside a ziplock bag and roll over them with a rolling pin, applying enough pressure to fracture the shells without pulverizing the nibs into dust. You can also crack each bean by hand if you prefer precision over speed. A hammer works too, but go easy. Smashing beans too aggressively creates tiny fragments that get lost during winnowing.
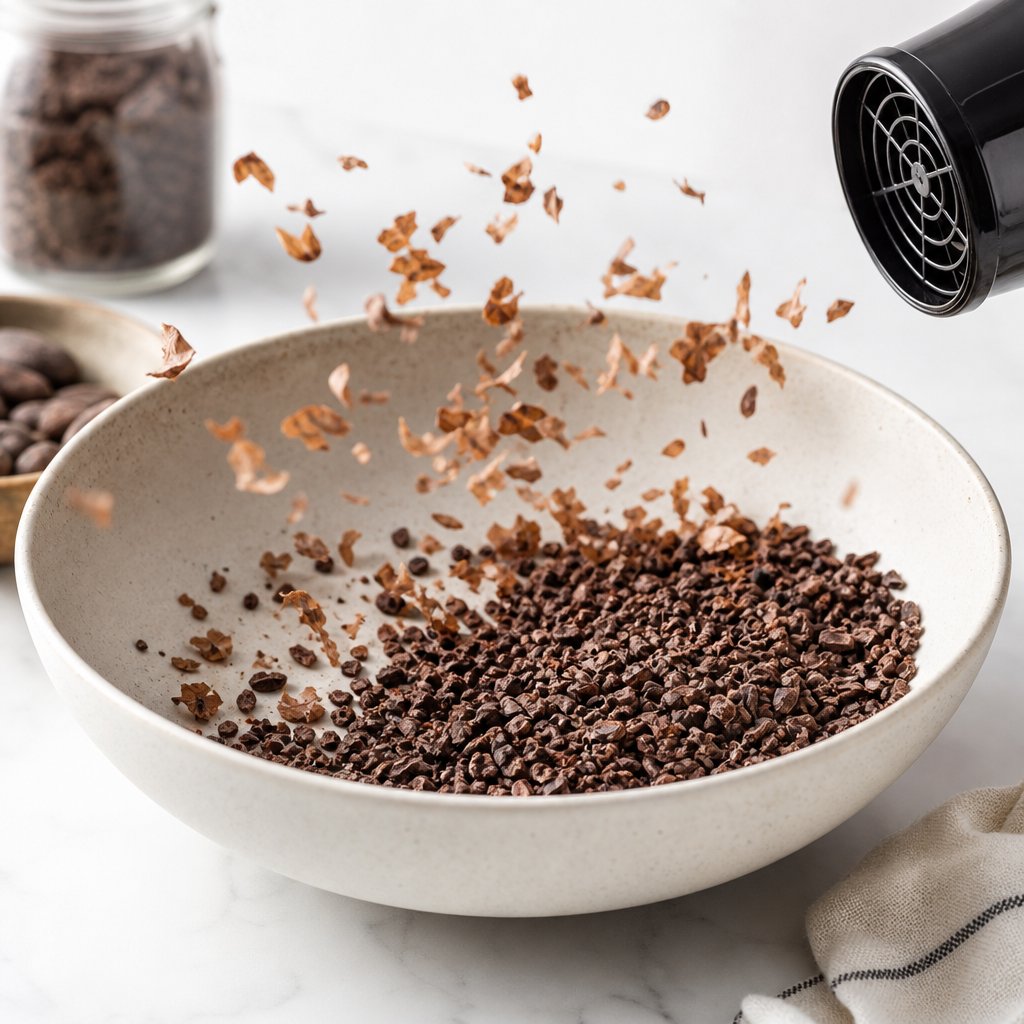
Winnowing exploits the weight difference between nibs and husks. The simplest home method uses a hair dryer and a bowl. Pour your cracked beans into a wide bowl, aim the dryer on a low-heat or cool setting, and gently shake the bowl while the airstream carries husk fragments away. Do this outdoors or over a sheet, because the mess is real. Wear safety glasses if you are processing more than a few hundred grams at a time.
For larger batches, a box fan tilted at an angle works well. Pour cracked beans slowly from one container into another while the fan blows across the stream. Husks drift sideways into a collection bin while heavier nibs fall straight down. Two or three passes usually achieves 95 percent or better separation. A few small husk fragments remaining will not ruin your powder, but removing as much as possible keeps the final product smooth and free of papery off-flavors.
Grinding Equipment Compared for Home Producers
With clean nibs in hand, you are ready for the transformation that turns cacao nibs to chocolate liquor. Grinding cacao nibs generates friction, and friction generates heat. That heat melts the cocoa butter locked inside the nibs, roughly 50 to 55 percent of their weight according to Caldera Cacao. The solid nibs gradually liquefy into a thick, glossy paste called cacao liquor or cacao mass. This is completely normal and expected. You have not added anything. The fat was always there, just trapped inside solid cell structures.
The path from ground cocoa beans to smooth liquor depends heavily on your equipment. Here is an honest comparison:
| Method | Approximate Cost | Grind Quality | Batch Size | Ease of Cleanup |
|---|---|---|---|---|
| Mortar and pestle | $15-40 | Coarse to medium, uneven | 50-100g | Easy |
| Food processor | $40-100 | Coarse, leaves gritty particles | 200-500g | Moderate |
| Burr coffee grinder | $50-150 | Medium, consistent but clogs with fat | 100-200g | Difficult (fat buildup) |
| Champion juicer | $250-350 | Good, produces smooth paste | 500g+ | Moderate |
| Dedicated cacao grinder (melangers) | $180-500 | Excellent, sub-20 micron particles | 500g-2kg | Moderate |
A food processor is the most accessible starting point. Pulse the nibs first to break them into smaller pieces, then run continuously for 5 to 10 minutes. You will hear the texture shift from crunchy to pasty as cocoa butter releases. The limitation? Food processors cannot achieve the fine particle size needed for truly smooth powder. You will end up with a grainy paste that works but is not ideal.
Burr grinders deliver more consistent particle size, but the high fat content of nibs causes clogging. You will spend as much time cleaning as grinding. A Champion juicer pushes nibs through a screen using an auger, producing a reasonably smooth liquor in a single pass. It is effective but expensive for occasional use.
For anyone serious about making chocolate from cacao nibs or producing powder regularly, a dedicated stone grinder (melanger) is the clear winner. These machines use granite wheels rotating on a granite base to simultaneously grind and refine. Caldera Cacao reports grinding for three to four days to reach sub-20 micron particle size for finished chocolate. For cacao powder production, you do not need that level of refinement. Running a melanger for 2 to 4 hours produces a liquor smooth enough for pressing.
How do you know when grinding is complete? The liquor should flow freely when warm, with no visible grit or nib fragments. Rub a small amount between your fingers. If you feel distinct particles, keep grinding. If it feels like warm peanut butter with a silky sheen, you are ready. Temperature during grinding typically reaches 40 to 50 degrees Celsius from friction alone, which is enough to keep the cocoa butter liquid without cooking the solids further.
One important note: if you want to make chocolate from cacao nibs rather than powder, this liquor stage is where the paths diverge. Chocolate makers add sugar and continue refining. Powder makers move to the next challenge, which is separating that 50-plus percent cocoa butter from the solids so the final product is a dry, scoopable powder rather than a greasy paste.
Step 5 - Separate Cocoa Butter and Press the Cake
That glossy, flowing cacao liquor sitting in your grinder is roughly 50 to 55 percent pure cocoa butter by weight. Leave it as-is and you have cacao paste, a wonderful ingredient for chocolate making from cocoa powder blends and confections, but not a dry, scoopable powder. The transformation from liquor to homemade cocoa powder hinges on one mechanical challenge: squeezing out enough fat so the remaining cocoa solids can be milled into something that behaves like powder rather than paste.
This is the step most home producers struggle with. Commercial factories use hydraulic presses operating at up to 550 bars of pressure to force cocoa butter through fine filters, leaving behind a compressed disc called press cake. You will not replicate that force in a kitchen, but several methods get you close enough to produce genuinely useful powder.
Fat Separation Methods Ranked by Effectiveness
How do you make cocoa powder without industrial equipment? You improvise. Here are four approaches ranked from most accessible to most effective:
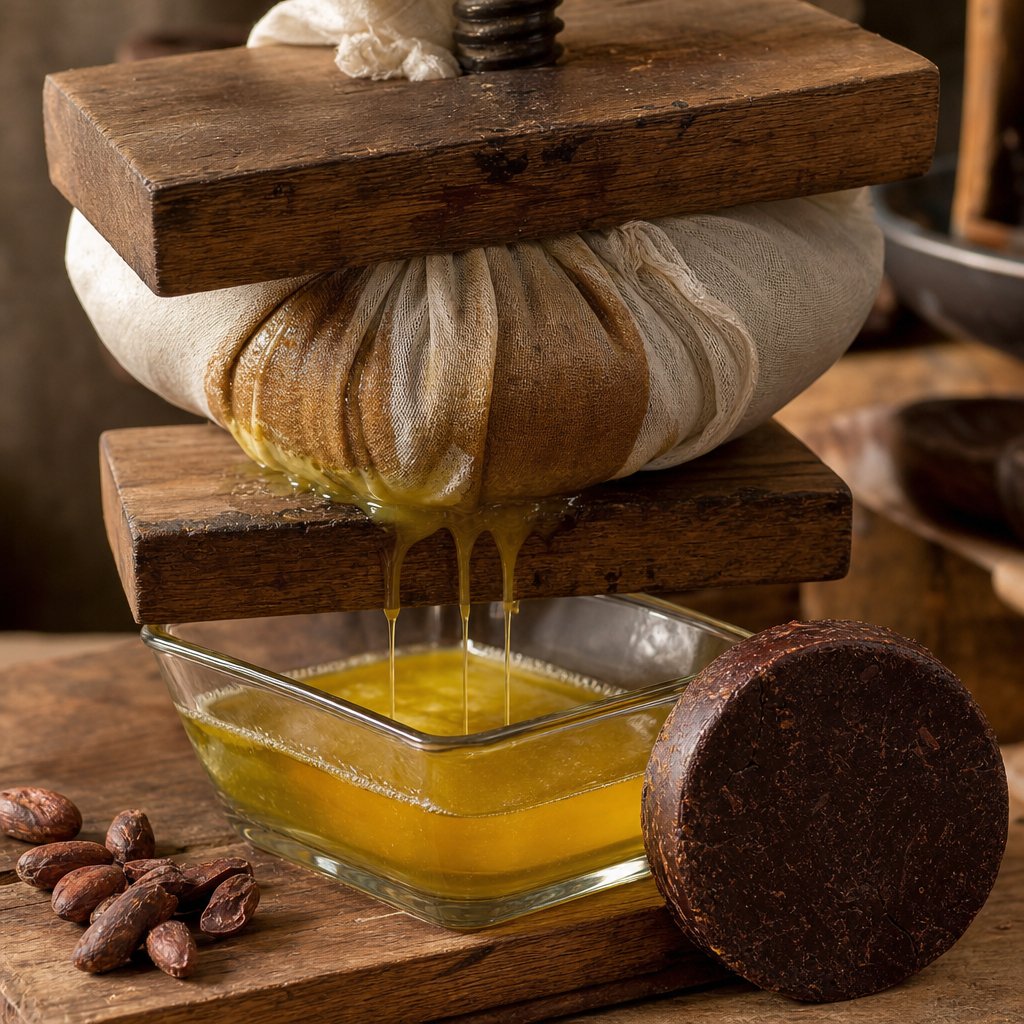
- Cheesecloth hand-pressing: Wrap warm cacao liquor in four to six layers of cheesecloth, place it between two cutting boards, and apply body weight or clamp pressure. Cocoa butter seeps through the fabric into a collection tray below. This method is free if you already own cheesecloth, but it removes only 15 to 25 percent of the total fat. The resulting cake stays oily and crumbles unevenly. Best for small experimental batches where you want to understand the process before investing in better equipment.
- Freezing-and-crumbling method: Pour warm liquor into a shallow pan and freeze it solid. Once frozen, break it into chunks and pulse in a food processor. The cold makes cocoa butter brittle rather than sticky, allowing some fat to separate as fine shavings during processing. Sieve the mixture through a fine mesh strainer. Repeat the freeze-pulse-sieve cycle two or three times. This removes roughly 20 to 30 percent of fat and produces a coarse but workable powder without any pressing equipment.
- DIY hydraulic press setup: A bottle jack (the kind used for car tire changes) mounted inside a steel frame creates surprising pressure. Line a perforated steel cylinder with cheesecloth, fill it with warm liquor, and press with the jack. Home setups generating 2 to 4 tons of force can remove 35 to 45 percent of the cocoa butter, approaching commercial results. The expected yield from 500g of nibs is approximately 150 to 200g of extracted butter using this approach, leaving a firm press cake behind.
- Dedicated cocoa butter press: Purpose-built tabletop presses designed for small-batch chocolate makers deliver the most consistent results. They apply even pressure across the entire cake surface, extracting 40 to 50 percent of the fat and producing a dry, uniform disc that mills easily into fine powder. The investment runs $300 to $800, but for anyone serious about how to make homemade cocoa powder regularly, it pays for itself in consistency and time saved.
How do you judge when enough fat has been removed? Two simple tests tell you. First, the texture test: press a piece of the cake between your fingers. If it smears and leaves an oily film, more fat needs to come out. If it crumbles into dry fragments with only a slight waxy feel, you are in the right range. Second, the crumble test: drop a chunk of press cake onto a hard surface from about six inches. Properly pressed cake shatters into pieces. Under-pressed cake deforms or flattens on impact.
Fat content in your finished powder determines its best use:
- 10 to 12 percent fat (heavily pressed): behaves like commercial baking cocoa. Mixes cleanly into dry ingredients, does not clump, and stores longest. The ingredients for cocoa powder at this fat level are simply the pressed cocoa solids themselves, nothing added.
- 15 to 20 percent fat (moderately pressed): richer mouthfeel, ideal for drinking chocolate and hot cocoa blends. Dissolves more smoothly in milk or water.
- 22 to 28 percent fat (lightly pressed): closer to pure cocoa in its natural state. Works beautifully for ceremonial cacao preparations and smoothie additions where richness is a feature, not a flaw.
Natural vs Dutch-Processed and How to Choose
At this stage you face a fork in the road. Natural cacao powder retains its original acidity (pH around 5.0 to 5.5), giving it a sharp, fruity bite and lighter brown color. Dutch-processed powder has been treated with an alkaline solution to neutralize that acidity, producing a darker color, smoother flavor, and better solubility in liquids.
The alkalization process can be applied to nibs, liquor, or pressed cake. For home producers, treating the pressed cake is simplest. Dissolve food-grade potassium carbonate in a small amount of warm water, roughly 1 to 3 percent of the cake weight in potassium carbonate. Work the solution evenly into crumbled press cake, then spread the treated cake on a sheet pan and dry it at low heat (50 to 60 degrees Celsius) until moisture returns to safe levels.
Santa Barbara Chocolate notes that potassium carbonate is the most widely used alkalizing agent in cocoa processing, raising pH to a mild level while preserving natural aroma and reducing astringency. Light alkalization (pH 6.8 to 7.5) retains some fruity undertones with a rounder chocolate flavor. Moderate alkalization (pH 7.6 to 8.0) produces the classic dark cocoa color familiar from European baking. Stronger alkalization using sodium hydroxide creates very dark, almost black powder, but this requires precise handling and is better left to experienced producers.
One tradeoff worth noting: alkalization reduces flavanol and antioxidant content. If you are making powder for health benefits, stay natural. If you want to make chocolate from cocoa powder that tastes smooth and mixes easily into beverages, Dutch processing is worth the slight nutritional trade.
Whether you choose natural or alkalized, you now have a pressed cake ready for its final transformation. The cake still needs to become actual powder, fine enough to dissolve on the tongue and perform in recipes, which means one more round of milling and careful attention to storage conditions that preserve everything you have built.
Step 6 - Mill to Fine Powder and Store Properly
Your pressed cake looks like a dense, dry disc. It crumbles when you snap a piece off, smells deeply of chocolate, and feels slightly waxy between your fingers. This is the final raw material. Turning it into silky, scoopable powder takes one more grinding pass and a sieving step that separates good homemade cacao from gritty disappointment.
Milling Pressed Cake Into Silky Powder
Break the press cake into rough chunks by hand or with a mallet. Pieces about the size of a walnut work best for most grinders. A dedicated spice grinder or coffee grinder handles small batches of 50 to 100 grams at a time. Pulse in short bursts of 5 to 10 seconds rather than running continuously. Why? Prolonged grinding generates heat, and heat re-melts residual cocoa butter, turning your powder back into a sticky paste. Let the grinder rest 30 seconds between pulses to dissipate warmth.
A high-speed blender works for larger batches but requires the same caution. Run it on medium speed and stop frequently to scrape down the sides. If you notice the powder clumping against the walls or darkening in color, it is getting too warm. Pop the container in the freezer for five minutes, then resume.
Sieving is what separates a passable powder from a professional one. Pass your ground cake through a fine-mesh strainer (60 to 80 mesh, roughly 180 to 250 microns). Anything that does not fall through goes back into the grinder for another round. Two or three sieve-and-regrind cycles typically produce a uniform consistency. The result should feel like talcum powder when rubbed between your fingers, with no detectable grit.
Grind fineness directly affects how your powder performs. A finer grind dissolves seamlessly in hot liquids, making it ideal for drinking chocolate and any cacao powder recipe calling for smooth suspension. A slightly coarser grind holds up better when baking with cacao powder, where it blends into batters and doughs without over-absorbing moisture. For smoothies, even a moderately coarse grind works because the blender does the final homogenizing. So if you are wondering how do I use cacao powder from a home batch, match your milling effort to your intended application.
You can also add cacao powder for coffee by stirring a teaspoon of finely milled powder directly into your morning brew. The finer the grind, the better it integrates without settling at the bottom of the cup.
Storage Methods for Maximum Shelf Life
You have spent hours learning how to make chocolate powder from cocoa beans. Proper storage protects that investment. Homemade cacao powder, with its slightly higher residual fat content compared to commercial versions, is more vulnerable to oxidation and moisture absorption. Santa Barbara Chocolate reports that properly stored cocoa powder lasts 1 year or longer after opening, and up to 2 to 3 years unopened, thanks to its naturally low moisture and high polyphenol content acting as antioxidants.
Follow these best practices to maximize shelf life:
- Use airtight containers: glass jars with rubber-sealed lids or food-grade metal tins prevent oxygen exposure. Avoid plastic bags, which allow slow gas exchange over time.
- Store in a cool, dark location: aim for 60 to 70 degrees Fahrenheit (15 to 21 degrees Celsius). Keep containers away from ovens, stovetops, and windows where heat and UV light accelerate degradation.
- Control humidity: ambient humidity above 65 to 75 percent promotes clumping and mold. In humid climates, add a food-safe silica gel packet inside the container to absorb excess moisture.
- Freeze for long-term bulk storage: vacuum-seal portions in freezer bags to extend shelf life an additional 6 to 12 months. Thaw sealed bags to room temperature before opening to prevent condensation from forming on the cold powder.
- Label with the date: homemade powder lacks a printed expiration. Mark the milling date so you can track freshness over time.
Watch for these signs that your powder has deteriorated:
- Off odors: a musty, stale, or rancid smell replacing the rich chocolate aroma signals fat oxidation.
- Persistent clumping: occasional loose clumps break apart easily, but hard, dense lumps indicate moisture intrusion.
- Visible mold: any white, green, or fuzzy growth means the batch should be discarded entirely.
- Flat taste: if the powder tastes dull, sour, or lacks its original bitterness and depth, oxidation has degraded the flavor compounds.
Wondering what to do with cacao powder once you have a properly stored stash? The versatility is the real reward. Use it in hot chocolate, protein shakes, baked goods, energy balls, mole sauces, or dusted over fruit. Understanding cacao powder how to use it across different applications comes down to adjusting quantity and grind to suit the recipe. A well-stored batch gives you months of experimentation from a single pressing session.
Even with careful milling and storage, home batches sometimes produce results that feel off. Powder that stays oily, tastes too bitter, or refuses to dissolve smoothly points to specific process failures earlier in the chain, each with a clear fix.
Step 7 - Troubleshoot Common Problems and Optimize Results
You followed every step, invested hours into roasting and pressing, and the powder in your jar still does not look or taste right. Maybe it clumps into greasy balls when you scoop it. Maybe it tastes like burnt coffee instead of chocolate. These failures are not random. Each one traces back to a specific process variable that went sideways, and each one has a fix.
Fixing Oily, Bitter, or Gritty Powder
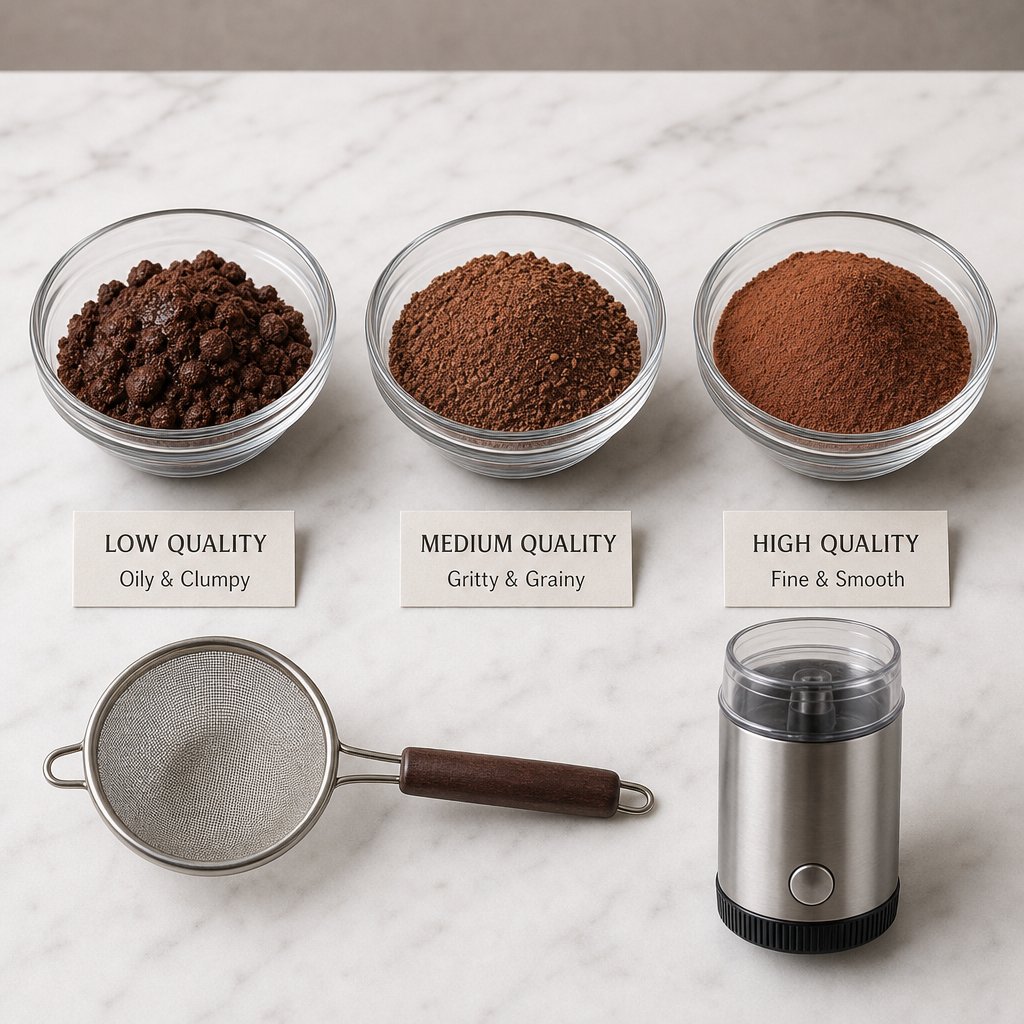
The five most common home production problems share a pattern: they all result from insufficient processing at one particular stage. Here is a diagnostic table that connects symptoms to causes and corrective actions.
| Problem | Likely Cause | Solution |
|---|---|---|
| Powder stays oily and clumps into paste | Insufficient fat removal during pressing (residual fat above 28%) | Re-press the cake using higher force. Alternatively, freeze the powder solid, pulse in a food processor, and sieve. Repeat 2-3 times to separate brittle fat particles from dry solids. |
| Overly bitter or harsh taste | Over-roasting (temperature too high or duration too long) or under-fermented beans lacking flavor precursors | For future batches, reduce roast temperature by 10-15°C or shorten time by 3-5 minutes. If beans were under-fermented, blend with a milder batch or use the powder in recipes with sweeteners that mask bitterness. |
| Gritty, uneven texture | Inadequate grinding time or wrong equipment unable to achieve fine particle size | Regrind in a spice grinder using short pulses, then pass through a 60-80 mesh sieve. Return oversized particles to the grinder. Repeat until everything passes through. If your grinder cannot achieve this, switch to a finer-capable tool. |
| Clumping during storage | Moisture intrusion from improper containers, humid environment, or powder stored before fully cooling | Transfer to an airtight glass jar with a food-safe silica packet. Store below 65% relative humidity. Always cool powder completely to room temperature before sealing containers. |
| Off-flavors (musty, moldy, or ammonia-like) | Contamination during fermentation from dirty equipment, soil contact, or over-fermentation beyond 7 days | This cannot be fixed after the fact. Discard the batch. For future ferments, sanitize all surfaces, avoid soil contact, monitor temperature daily, and end fermentation when cut tests show 75%+ brown interiors. |
A few of these deserve deeper explanation. Oily powder is the most common frustration because home pressing equipment simply cannot match the 400-plus bars of pressure that commercial hydraulic presses generate. If your powder smears when rubbed between your fingers, try the freeze-crumble workaround: spread the oily powder on a sheet pan, freeze it for two hours, then pulse it in a food processor and sieve immediately while still cold. The cold makes residual cocoa butter brittle enough to separate from the dry cocoa solids. Three cycles of this usually brings fat content down to a workable 18 to 22 percent range.
Bitterness is trickier because it can stem from multiple sources. If your beans were properly fermented (confirmed by cut test) and the bitterness still overwhelms, over-roasting is almost certainly the culprit. Roasting above 155°C or extending time beyond 30 minutes for most varieties drives excessive polymerization of polyphenols, creating harsh, astringent compounds that no amount of post-processing can undo. For batches already roasted too dark, blending with a lighter-roasted batch at a 1:1 ratio often rescues the flavor profile enough for baking use.
Grittiness usually comes down to equipment limitations. As noted by Chocolate Alchemy, cocoa powder will never truly dissolve in liquid, so particle size matters enormously for mouthfeel. A food processor alone rarely achieves particles fine enough for smooth drinking chocolate. If you find yourself asking whether you can i use cacao powder instead of cocoa powder in a recipe and the texture feels wrong, the issue is likely grind fineness rather than the powder itself. Dedicated spice grinders or ball mills produce the sub-250 micron particles needed for smooth performance in beverages and delicate baked goods.
One question that comes up frequently: can i substitute cacao powder for cocoa powder in existing recipes? Yes, with adjustments. Homemade cacao powder typically has higher fat content and stronger flavor intensity than commercial cocoa. Reduce added fats in the recipe by 1 to 2 tablespoons per quarter cup of powder substituted, and start with 75 percent of the called-for amount, tasting as you go. Can you use cacao powder instead of cocoa powder in recipes that call for Dutch-processed? You can, but expect a slightly more acidic result. Add a pinch of baking soda (about 1/8 teaspoon per 3 tablespoons of powder) to neutralize the extra acidity if the recipe relies on baking powder for leavening.
Similarly, can you substitute cacao powder for cocoa powder in chocolate desserts without anyone noticing? In brownies, cakes, and cookies, the swap works seamlessly because sugar, butter, and other strong flavors mask subtle differences. In delicate applications like mousse or ganache, the higher fat content and bolder flavor of homemade powder actually improves the result. Can cocoa powder be substituted for cacao powder going the other direction? Yes, though you may lose some of the nuanced flavor notes your home processing preserved.
How Home Processing Affects Nutrient Retention
Beyond flavor troubleshooting, there is a compelling nutritional reason to refine your home process rather than buying commercial powder. Industrial cacao processing uses high temperatures and aggressive alkalization that strip bioactive compounds at every stage. Home producers working at gentler parameters can preserve significantly more of what makes cacao a functional food.
Flavonoids, the primary antioxidant compounds in cacao, are heat-sensitive and pH-sensitive. Research from Universitas Padjadjaran published in the Asian Journal of Plant Sciences documents the cumulative losses across industrial processing: fermentation alone reduces flavonoid content by up to 80 percent, roasting can remove an additional 65 percent of remaining polyphenols and the alkalization process strips up to 78.5 percent of what survives roasting. By the time commercial powder reaches your pantry, only a fraction of the original flavonoid content remains.
Home producers have leverage at two critical points. First, roasting temperature. The same research found that short-duration, high-temperature roasting preserved more flavanol content than prolonged low-temperature roasting. For home ovens, this translates to roasting at the higher end of your variety's range for a shorter time rather than going low and slow. A Forastero batch roasted at 145°C for 15 minutes retains more epicatechin than the same beans roasted at 120°C for 35 minutes.
Second, alkalization. Skipping Dutch processing entirely preserves the full remaining flavanol content. If you choose to alkalize, light treatment (pH 6.8 to 7.1) retains approximately 40 percent of natural flavanol levels, while medium alkalization (pH 7.2 to 7.5) drops retention to around 22 percent. For health-focused powder, staying natural or using only light alkalization keeps the most nutritional value intact.
The practical result? A home-processed batch roasted at moderate temperatures and left unalkalized can retain two to four times the flavonoid content of a heavily processed commercial equivalent. That difference shows up in research on cardiovascular benefits, antioxidant capacity, and anti-inflammatory effects associated with flavanol-rich cacao consumption. Your troubleshooting efforts are not just about taste. They are about protecting the compounds that make homemade powder nutritionally superior to what sits on store shelves.
Perfecting your process across multiple batches builds a skill set that goes beyond personal use. Some home producers reach a point where friends, family, and local customers start asking to buy their powder, and that interest raises an entirely different set of questions about consistency, compliance, and scale.
Step 8 - Scale Your Cacao Powder From Kitchen to Market
Friends keep asking to buy your latest batch. A local coffee shop wants to stock your organic cacao powder blend. You are fielding DMs from people who tasted your chocolate powder at a farmers market and want more. The leap from hobby to business feels exciting, but it introduces challenges that have nothing to do with roasting temperatures or pressing techniques.
When Home Batches Inspire a Product Line
Many successful cacao powder chocolate brands started exactly where you are now, perfecting small batches in a home kitchen before realizing the demand exceeded what a single grinder and a bottle jack could supply. The gap between making a great product and selling one legally comes down to three areas: consistency, compliance, and packaging.
Consistency means every bag a customer opens tastes identical to the last one. Home batches vary naturally because bean lots shift, fermentation conditions fluctuate, and pressing force is hard to replicate precisely. Scaling requires standardized processes, documented formulations, and quality checks at every stage.
Compliance is where most aspiring brands stall. In the United States, selling food products requires FDA facility registration, food handler permits, kitchen health inspections, and proper labeling that meets nutritional disclosure requirements. If you plan to sell across state lines or internationally, additional certifications like HACCP, GMP, and potentially ISO 22000 or FSSC 22000 come into play. Canadian sellers face similar requirements through the Canadian Food Inspection Agency. These are not optional hurdles. They are legal prerequisites.
Packaging adds another layer. Retail and e-commerce channels demand shelf-stable formats, tamper-evident seals, compliant nutrition labels, and often third-party testing documentation. Customers buying cocoa powder for chocolate making expect professional presentation that signals safety and quality.
Partnering With a Manufacturer to Scale Your Recipe
Most home producers reach a crossroads: invest heavily in their own certified production facility, or partner with a contract manufacturer who already has the infrastructure. OEM/ODM manufacturers specialize in turning your perfected formula into a market-ready product. They handle the regulatory paperwork, maintain certified facilities, and produce at volumes your kitchen never could.
For cacao powder specifically, you want a partner experienced in powder and granule formats. ZhuFeng, for example, offers OEM/ODM health food manufacturing with dedicated powder and granule production lines, customized formulation services, and flexible order quantities suited to emerging brands. Their format range spans from powders to capsules and gummies, which means you could eventually expand a cacao powder chocolate line into functional blends or supplement products without switching manufacturers.
Whether you are exploring how to make chocolate from cocoa powder at commercial scale or developing a drinking chocolate blend, the right manufacturing partner turns your recipe into a repeatable, compliant product. Imagine scaling your signature blend into retail packaging, knowing how to make chocolate with cocoa powder you developed and tested yourself, but produced at volumes that meet actual market demand.
When evaluating potential manufacturing partners, prioritize these considerations:
- Minimum order quantities: some manufacturers require 500kg+ runs, which may be too large for a new brand testing the market. Look for partners offering lower MOQs for initial launches.
- Format flexibility: a partner who handles powder, granules, and other formats gives you room to expand your product line without starting over.
- Formulation support: the best OEM/ODM partners help refine your home recipe for production stability, shelf life, and regulatory compliance.
- Certifications held: verify GMP, HACCP, and any market-specific certifications (FDA registration, ISO 22000) relevant to your target sales regions.
- Packaging and labeling services: end-to-end partners who handle filling, sealing, and label printing reduce the number of vendors you manage.
The journey from learning how to make chocolate of cocoa powder in your kitchen to shipping chocolate made from cocoa powder under your own brand label is not a small leap. But it follows a logical path: perfect your process, document your formula, validate demand, then hand production to professionals who scale without sacrificing the quality you built batch by batch. Your expertise in sourcing, roasting, and pressing becomes the intellectual property. The manufacturer becomes the engine that delivers it to shelves.
Frequently Asked Questions About Making Cacao Powder
1. How long does it take to make cacao powder from raw beans at home?
From dried, pre-fermented beans to finished powder, expect roughly 3 to 5 hours of active work spread across a single day. This includes roasting (30-45 minutes), cracking and winnowing (20-30 minutes), grinding into liquor (15-40 minutes depending on equipment), pressing out cocoa butter (30 minutes to several hours), and final milling. If you start from whole cacao pods and include fermentation (2-7 days) and drying (1-4 weeks), the total timeline extends significantly. Starting from purchased cacao nibs shortens the process to about 2 hours since you skip roasting and winnowing entirely.
2. What is the difference between cacao powder and cocoa powder?
The distinction comes down to heat exposure during processing. Cacao powder is made by cold-pressing raw or minimally heated beans, which preserves higher levels of antioxidants, flavonoids, and minerals while delivering a bolder, earthier flavor. Cocoa powder comes from beans roasted at 250 to 350 degrees Fahrenheit before pressing, which mellows bitterness but reduces antioxidant content. When making powder at home, you control exactly where your product falls on this spectrum by adjusting roast temperature or skipping roasting altogether for a true raw cacao powder.
3. Can I substitute cacao powder for cocoa powder in baking recipes?
Yes, homemade cacao powder works as a direct substitute in most recipes with minor adjustments. Since home-processed cacao typically has higher fat content and stronger flavor intensity than commercial cocoa, reduce added fats by 1 to 2 tablespoons per quarter cup of powder and start with 75 percent of the amount called for. For recipes requiring Dutch-processed cocoa, add 1/8 teaspoon of baking soda per 3 tablespoons of natural cacao powder to neutralize extra acidity. In brownies, cakes, and cookies, the swap is virtually undetectable because sugar and butter mask subtle differences.
4. What equipment do I need to separate cocoa butter from cacao liquor at home?
You have several options ranging from zero-cost to moderate investment. The simplest method uses cheesecloth wrapped around warm liquor with body weight or clamp pressure applied between cutting boards, removing about 15-25% of fat. A freezing-and-crumbling technique requires only a freezer, food processor, and fine sieve, extracting 20-30% of fat. A DIY hydraulic press using a bottle jack in a steel frame generates 2-4 tons of force and removes 35-45% of cocoa butter. Dedicated tabletop cocoa butter presses ($300-$800) deliver the most consistent results at 40-50% fat extraction.
5. How should I store homemade cacao powder to maximize shelf life?
Store your powder in airtight glass jars with rubber-sealed lids or food-grade metal tins, placed in a cool, dark location between 60-70 degrees Fahrenheit. Keep ambient humidity below 65% and add a food-safe silica gel packet inside the container in humid climates. Always cool powder completely to room temperature before sealing to prevent condensation. For long-term bulk storage, vacuum-seal portions in freezer bags to extend shelf life by 6-12 months. Properly stored homemade cacao powder lasts 1 year or longer after opening and up to 2-3 years when sealed, though its slightly higher fat content makes it more vulnerable to oxidation than commercial versions.