What Is Diastatic Malt Powder
Diastatic Malt Powder Defined
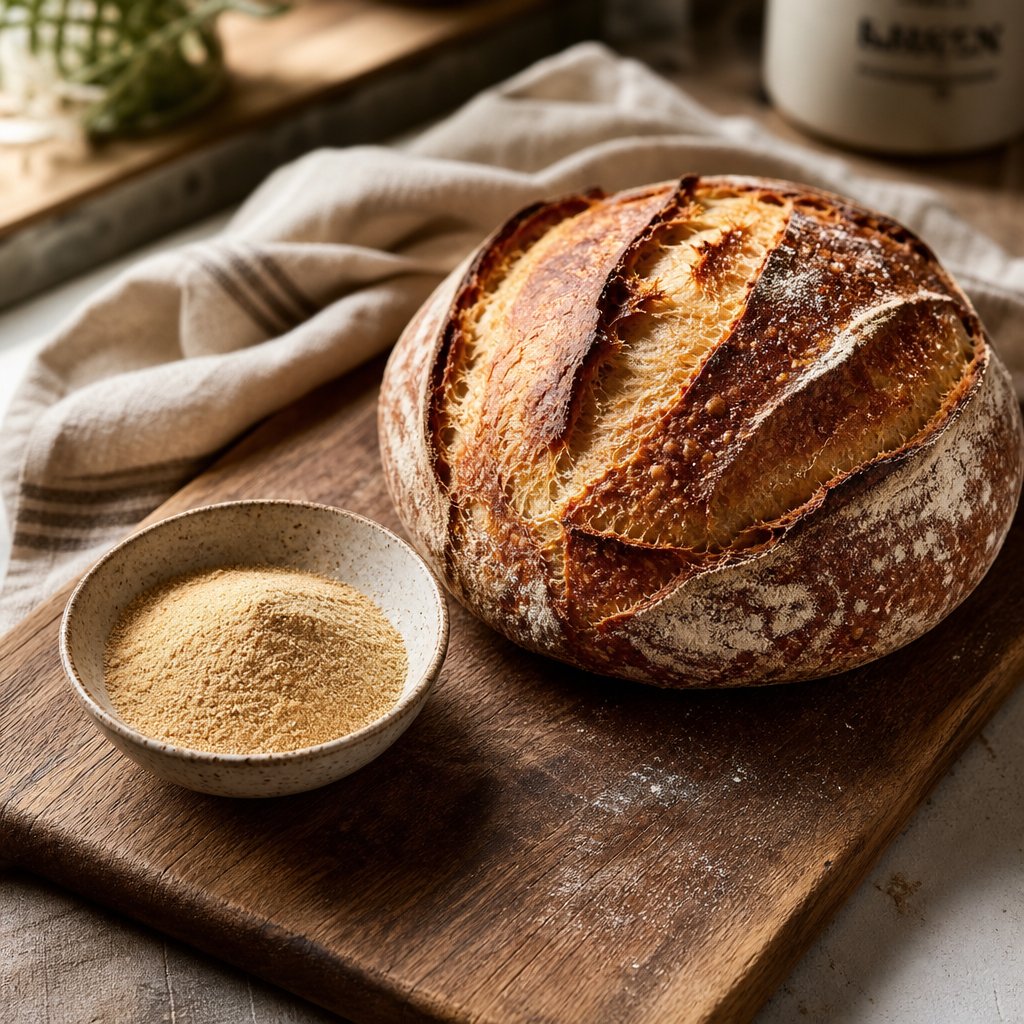
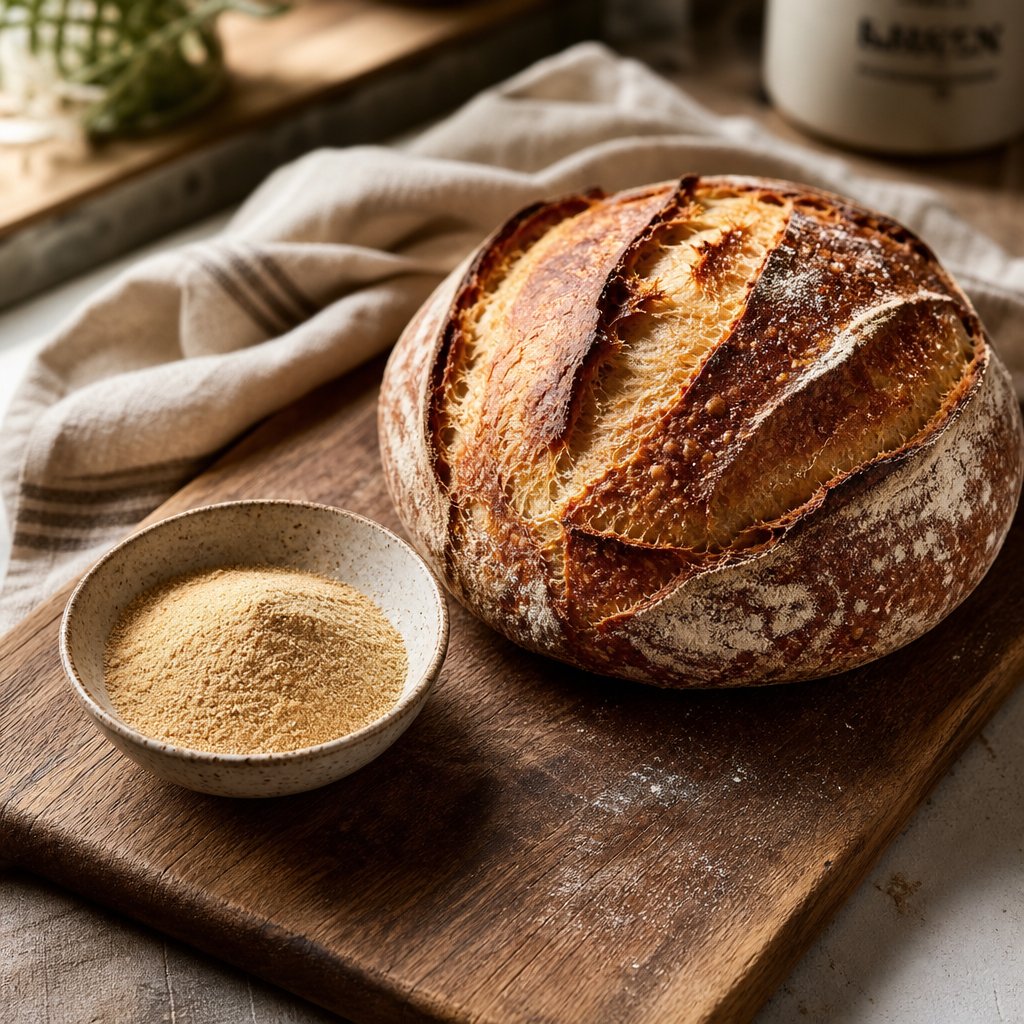
You have probably seen it listed in artisan bread recipes or spotted it on the back of your flour bag. So what is diastatic malt powder, exactly? In short, it is a finely ground flour made from barley grain that has been sprouted, carefully dried at low temperatures, and milled into a powder. The key detail: it still contains live enzymes capable of breaking down starch into sugar during baking.
Diastatic malt powder is a natural dough conditioner made from malted barley that retains active diastase enzymes, primarily alpha-amylase and beta-amylase, which convert starch into fermentable sugars to improve rise, crust color, and flavor in yeasted baked goods.
The diastatic definition comes down to one word: enzymes. "Diastatic" refers to the presence of diastase, a natural enzyme complex that splits long starch chains into simpler sugars like maltose and dextrose. Those sugars feed yeast directly, giving your dough more fuel to rise and your crust more material to caramelize. If you have ever wondered what is malt in a baking context, this is it: grain that has been partially germinated to unlock its enzymatic potential, then preserved in powder form for easy use.
What Makes It Different from Regular Flour
Standard wheat flour contains plenty of starch but only limited free sugars. Yeast burns through those available sugars early in fermentation, and then the rise slows. Diastatic malt powder solves that problem. Unlike regular flour, it is specifically processed to preserve enzymes that actively convert starch to fermentable sugars throughout the entire proofing and baking process.
The diastatic meaning in practical terms? Your dough gets a continuous supply of fresh sugar rather than a one-time dose. That translates into three visible improvements:
- Better oven spring and higher volume from sustained yeast activity
- Deeper, more even crust browning through enhanced caramelization
- A subtle malty sweetness and more complex flavor profile
Because the powder is derived from barley that has been sprouted, dried below enzyme-killing temperatures, and ground to a flour-like fineness, it functions as a living ingredient in your dough. That living quality is precisely what separates it from non-diastatic malt powder, which has been heated to deactivate those same enzymes and serves only as a flavoring agent. Understanding this distinction is the first step toward using malt powder correctly rather than accidentally wrecking your crumb.
The real question, then, is how those enzymes get into the barley in the first place and why temperature control during production matters so much.
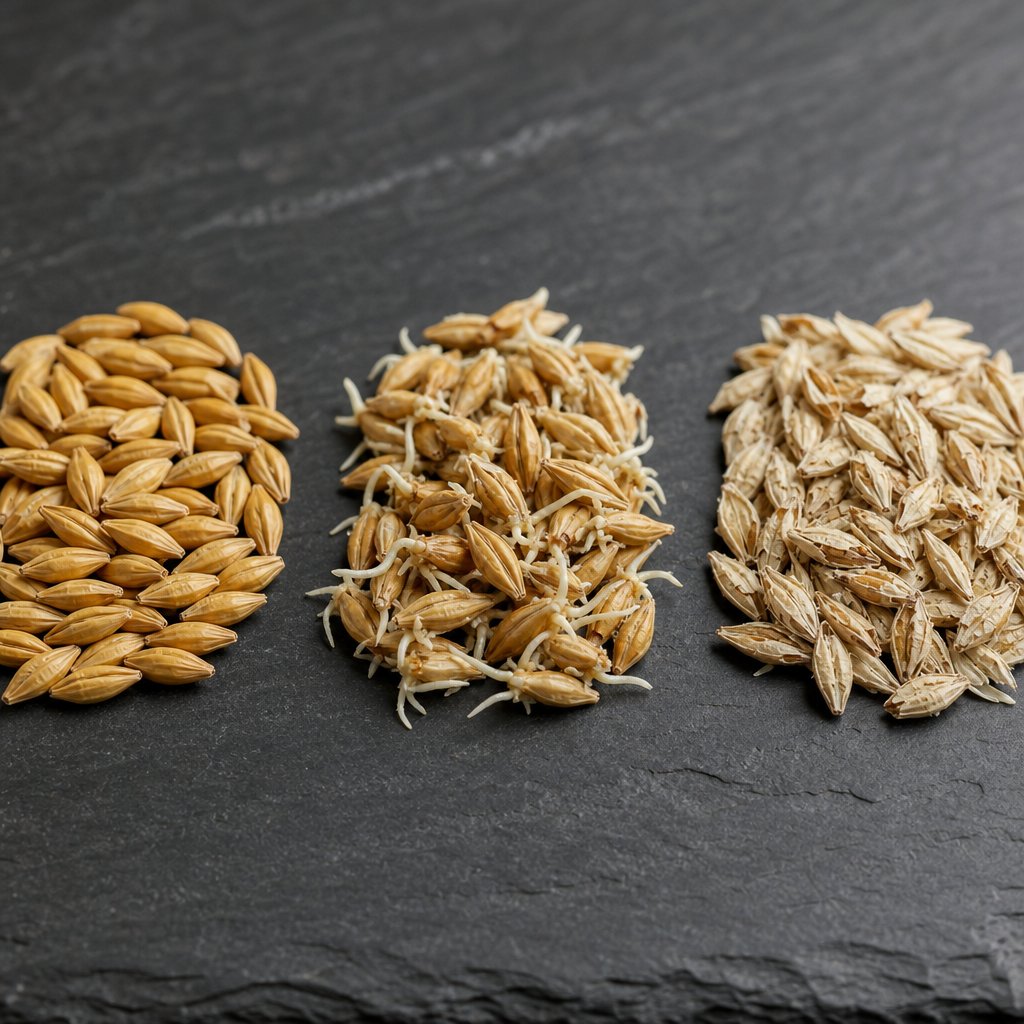
From Grain to Powder and the Full Malting Process
Every grain of barley sitting in a field already contains the genetic blueprint for enzyme production. It just needs the right trigger. Understanding how malt is made reveals why this ingredient works so differently from anything else in your pantry. The process has three distinct stages, each building on the last, and each requiring precise control to preserve the enzymatic power that makes diastatic malt useful in bread.
Steeping and Germination
So what is malted barley, really? It starts with raw barley kernels soaked in water through a process called steeping. The goal is to raise the grain's internal moisture from roughly 12% up to about 44-46%. According to Great Western Malting, this happens through successive immersions and air rests over one to two days. During immersion, the water is aerated to keep dissolved oxygen high enough for the developing embryos. During air rests, carbon dioxide is vented to prevent suffocation.
Once the kernels show signs of chitting (tiny root tips breaking through the husk), they move into the germination phase. Imagine thousands of seeds thinking spring has arrived. Over 4 to 6 days, rootlets grow to roughly 1.5 to 2 times the length of the kernel, and the grain's internal chemistry shifts dramatically. Alpha-amylase is synthesized fresh during this stage, while beta-amylase, already present in an inactive form bound to starch, gets released and activated by proteolytic enzymes. This is the critical window where diastatic power is born.
Temperature, oxygen, and moisture all influence how much enzyme activity develops. Germination typically occurs at a controlled 14-20 degrees Celsius, with the grain bed turned regularly to prevent rootlets from matting together.
Kilning and Grinding
Here is where the path splits between diastatic and non-diastatic malt. Kilning dries the sprouted grain to halt growth and stabilize the product for storage. The question of how do you malt barley without destroying its enzymes comes down to temperature control.
For diastatic malt, drying must stay below approximately 50 degrees Celsius (122 degrees Fahrenheit) during the critical free-drying phase. At these gentle temperatures, moisture drops from around 44% down to 4-5% while enzymes remain viable. Push the temperature higher, into the 70-95 degree Celsius range used for pale brewing malts, and enzyme activity degrades significantly. Go higher still, above 100 degrees Celsius, and you produce dark, flavorful malt with zero enzymatic power. That is exactly what is malt made of when it is labeled non-diastatic: the same sprouted grain, just heat-treated past the point of enzyme survival.
Once fully dried, the tiny rootlets are removed and the malt is ground into a fine powder. What is malt powder made of at this point? Nothing but dried, sprouted barley, milled to a flour-like consistency. No additives, no processing aids. Just grain, water, time, and careful temperature management.
How Commercial Mills Use Malted Barley
Here is something many home bakers overlook: you may already be using malted barley flour without realizing it. Most commercial bread flours in North America have a small percentage of malted barley flour blended in at the mill. Millers do this to standardize enzyme activity across different wheat harvests, ensuring consistent performance for bakeries.
Check the ingredient label on your flour bag. If you see "malted barley flour" listed after wheat flour, your flour is pre-malted. This matters because adding more diastatic malt on top of an already-supplemented flour can push enzyme activity too high, leading to the sticky, gummy crumb problems covered later in this article.
European flours, by contrast, are often sold without added malt. That is why many French and German bread recipes call for supplemental malted barley flour, and why following those recipes with North American flour without adjusting can produce over-conditioned dough. Knowing what is malted barley flour on your label, and whether it is already present, is the first decision point before you measure out any additional malt.
With the production process clear, the next logical question becomes: what exactly separates diastatic from non-diastatic malt in terms of real-world performance, and when does each one belong in your recipe?
Diastatic vs Non-Diastatic Malt Powder Compared
Both products start as the same sprouted barley grain. Both carry that distinctive malty sweetness. Yet using one where the other belongs can mean the difference between a perfect loaf and a sticky, collapsed mess. The comparison between diastatic vs non-diastatic malt powder goes far deeper than a simple "active vs inactive" label.
Enzyme Activity and Function
Diastatic malt retains active amylase enzymes that go to work the moment they contact water and starch in your dough. Throughout fermentation and proofing, these enzymes continuously break down flour starch into maltose and dextrose, feeding yeast fresh sugar and generating the byproducts responsible for better rise, deeper flavor, and richer crust color.
Non-diastatic malt powder, by contrast, has been heat-treated to deactivate those enzymes entirely. It contributes sweetness and color from the sugars already present in the powder itself, but it cannot generate new sugars from flour starch. Think of it this way: diastatic malt is a factory that produces sugar on demand, while malt powder non diastatic is a one-time delivery of pre-made sweetness.
This distinction matters because yeast activity, crust development, and crumb structure all depend on how and when sugars become available during the baking timeline.
When to Use Each Type
Choosing between diastatic malt powder vs non diastatic comes down to what you need the ingredient to do. If your goal is dough conditioning, improved fermentation, and better oven spring, diastatic is the right tool. If you want malty flavor and amber color without altering fermentation dynamics, non-diastatic is the safer choice.
| Category | Diastatic Malt Powder | Non-Diastatic Malt Powder |
|---|---|---|
| Enzyme Activity | Active (amylase enzymes intact) | Inactive (enzymes destroyed by heat) |
| Primary Purpose | Dough conditioning and fermentation support | Flavor and color enhancement |
| Effect on Fermentation | Accelerates yeast activity by producing fermentable sugars | No effect on fermentation rate |
| Crust Impact | Browning via newly produced sugars (continuous caramelization) | Browning via existing sugars in the powder |
| Common Applications | Bread dough, pizza dough, baguettes, enriched doughs | Bagel boiling water, pretzels, hot dog buns, beverages |
| Risk of Overuse | High: gummy crumb, collapsed structure, overly dark crust | Minimal: may become overly sweet but won't damage structure |
Notice the risk column. Diastatic malt demands precision because its enzymes keep working as long as conditions allow. Non-diastatic malt is far more forgiving since it behaves like any other dry sweetener. As The Perfect Loaf notes, using diastatic where non-diastatic is specified can result in a reddish color and rubbery crumb texture.
Can You Substitute One for the Other
Short answer: no, diastatic vs non-diastatic malt powder are not interchangeable. They share a name and an origin, but they perform fundamentally different jobs in dough.
If a recipe calls for non-diastatic malt powder and you substitute diastatic, you introduce active enzymes into a formula that was not designed to handle them. The result? Over-conditioned dough with weakened gluten structure, excessive browning, and potentially gummy interiors. King Arthur Baking suggests a workaround: spread diastatic malt powder on a sheet pan and bake at 350 degrees Fahrenheit for 5 minutes to deactivate the enzymes before using it as a non-diastatic substitute.
Going the other direction is less destructive but equally ineffective. Using non-diastatic malt powder where diastatic is called for will add sweetness and some color, but it will not improve fermentation, boost oven spring, or provide the continuous sugar supply that yeast needs during long proofing. Your bread will taste slightly maltier without gaining any structural benefit.
The practical takeaway: keep both in your pantry if you bake regularly. They cost little, last months in airtight storage, and serve purposes that no single product can cover alone. Knowing which one your recipe actually needs is half the battle. The other half is understanding what happens at the molecular level when those active enzymes meet flour starch inside your dough.
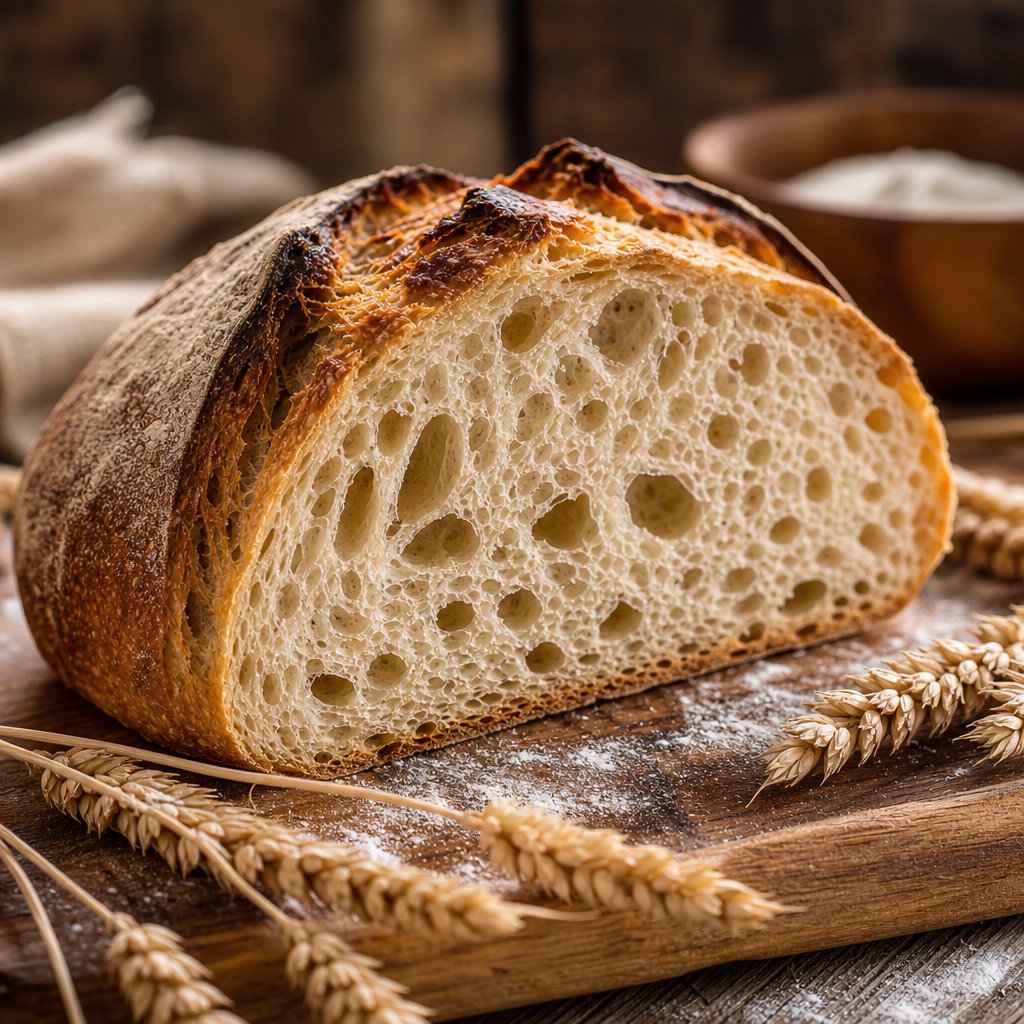
How Enzymes in Diastatic Malt Transform Your Bread
Imagine your dough as a city, and yeast cells as workers who need fuel to do their job. Flour starch is like a warehouse full of locked crates. The sugars are in there, but yeast cannot access them directly. Diastatic malt delivers the keys: enzymes that crack open those crates and keep a steady stream of fuel flowing from the first minute of mixing through the final moments of oven spring.
So what does diastatic malt powder do at the molecular level? It runs a two-step relay race inside your dough, converting locked-away starch into sugars that yeast can actually eat.
Starch-to-Sugar Conversion Explained
Flour naturally contains around 70% starch but very little free sugar. Yeast burns through those limited available sugars within the first 30 to 60 minutes of fermentation. After that, rising slows unless new sugars appear. This is where malt powder for baking earns its place in a recipe.
The conversion happens in two stages, each driven by a different enzyme:
- Alpha-amylase attacks starch chains at random points along their length, chopping long molecules of amylose and amylopectin into shorter fragments called dextrins. As the Baking Industry Research Trust explains, alpha-amylase can practically attack starch anywhere along its chains, producing smaller chains of various lengths.
- Beta-amylase then works from the ends of those shorter fragments, snipping off pairs of glucose units to produce maltose, a disaccharide that yeast can ferment directly.
Think of alpha-amylase as a chainsaw cutting a fallen tree into logs, and beta-amylase as a splitter turning those logs into usable firewood. Neither enzyme alone does the full job. Together, they create a continuous supply of fermentable sugar that keeps yeast active far longer than flour starch alone would allow.
This cascade produces three outcomes you can see and taste in the finished loaf:
- Better rise: More maltose means more yeast activity, which means more CO2 production and greater loaf volume.
- Deeper crust color: Residual sugars that yeast does not consume remain in the dough and participate in Maillard reactions during baking, where sugars react with amino acids above 130 degrees Celsius to produce brown pigments and complex flavor compounds.
- Richer flavor: The enzymatic breakdown generates not just maltose but also glucose, dextrins, and various intermediate compounds that contribute to what is malt flavor in bread: that subtle, toasty sweetness distinct from plain sugar.
What is malted flour doing differently than regular malt flour in this process? The distinction is enzymatic activity. Plain malt flour that has been kilned at high temperatures still contains residual sugars from the malting process, but it cannot generate new ones. Diastatic malt keeps producing fresh maltose throughout fermentation, which is why even a tiny amount, less than 1% of flour weight, can noticeably change your bread's character.
Understanding Diastatic Power and the Falling Number Test
If enzymes are so powerful, how do millers know whether a batch of flour has too much activity, too little, or just the right amount? They use a standardized measurement called the Falling Number test.
Here is how it works in simple terms: a sample of flour is mixed with water and heated into a gel inside a glass tube. A weighted plunger is dropped into the gel, and the time it takes to fall to the bottom is measured in seconds. If enzymes in the flour are highly active, they rapidly break down the starch gel into a thinner liquid, and the plunger falls fast. If enzyme activity is low, the gel stays thick and the plunger sinks slowly.
- Low Falling Number (below 250 seconds): High enzyme activity. Starch breaks down quickly. Risk of sticky, gummy crumb if uncorrected.
- Ideal range (250-280 seconds): Balanced enzyme activity. Most large-scale bakeries target this window for consistent bread quality.
- High Falling Number (above 350 seconds): Low enzyme activity. The flour likely needs supplemental malt or another source of amylase to perform well in bread.
For home bakers, you will never run this test yourself. But the concept explains something practical: why two bags of bread flour from different brands or harvest years can behave so differently in the same recipe. One may already have adequate enzyme activity from its wheat or added malted barley, while another may be enzyme-deficient and benefit from a small addition of diastatic malt.
More diastatic power means faster starch breakdown, which improves rise, crust color, and flavor up to a point, but becomes destructive in excess by weakening gluten structure and producing a gummy, underbaked interior.
This is the conditioning definition in baking at its core: using enzymes to modify dough behavior during fermentation. Diastatic malt is one of the oldest and most natural forms of dough conditioning, predating modern commercial enzyme preparations by centuries. What is malty flavor in your bread? It is the taste of this enzymatic process at work, converting bland starch into complex sugars that caramelize, ferment, and develop into something far more interesting than flour and water alone could produce.
The science is clear. The real challenge is applying it correctly, because the right amount of diastatic malt depends heavily on your specific flour, your fermentation timeline, and the style of bread you are baking.
Practical Baking Applications and Dosage Guidelines
Knowing how enzymes work is one thing. Knowing how much diastatic malt powder to use in bread without crossing the line into gummy, over-conditioned territory is where most bakers struggle. The answer is not a single number. It shifts based on what you are baking, how long your dough ferments, and whether your flour already contains added malt.
Dosage Guidelines for Different Bread Types
The general starting point for diastatic malt powder for baking is 0.5% to 1% of total flour weight. For a recipe using 500 grams of flour, that translates to 2.5 to 5 grams, roughly half a teaspoon to one teaspoon. The Perfect Loaf recommends beginning even lower at 0.25% and adjusting upward through testing.
The logic behind adjusting is straightforward: shorter fermentation gives enzymes less time to work, so you can use slightly more. Longer fermentation gives enzymes hours of uninterrupted activity, so you need less or none at all. Here are recommended usage rates for common applications:
- Sandwich bread (2-3 hour bulk ferment): 0.5% to 1% of flour weight. The shorter timeline benefits from a moderate dose to boost rise and crust color.
- Baguettes (3-4 hour ferment or overnight retard): 0.25% to 0.5%. French-style breads rely on subtle flavor development, and a light touch of baking malt powder prevents over-browning on thin crusts.
- Pizza dough with diastatic malt (24-72 hour cold ferment): 0.25% to 0.5%. The extended cold fermentation already generates significant enzymatic activity, so less is more. The goal is leopard-spotted char, not a burnt base.
- Bagels (short ferment plus boiling): 0.5% in the dough for structure, with non-diastatic malt or barley malt syrup in the boiling water for color and flavor.
- Enriched doughs like brioche or challah: 0.25% to 0.5%. These doughs already contain sugar that feeds yeast, so supplemental malt for baking should be minimal to avoid excessive browning from the combined sugar load.
Always measure by weight rather than volume. A kitchen scale accurate to 1 gram is essential because the difference between the right amount and too much can be as little as 2 grams in a home-sized batch.
Sourdough and Long Fermentation Considerations
If you bake sourdough, you might wonder whether diastatic malt powder sourdough recipes even make sense. After all, wild yeast and lactic acid bacteria already produce their own enzymatic activity during those long, slow ferments. The acids generated by lactobacilli activate native flour enzymes, and the extended timeline gives those enzymes plenty of opportunity to break down starch naturally.
So does sourdough need additional baking malt? It depends on your flour. As Pantry Mama explains, diastatic malt powder for bread made with organic or whole-wheat flours that lack added malt can genuinely improve oven spring and crust color in sourdough. The enzymes in the powder supplement what the flour cannot provide on its own.
However, over-malting sourdough carries real risks. Too much enzyme activity during a 12 to 18 hour bulk ferment can break down starch faster than gluten can hold the structure together. You will notice the dough becoming progressively slacker, harder to shape, and wetter-feeling even though you added no extra water. The finished loaf may have a gummy, underbaked-seeming crumb that does not improve no matter how long you leave it in the oven.
A practical rule: if your sourdough bulk ferments longer than 8 hours at room temperature or uses an overnight cold retard, start at 0.25% or skip added malt entirely. Let the natural fermentation do its work first, and only add diastatic malt powder for bread that genuinely needs the boost.
Adjusting for Pre-Malted Commercial Flour
Here is the decision framework that saves most bakers from accidental over-malting: check your flour label before adding anything.
Most North American bread flours, including popular brands, already list "malted barley flour" in their ingredients. These flours have been pre-malted at the mill to ensure consistent enzyme activity across different wheat harvests. Adding more diastatic malt powder on top of an already-supplemented flour can easily push you past the tipping point into gummy territory.
European flours tell a different story. Many French, German, and Australian bread flours are sold without added malt. That is why European baking traditions frequently call for supplemental malt for baking, and why those same recipes can produce over-conditioned dough when followed with North American flour without reducing or eliminating the added malt.
Use this quick decision process:
- Flour lists malted barley flour as an ingredient: Start with no added malt. Only add 0.25% if you notice pale crusts or sluggish fermentation after testing.
- Flour has no malt listed (common with organic, whole-wheat, home-milled, or European flours): Start at 0.5% and adjust upward to 1% based on results.
- You are unsure: Begin at 0.25% and bake a test loaf. Increase only if the crust lacks color and the rise seems weak.
The pattern across all these scenarios is the same: start low, observe results, and adjust in small increments. Diastatic malt powder for baking is one of those ingredients where restraint consistently outperforms enthusiasm. A quarter teaspoon too much is far harder to fix than a quarter teaspoon too little.
But what if you cannot find diastatic malt powder at all, or you want to make your own from scratch? Both paths are entirely possible with the right approach.
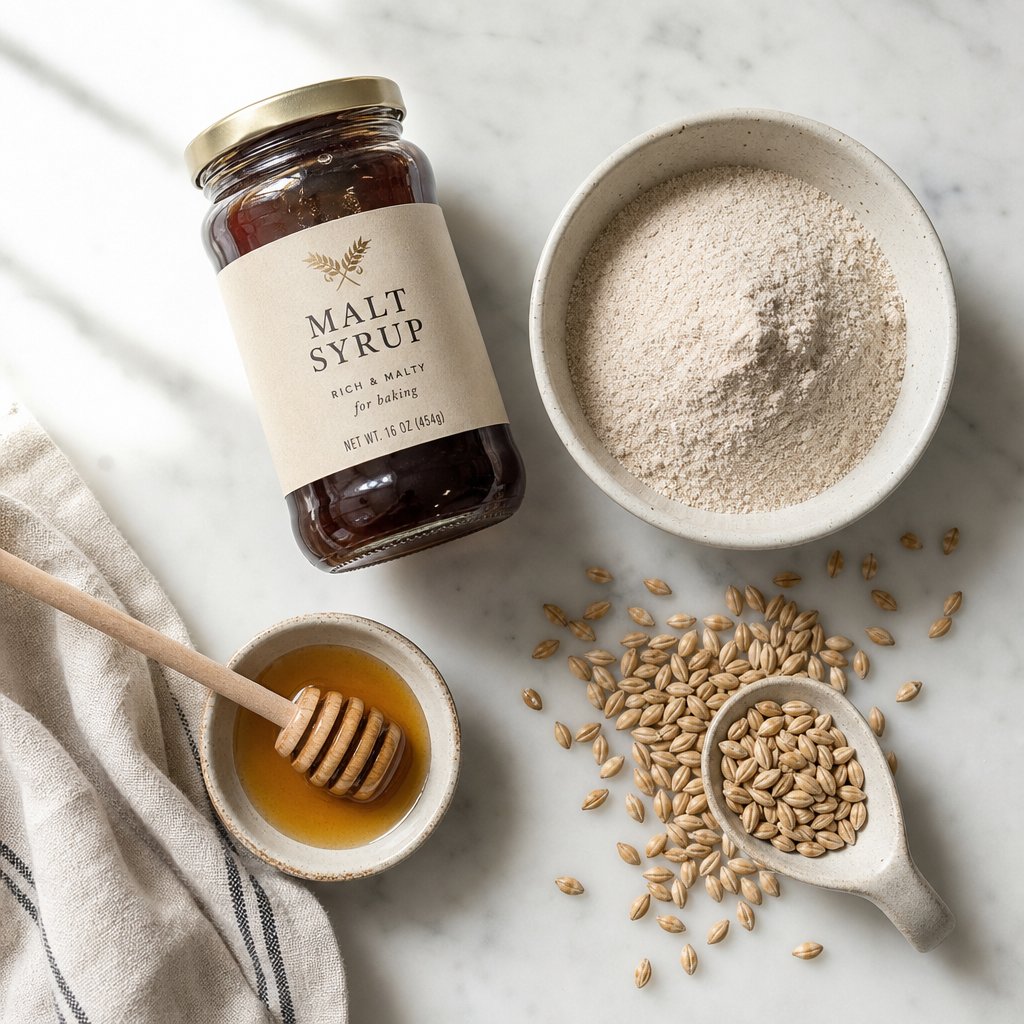
Homemade Malt Powder and Effective Substitutes
Not everyone lives near a specialty baking shop, and online orders sometimes take longer than your baking schedule allows. Whether you prefer the satisfaction of making ingredients from scratch or simply need a diastatic malt powder substitute in a pinch, you have options. Some replicate the enzymatic effect closely. Others only approximate the flavor and color. Knowing the difference keeps your bread on track.
Making Diastatic Malt Powder at Home
The process is surprisingly accessible. You are essentially replicating what commercial maltsters do, just on a kitchen scale. All you need is whole barley (unhulled or hulled), water, a sprouting tray or jar, a dehydrator or oven, and a grain mill or high-powered blender.
Here is the step-by-step process:
- Select your grain: Start with whole, raw barley. Hulled barley works well for home sprouting. You can also use wheat berries or rye for variations, though barley produces the highest and most consistent diastatic power.
- Soak (steep): Submerge the barley in cool water for 8 to 12 hours. Drain, let it rest for 8 hours, then soak again for another 8 hours. This mimics the steeping cycle that raises internal moisture to the level needed for germination.
- Sprout (germinate): Spread the soaked grain in a single layer on a tray or in a wide-mouth jar with a mesh lid. Rinse twice daily and keep in a cool, dark spot. Over 4 to 6 days, rootlets will emerge and grow to roughly the length of the kernel itself. This is the stage where amylase enzymes develop.
- Dry (kiln): This is the critical step. Transfer the sprouted grain to a dehydrator set below 50 degrees Celsius (122 degrees Fahrenheit), or use your oven at its lowest setting if it stays below that threshold. Cultures for Health notes that enzyme activity begins to denature above 113 degrees Fahrenheit (about 45 degrees Celsius), so staying well below that range preserves the diastatic power you worked to develop. Drying takes 12 to 24 hours depending on humidity and airflow.
- Clean and grind: Once the grain is fully dry, rub off the rootlets by rolling the kernels between your hands or in a towel. Then grind to a fine powder using a grain mill, spice grinder, or high-speed blender.
How do you know the grain is dry enough? Weigh it before soaking and after drying. The dried sprouted grain should return to approximately its original pre-soak weight, indicating that the moisture absorbed during sprouting has been fully removed. Grain that retains too much moisture will gum up your grinder and can develop mold in storage.
Temperature control during drying is the single factor that determines whether you produce diastatic or non-diastatic malt. Too hot, even briefly, and you destroy the very enzymes you spent days cultivating. If your oven's lowest setting runs above 150 degrees Fahrenheit, a dedicated food dehydrator with adjustable temperature is a worthwhile investment for this project.
Effective Substitutes When You Cannot Find It
Sometimes you need a diastatic malt powder replacement right now, not in six days. The honest truth: no substitute perfectly replicates the enzymatic conditioning effect. Diastatic malt is unique because it generates new sugars from starch over time. Everything else either delivers a fixed dose of sugar or mimics the flavor without the functional chemistry.
That said, some options come closer than others. Here they are ranked from most effective barley malt substitute to least:
| Substitute | Enzyme Activity | How to Use | What It Does Well | What It Cannot Do |
|---|---|---|---|---|
| Malted barley syrup (diastatic type) | Some activity (varies by brand) | Use 1.5x the weight of powder called for; reduce recipe liquid by the same amount | Provides partial enzyme activity plus malty flavor and color | Less concentrated enzymatic power; alters dough hydration |
| Honey or sugar | None | Use equal weight to the malt powder called for | Feeds yeast immediately; improves crust browning | No starch-to-sugar conversion; no sustained sugar production during long ferments |
| Bread flour with malted barley already added | Low to moderate (built into the flour) | Switch to a pre-malted flour and skip the added malt entirely | Provides baseline enzyme activity without measuring a separate ingredient | Cannot be adjusted precisely; enzyme level is fixed by the miller |
| Malted milk powder | None (contains non-diastatic malt) | Not a direct substitute; use only for flavor in non-critical applications | Adds malty, milky sweetness to enriched doughs | Contains milk solids and sugar that change dough chemistry; no enzymatic function |
A few practical notes on these options:
- Malted barley syrup is the closest malt syrup substitute for diastatic powder, but quality varies. Some brands are heat-processed into a non-diastatic state for shelf stability. Look for labels that specify "diastatic" or "enzyme-active" if you want the functional benefit. If the label does not specify, assume it is non-diastatic and treat it as a flavor-only addition.
- Honey works as a quick yeast booster because it contains simple sugars (fructose and glucose) that yeast can ferment immediately. It will not replicate the slow, sustained sugar release that diastatic malt provides throughout a long proof, but for short-ferment breads, it gets you most of the way there.
- Malted milk powder is a common source of confusion. Despite the word "malt" in its name, it is a malted milk powder substitute for milkshakes and cookies, not for bread conditioning. It contains non-diastatic malt blended with milk solids and sometimes wheat flour. Using it in place of diastatic malt will add dairy sweetness without improving fermentation.
If you bake regularly and want consistent results, sourcing actual diastatic malt powder is worth the effort. It stores well in an airtight container for months, a single bag lasts through dozens of bakes at the tiny quantities required, and nothing else delivers quite the same combination of enzymatic conditioning, subtle flavor, and crust development.
Of course, having the right ingredient on hand only helps if you use it correctly. The margin between "just enough" and "too much" is narrow, and the symptoms of over-malting are not always obvious until the loaf comes out of the oven.
Troubleshooting Over-Use and Common Mistakes
A few grams too many and your loaf tells you in ways that are hard to miss. The tricky part? Some symptoms of over-malting look identical to other baking problems, which leads bakers to chase the wrong fix. Knowing exactly what excessive diastatic barley malt powder does to dough helps you diagnose the real issue and correct it before your next bake.
Signs You Have Used Too Much
Over-malted dough does not always announce itself during mixing or shaping. Often, the problems only become visible after baking. Watch for these telltale signs:
- Gummy or wet-feeling crumb that does not improve with longer baking. As The Dough Formula explains, bread at 190 degrees Fahrenheit looks the same as bread at 208 degrees from the outside, but the crumb difference is significant. With over-malted dough, even hitting 210 degrees internally may not eliminate that sticky, compressed texture because excess enzyme activity has broken down too much starch for the crumb to set properly.
- Collapsed loaf structure where the sides cave inward or the top sinks after cooling. Enzymes weaken the starch network that supports the crumb, and without that scaffolding, the loaf cannot hold its shape under its own weight.
- Excessively dark or burnt-looking crust before the interior is done. The surplus of free sugars caramelizes and undergoes Maillard reactions far too quickly, giving you a near-black exterior while the inside remains underbaked.
- Overly sticky dough that resists shaping. If your dough feels progressively slacker and wetter during bulk fermentation even though you added no extra water, enzymes are breaking down starch faster than gluten can compensate.
- A malty or cloying off-flavor that overwhelms the natural wheat and fermentation character of the bread.
The most common misdiagnosis? Blaming underbaking. Bakers see gummy crumb and assume they pulled the loaf too early, so they extend bake time on the next attempt. But as the reference above notes, gumminess from structural causes is not thermal. No amount of extra oven time fixes crumb that has been enzymatically degraded at the starch level.
How to Correct Over-Malted Dough
Caught it mid-process? You still have options. None are perfect, but each limits the damage:
- Reduce fermentation time. Enzymes need time to work. Shortening bulk ferment and final proof narrows the window of starch breakdown. Shape earlier than you normally would and get the dough into the oven sooner.
- Increase baking temperature slightly. A hotter oven sets the crumb structure faster, locking in whatever starch integrity remains before enzymes can do more damage. Try raising your temperature by 10-15 degrees Celsius for the first 10 minutes of the bake.
- Reduce hydration. Starch breakdown releases water that was previously bound in the starch matrix, effectively increasing your dough's hydration from the inside. Compensate by pulling back 5-10% of the water in your formula.
- Dilute with fresh dough. In extreme cases, mix the over-malted dough with an equal or larger batch of unmalted dough. This spreads the enzyme load across more flour, reducing the concentration to manageable levels.
Prevention remains easier than correction. Always measure dry malt powder by weight, not volume. A level teaspoon can vary by 30% or more depending on how densely you scoop. Start with less than you think you need, bake a test loaf, and only increase if the crust lacks color or the rise seems sluggish.
Storage and Shelf Life
Diastatic malt powder is shelf-stable, but its enzyme activity is not permanent. Heat, moisture, and time all degrade diastatic power gradually. Store it in an airtight container in a cool, dry pantry away from the stove or any heat source. Under these conditions, expect reliable enzyme activity for 6 to 12 months.
Can you freeze diastatic malt powder to extend its life? Yes. Freezing effectively pauses enzyme degradation. Seal the powder in a moisture-proof bag or container, press out excess air, and store in the freezer. It will keep its diastatic power for well over a year. When you need it, scoop out what you need directly from frozen. The powder does not clump or require thawing because its moisture content is already extremely low.
If your diastatic barley malt powder has been sitting in the pantry for over a year, or stored in a warm kitchen, its enzyme activity may have declined. You will notice the signs in your bread: paler crusts and less oven spring than you used to get with the same amount. At that point, either increase the dose slightly or replace the powder with a fresh supply.
Troubleshooting a single ingredient is useful, but the bigger picture matters too. Diastatic malt powder is just one product in a family of malt-based ingredients, and choosing the wrong member of that family for a specific task creates its own set of problems.
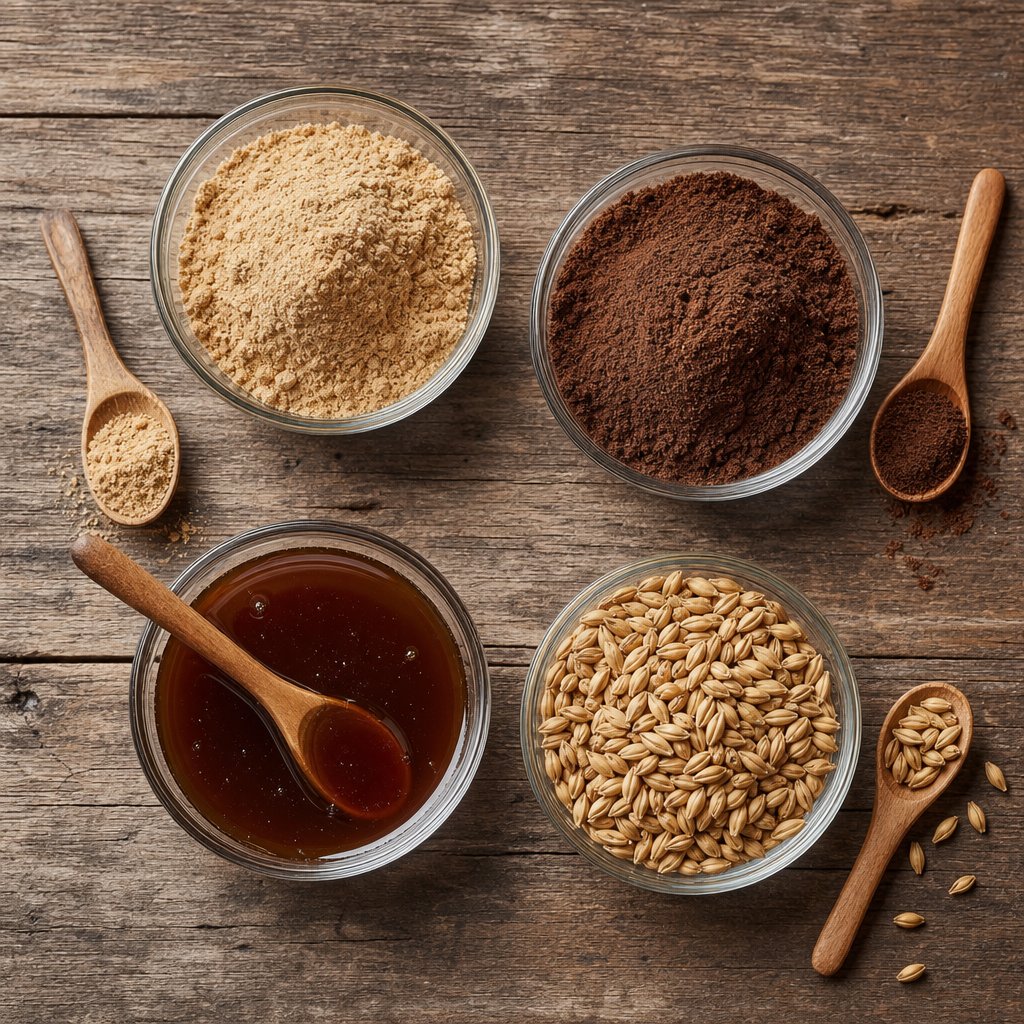
Choosing Between Malt Products and Alternative Grains
Walk into a specialty baking aisle and you will find barley malt powder sitting next to malted barley syrup, malt extract powder, and non-diastatic malt. They all say "malt" on the label. They all come from sprouted grain. Yet grabbing the wrong one for your recipe can mean flat bread, gummy crumb, or a flavor profile that misses the mark entirely.
Choosing the Right Malt Product for Your Purpose
The confusion is understandable. What is barley malt syrup compared to dry malt extract? Is malted barley extract the same as diastatic powder? Each product occupies a specific niche based on its form, enzyme status, and intended application. This table breaks down the four most common options:
| Product | Form | Enzyme Activity | Best Use Case | Flavor Intensity |
|---|---|---|---|---|
| Diastatic malt powder | Fine powder | Active (high diastatic power) | Bread dough conditioning, improving rise and crust | Mild, subtle malt sweetness |
| Non-diastatic malt powder | Fine powder | Inactive (enzymes destroyed) | Bagel boiling water, pretzel dipping, flavoring breads | Moderate, caramel-like sweetness |
| Barley malt syrup | Thick liquid | Variable (often inactive, some brands retain partial activity) | Bagel dough and boiling water, pretzels, dark breads | Strong, earthy malt flavor |
| Malt extract powder | Dry powder (spray-dried) | Inactive | Beverages, confections, flavoring applications | Pronounced, sweet malt character |
A few clarifications worth noting. Malt barley syrup is essentially concentrated wort, the liquid produced when malted barley is mashed in hot water to dissolve its sugars. That cooking process typically deactivates enzymes, which is why most commercial malted barley syrup functions as a flavor and color agent rather than a dough conditioner. If a recipe calls for it in boiling water or as a sweetener, it is doing a non-diastatic job.
Malt extract for baking and brewing comes in both liquid and powder forms. The powder version, often labeled malt extract powder or extract of malt, is spray-dried from the same concentrated liquid. It dissolves easily, stores well, and delivers consistent malty sweetness without enzymatic activity. Home brewers use it as a fermentable sugar source, while bakers reach for it when they want flavor without the risks of active enzymes.
The practical rule: if your goal is dough conditioning and improved fermentation, only diastatic malt powder delivers. Everything else adds flavor, color, or pre-formed sugars without the ongoing starch-conversion engine.
Grains Beyond Barley
Barley dominates the malt world for good reason. It produces the highest and most consistent diastatic power of any common cereal grain, thanks to its husk structure that protects the kernel during germination and its naturally high beta-amylase content. But it is not the only option.
Wheat malt offers comparable enzyme activity to barley and is common in European baking traditions, particularly in German and Austrian bread formulas. Its flavor profile leans slightly sweeter and less earthy than barley malt powder. Some bakers prefer it in lighter breads where barley's distinctive taste might feel too assertive.
Rye malt brings a different character entirely. As Gastronomusa's malt guide notes, rye malt introduces spicy and nutty notes that pair naturally with dark, dense bread styles like pumpernickel and traditional Baltic rye. Its diastatic power is lower than barley's, so it functions more as a flavor ingredient than a primary enzyme source.
For most home bakers, barley malt remains the standard recommendation. It is the most widely available, the most predictable in enzyme strength, and the most forgiving across different bread styles. Wheat and rye malts are worth exploring once you are comfortable with barley and want to push your flavor profiles in new directions.
With the right product selected and the right grain chosen, the remaining question for many bakers is scale. What changes when you move from a home kitchen producing two loaves a week to a professional operation turning out hundreds?
Professional Use and Scaling Malt Powder for Commercial Products
A home baker measures half a teaspoon of diastatic malt into a single batch of dough. A commercial bakery producing 500 loaves per shift needs that same enzymatic precision multiplied across tons of flour, with zero room for batch-to-batch variation. The ingredient is identical. The sourcing, quality control, and integration strategy are entirely different.
How Professional Bakeries Use Diastatic Malt
Large-scale bakeries rarely buy diastatic malt powder off a retail shelf. Instead, they work directly with flour millers to specify exact diastatic power in their base flour. The miller blends malted barley flour into the wheat flour at precise ratios calibrated to the bakery's fermentation schedule, oven temperatures, and product line. This approach eliminates a separate measuring step on the production floor and ensures every bag of flour performs identically.
Artisan bakeries operate differently. Many prefer to buy unmalted flour and add diastatic malt separately, giving them finer control over enzyme levels for different products. A baguette formula might get 0.3% malt while a sandwich loaf gets 0.8%, all from the same base flour. This flexibility matters when your menu spans multiple bread styles with different fermentation timelines.
Where can i buy diastatic malt powder at professional volumes? The sourcing equation shifts with scale:
- Small artisan bakeries (under 200 loaves/day): Often purchase retail-sized containers. King Arthur diastatic malt powder in the 4 oz format or similar retail packages from specialty suppliers work fine at this volume. Some source from local homebrew shops that carry bulk malted barley.
- Mid-size bakeries (200-1,000 loaves/day): Typically buy 25-50 lb bags from commercial baking suppliers like Briess Malt or regional distributors. Consistency between lots becomes a priority at this scale.
- Large operations (1,000+ loaves/day): Work with millers to pre-blend malt into custom flour specifications, or contract directly with maltsters for bulk supply with guaranteed diastatic power ratings and certificate of analysis for each shipment.
For home bakers wondering where can i buy malt powder for occasional use, specialty baking retailers remain the most accessible option. You can find diastatic malt powder at Whole Foods in some locations, through King Arthur's online shop, or from homebrew supply stores that stock malted barley products. A single 4 oz bag of King Arthur diastatic malt powder lasts months at home-baking quantities since you only need a few grams per batch.
The professional difference is not just volume. It is consistency. A commercial bakery cannot tolerate the natural variation that home bakers absorb without noticing. If one bag of malt has 20% more enzyme activity than the last, hundreds of loaves come out wrong before anyone catches the problem. That is why large operations demand lot-to-lot specifications that retail products simply do not guarantee.
Scaling Malt-Based Products for Commercial Launch
Beyond bakeries, a growing segment of food businesses are developing malt-based products for retail: functional baking mixes, grain-based nutritional powders, malt-enriched health supplements, and specialty flour blends. These products face a unique manufacturing challenge. Diastatic malt powder loses its enzymatic power if exposed to excessive heat during processing, packaging, or storage. Maintaining that activity through a commercial production line requires equipment calibrated to stay below critical temperature thresholds at every stage.
For brands entering this space, the path from kitchen-tested formulation to shelf-ready product involves several hurdles:
- Scaling recipes from grams to kilograms while maintaining enzyme activity ratios
- Meeting food safety and labeling requirements across target markets
- Ensuring consistent diastatic power specifications across production runs
- Managing packaging that protects enzyme viability during shipping and shelf life
Many nutrition brands, supplement importers, and private label sellers find that partnering with an experienced OEM/ODM manufacturer streamlines this process significantly. Rather than building in-house facilities with temperature-controlled milling and blending equipment, contract manufacturing allows brands to leverage existing powder and granule production expertise. ZhuFeng's OEM/ODM health food manufacturing services, for example, offer customized formulation and scalable production across flexible product formats including powders, granules, tablets, and capsules, helping businesses launch malt-based functional foods without the capital investment of dedicated processing lines.
The key advantage of working with a contract manufacturer experienced in grain-based powders is process control. Maintaining diastatic power through commercial-scale drying, blending, and packaging requires precise temperature monitoring that general food manufacturers may not prioritize. An OEM partner with powder and granule specialization understands that enzyme-active ingredients demand different handling than standard nutritional powders, from intake to final packaging.
Whether you are searching for diastatic malt powder near me for your weekend baking or evaluating bulk supply chains for a commercial product launch, the core principle stays the same: enzyme activity is fragile, temperature is everything, and the gap between a good malt product and a dead one is measured in degrees. Getting that right at any scale, from a single loaf to a thousand-unit production run, is what separates bread that rises beautifully from bread that falls flat.
Frequently Asked Questions About Diastatic Malt Powder
1. What does diastatic malt powder do in bread?
Diastatic malt powder introduces active amylase enzymes into your dough that continuously convert flour starch into maltose and other fermentable sugars. This sustained sugar production feeds yeast throughout the entire fermentation process, resulting in improved oven spring, greater loaf volume, deeper golden-brown crust color through enhanced Maillard reactions, and a subtle malty flavor complexity that plain sugar cannot replicate. It essentially acts as a natural dough conditioner that keeps working from mixing through the final moments of baking.
2. How much diastatic malt powder should I use per loaf?
The standard starting point is 0.5% to 1% of your total flour weight, which works out to roughly 2.5 to 5 grams for a recipe using 500 grams of flour. However, this amount should be adjusted based on fermentation length and flour type. Short-ferment sandwich breads can handle the full 1%, while long-fermented sourdoughs or pizza doughs should use 0.25% or less. If your flour already lists malted barley flour as an ingredient, reduce or skip added malt entirely to avoid over-conditioning.
3. Can I substitute non-diastatic malt powder for diastatic?
No, these two products are not interchangeable despite sharing a similar name and origin. Non-diastatic malt powder has had its enzymes destroyed by heat, so it adds sweetness and color but cannot improve fermentation or generate new sugars from starch. Using it where diastatic is called for will give you a slightly maltier taste without any structural benefit to your dough. Conversely, substituting diastatic where non-diastatic is specified risks over-conditioning, gummy crumb, and collapsed loaf structure due to uncontrolled enzyme activity.
4. How do I make diastatic malt powder at home?
Soak whole barley in water for 8 to 12 hours, then sprout it on a tray for 4 to 6 days until rootlets reach the length of the kernel. The critical step is drying: use a dehydrator or oven set below 50 degrees Celsius (122 degrees Fahrenheit) for 12 to 24 hours to preserve enzyme activity. Once fully dry, remove the rootlets and grind the sprouted grain into a fine powder. Temperature control during drying determines whether you produce diastatic or non-diastatic malt, so staying well below the enzyme-killing threshold is essential.
5. How should I store diastatic malt powder and how long does it last?
Store diastatic malt powder in an airtight container in a cool, dry location away from heat sources. Under proper conditions, expect reliable enzyme activity for 6 to 12 months. For longer storage, freezing is effective since it pauses enzyme degradation and the low-moisture powder will not clump. Signs that your malt has lost potency include paler crusts and reduced oven spring compared to previous bakes using the same amount. At that point, increase the dose slightly or replace with a fresh supply.