The Standard Baking Powder to Flour Ratio
You measured everything carefully, followed the recipe to the letter, and still pulled a flat, dense disappointment from the oven. Sound familiar? The culprit is almost always the leavening. Knowing how much baking powder per cup of flour to use is the single most important ratio in quick-bread baking, and most home bakers get it slightly wrong.
The Quick Answer Every Baker Needs
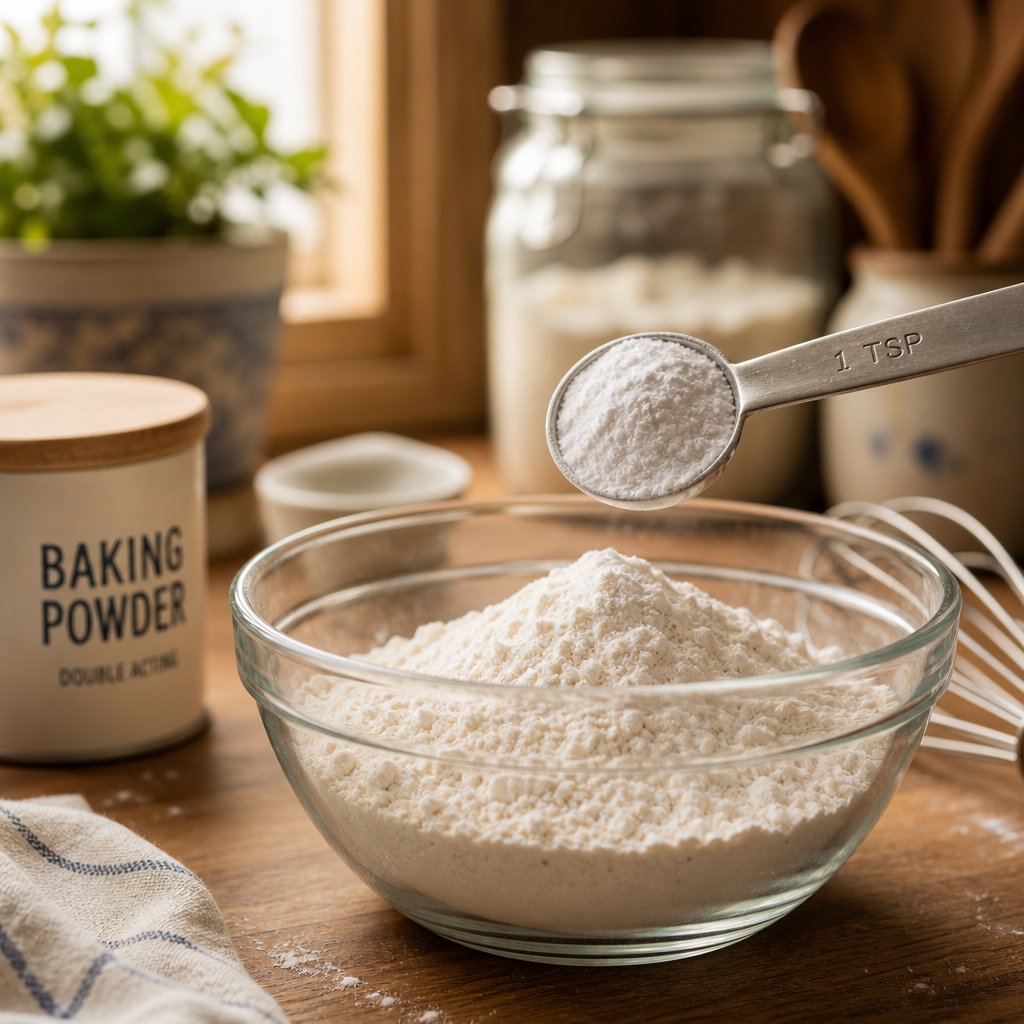
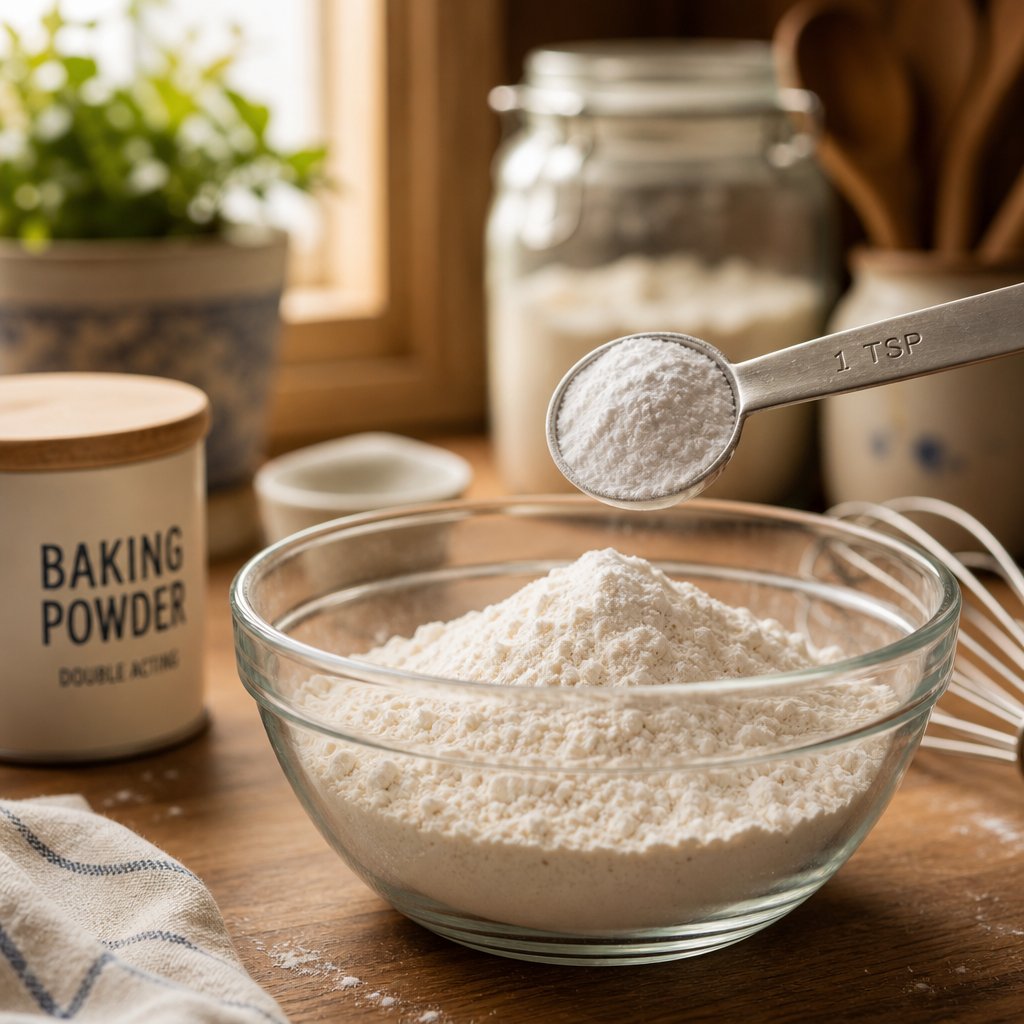
For every 1 cup (120 g) of all-purpose flour, use 1 to 1 1/2 level teaspoons of baking powder.
That is the standard baking powder to flour ratio used across cookbooks, culinary schools, and commercial packaging alike. A few details matter here. "Level" means you drag a straight edge across the top of the measuring spoon, no heaping allowed. And "1 cup" refers to a standard US dry measuring cup, spooned and leveled rather than scooped directly from the bag (scooping compacts the flour and throws off the ratio).
For most everyday recipes like pancakes, basic muffins, and quick breads, 1 1/4 teaspoons of baking powder per cup of flour hits the sweet spot. It gives a reliable rise without the bitter aftertaste that comes from overdoing it. Think of 1 teaspoon as the floor and 1 1/2 teaspoons as the ceiling, with the ideal amount depending on what you are baking.
Why One Number Is Not Enough
If a single number solved every situation, professional bakers would not spend years refining formulas. The truth is, how much baking powder for 1 cup flour shifts based on several real-world factors:
- Flour type (whole wheat is heavier than cake flour)
- Altitude (lower air pressure changes how gas expands)
- Acidity in the batter (buttermilk and yogurt create extra lift)
- Batter density (rich, heavy batters need more leavening power)
Each of these variables can push the ideal baking powder per cup of flour up or down by a quarter teaspoon or more. A quarter teaspoon sounds trivial, but in baking, that small shift is the difference between a tender crumb and a gummy center.
The ratio itself is simple. Knowing when and why to adjust it is what separates a good baker from a frustrated one.
Why Different Sources Recommend Different Amounts
Ever notice that one cookbook says 1 teaspoon, a food science textbook says 1 1/4, and the label on your baking powder can says 1 1/2? You are not imagining the inconsistency. Each recommendation is correct within its own context, and understanding why they differ gives you the flexibility to choose the right flour to baking powder ratio for any recipe you tackle.
| Recommended Amount (per 1 cup flour) | Source Type | Best Suited For |
|---|---|---|
| 1 teaspoon | Classic cookbooks, culinary school texts | Light batters: pancakes, crepes, thin cake layers |
| 1 1/4 teaspoons | Food science references, tested recipe sites | Standard batters: everyday muffins, coffee cake, scones |
| 1 1/2 teaspoons | Commercial baking powder packaging | Dense or enriched batters: quick breads, heavy muffins, fruit-loaded loaves |
The differences are not random. They reflect deliberate choices about texture, density, and even shelf-life assumptions.
Breaking Down the Range From 1 to 1.5 Teaspoons
Imagine pouring thin pancake batter versus spooning thick banana bread dough into a loaf pan. Those two batters have very different weights, and weight is what the leavening agent has to push against. A lighter batter traps gas easily, so it needs less help. A dense batter loaded with fruit, nuts, or whole grains resists expansion and demands more lifting power.
That is why the ratio of baking powder to flour is not a single fixed number but a range:
- Thin, pourable batters (crepes, waffles, standard pancakes) perform well at the low end, around 1 teaspoon per cup.
- Medium batters (vanilla muffins, simple quick breads) land in the middle at roughly 1 1/4 teaspoons.
- Heavy, enriched batters (dense zucchini bread, loaded blueberry muffins, whole-grain loaves) benefit from the full 1 1/2 teaspoons.
Choosing within this range is less about following a single authority and more about reading your batter. If it flows freely off a spoon, stay low. If it holds its shape in a thick mound, go higher.
How Recipe Richness Shifts the Ratio
Fats, sugars, and eggs all add weight and moisture to a batter. A recipe calling for a full stick of butter, two eggs, and a cup of sugar produces a heavier mixture than a lean batter made with just flour, milk, and a tablespoon of oil. That extra mass means the carbon dioxide bubbles generated by baking powder have to work harder to create lift.
Here is a practical way to think about it: every tablespoon of butter or additional egg yolk slightly increases the proportion of baking powder to flour your recipe needs. Rich batters also tend to set more slowly in the oven, giving gas more time to escape before the structure firms up. A slightly higher dose of leavening compensates for that loss.
You will also notice that commercial baking powder packaging consistently recommends the higher end of the range, typically 1 1/2 teaspoons per cup. This is not aggressive marketing. Manufacturers account for average potency loss during shelf life. Testing by Serious Eats found that baking powder begins losing measurable strength around the six-month mark after opening. By recommending a slightly generous flour and baking powder ratio, brands build in a safety margin so that even a container sitting in your cabinet for several months still delivers acceptable rise.
The takeaway is straightforward. When you encounter conflicting advice, check the context: what type of batter is the source describing, and how fresh is the leavening agent assumed to be? Match those conditions to your own kitchen, and the "correct" number becomes clear.
Of course, flour itself is not a single ingredient. Swap all-purpose for whole wheat or cake flour, and the density of the dry ingredients changes entirely, pulling the ideal ratio in a new direction.
How to Make Self-Rising Flour at Home
Knowing the correct ratio is one thing. Putting it to work is another. One of the most practical applications of the baking powder to flour relationship is making your own self-rising flour from scratch. If a recipe calls for self-rising flour and you only have all-purpose in the pantry, you are about two minutes away from a solution.
The One-Cup Self-Rising Flour Formula
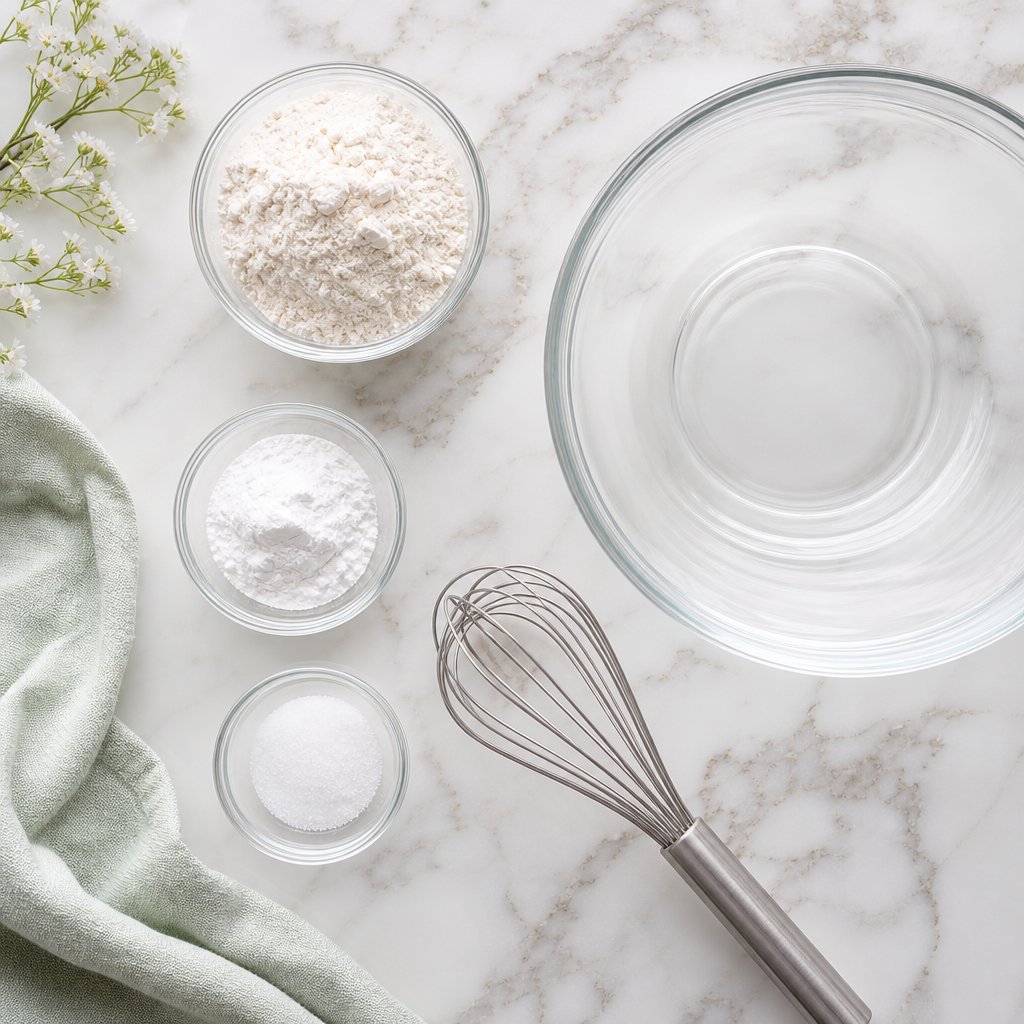
Here is how to make 1 cup of self rising flour using three pantry staples:
- Measure 1 cup of all-purpose flour using the spoon-and-level method (spoon flour into the cup, then sweep a straight edge across the top).
- Add 1 1/2 teaspoons of baking powder.
- Add 1/4 teaspoon of fine salt.
- Whisk all three ingredients together in a bowl until fully combined, at least 20 to 30 seconds of active whisking.
This 1 cup self rising flour recipe mirrors what you find inside commercial brands like White Lily or Martha White. The 1 1/2 teaspoon baking powder measurement sits at the top of the standard range because self-rising flour needs to perform reliably across many recipe types, from biscuits to pancakes to dumplings. The quarter teaspoon of salt rounds out the flavor the same way store-bought versions do.
If you have ever searched for how to make a cup of self rising flour, this is the formula professional bakers and culinary schools consistently recommend. It works because the ratio accounts for the broadest range of baked goods without over-leavening lighter recipes or under-leavening denser ones.
Scaling Up Without Losing Accuracy
Most baking projects call for more than a single cup. Use this table to scale the self rising flour recipe 1 cup at a time without rounding errors creeping in:
| All-Purpose Flour | Baking Powder | Salt |
|---|---|---|
| 1 cup | 1 1/2 teaspoons | 1/4 teaspoon |
| 2 cups | 1 tablespoon (3 teaspoons) | 1/2 teaspoon |
| 3 cups | 1 1/2 tablespoons (4 1/2 teaspoons) | 3/4 teaspoon |
| 4 cups | 2 tablespoons (6 teaspoons) | 1 teaspoon |
A quick tip that makes a real difference: whisk thoroughly. Baking powder clumps easily, and if it is not evenly distributed, some portions of your batter get too much lift while others stay flat. You end up with muffins that dome on one side or biscuits with dense pockets.
For even better distribution, sift the combined mixture two to three times. Sifting breaks up any remaining clusters and ensures the leavening agent is uniformly dispersed throughout the flour. This step takes an extra 30 seconds and prevents the uneven rise that frustrates so many home bakers.
You can store homemade self-rising flour in an airtight container for up to six months, though freshly mixed batches will always outperform older ones since baking powder gradually loses potency once exposed to air. A reliable 1 cup self raising flour recipe is worth memorizing, but making it fresh each time you bake gives you the strongest, most consistent rise.
This formula assumes standard all-purpose flour. Swap in whole wheat, cake flour, or a gluten-free blend, and the amount of baking powder needs to shift to match the new flour's weight and structure.
Adjusting Baking Powder for Different Flour Types
Not all flours weigh the same, absorb moisture the same way, or build structure with the same strength. Protein content, particle size, and the presence of bran or germ all change how a flour responds to leavening. The standard 1 to 1 1/2 teaspoon range assumes all-purpose flour. Step outside that default, and the amount of baking powder in flour needs to shift accordingly.
Here is a quick reference showing how common flour types compare:
| Flour Type | Protein Content | Baking Powder per Cup | Why the Adjustment |
|---|---|---|---|
| All-purpose | 10 - 12% | 1 - 1 1/2 tsp (baseline) | Medium weight and gluten development; standard reference point |
| Cake flour | 7 - 9% | 3/4 - 1 tsp | Finer grind, lower protein; less leavening prevents crumbly texture |
| Whole wheat | 13 - 14% | 1 1/2 - 1 3/4 tsp | Heavier due to bran and germ; needs extra lift to avoid density |
| Bread flour | 12 - 13% | 1 - 1 1/4 tsp | Strong gluten network traps gas efficiently; less leavening needed for quick breads |
| Gluten-free blends | Varies widely | 1 1/4 - 1 3/4 tsp | No gluten to trap gas; requires more lift plus a binder like xanthan gum |
Whole Wheat and Dense Flours Need More Lift
Whole wheat flour contains the entire wheat berry: bran, endosperm, and germ. That extra fiber and fat add weight that all-purpose flour simply does not carry. According to King Arthur Flour's baking experts, whole wheat flour has a protein content around 14%, compared to roughly 11.7% in their all-purpose variety. The sharp bran particles also cut through developing gluten strands, weakening the structure that would otherwise trap gas bubbles.
The practical fix is straightforward: increase baking powder for flour made from whole grains by about 25 percent over what you would use with all-purpose. If your baseline is 1 1/4 teaspoons, bump it to roughly 1 1/2 to 1 3/4 teaspoons when working with whole wheat. You will notice the crumb stays lighter and the center bakes through more evenly.
Cake Flour and Lighter Alternatives
Cake flour sits at the opposite end of the spectrum. It is milled to a finer consistency and contains only about 7 to 9% protein, which means less gluten forms during mixing. The result is a delicate, tender crumb that needs less mechanical lift to feel airy. Too much baking powder in a cake-flour batter creates an overly open, fragile texture that crumbles apart when sliced.
Reduce your baking powder flour measurement to around 3/4 to 1 teaspoon per cup when using cake flour. This lighter touch lets the flour's natural fineness do most of the textural work while the leavening provides just enough rise to keep the layers from being flat.
Gluten-Free Flour Blends
Gluten-free baking introduces a unique challenge. Without gluten's elastic mesh to trap carbon dioxide, gas escapes more easily from the batter. You can add extra baking powder, but leavening alone will not solve the structural problem. Most successful gluten-free recipes pair a slightly higher dose of flour with baking powder alongside a binding agent like xanthan gum (typically 1/4 to 1/2 teaspoon per cup of flour) or psyllium husk.
Because gluten-free blends vary so widely in composition, from rice-flour-based mixes to those built on almond or oat flour, there is no single universal ratio. Start at 1 1/4 teaspoons of baking powder per cup, test the result, and increase by 1/4 teaspoon increments if the rise falls short. Always check the blend's packaging for specific leavening guidance, since some commercial mixes already include a small amount of leavening agent.
Flour type is one variable you can see and measure before you start mixing. Other factors, like the altitude of your kitchen or the acidity of your wet ingredients, are less obvious but just as powerful in shifting how much lift your batter actually needs.

How Altitude and Recipe Acidity Change the Rules
Flour type is something you choose deliberately. Altitude and acidity, on the other hand, are conditions that exist whether you think about them or not. Both quietly alter how gas behaves inside your batter, and ignoring either one is a fast track to collapsed centers or gummy interiors. These are two of the most overlooked factors in getting the baking soda to flour ratio and baking powder amounts right.
High-Altitude Baking Powder Adjustments
Imagine blowing up a balloon inside a pressurized airplane cabin versus on top of a mountain. At higher elevations, air pressure drops. That means the carbon dioxide produced by baking powder expands more easily and more aggressively. Your batter rises faster, stretches thinner, and often collapses before the structure has time to set in the oven's heat.
The fix is counterintuitive for many bakers: use less leavening, not more. King Arthur Baking recommends decreasing baking powder and baking soda amounts as elevation increases, noting that high altitude is generally considered to be above 3,000 to 3,500 feet. Their leavening chart shows reductions that become more dramatic the higher you go.
Here is a simplified reference for adjusting 1 teaspoon of baking powder based on your kitchen's elevation:
| Altitude Range | Adjusted Amount (per 1 tsp called for) | Reduction |
|---|---|---|
| Sea level to 3,000 ft | 1 teaspoon (no change) | None |
| 3,000 - 5,000 ft | 7/8 teaspoon | Reduce by 1/8 tsp |
| 5,000 - 6,500 ft | 1/2 teaspoon | Reduce by 1/2 tsp |
| 6,500 - 8,000 ft+ | 1/4 teaspoon | Reduce by 3/4 tsp |
Notice how steep the reduction becomes above 5,000 feet. At that elevation, you are cutting the leavening by half. A baker in Denver (5,280 ft) using the standard 1 1/2 teaspoons per cup of flour would need to drop closer to 3/4 teaspoon baking powder to avoid over-rising.
What does over-leavened batter actually look like? The cake or muffin rises beautifully in the first few minutes, domes high, then sinks in the center as the stretched structure gives way. You pull it from the oven and find a crater where the peak used to be. The crumb around the edges may be coarse and dry because the batter expanded too quickly and lost moisture before setting.
Beyond reducing leavening, King Arthur's high-altitude guide also suggests increasing oven temperature by 15 to 25 degrees Fahrenheit. The higher heat sets the batter's structure faster, locking in the rise before it can collapse. Increasing liquid by 1 to 2 tablespoons at 3,000 feet (and an additional 1 1/2 teaspoons per 1,000 feet above that) also helps compensate for faster evaporation at altitude.
If you have recently moved to a mountain town and your tried-and-true recipes suddenly fail, altitude is almost certainly the reason. Start with the smaller reduction first, bake a test batch, and adjust from there. Individual microclimates vary, so what works at 4,000 feet in one valley may need further tweaking at 4,000 feet in another.
How Acidic Ingredients Change the Equation
Altitude is about physics. Acidity is about chemistry. When your recipe includes buttermilk, yogurt, lemon juice, vinegar, molasses, or natural cocoa powder, those ingredients introduce acids that react with the sodium bicarbonate (baking soda) component inside baking powder. The reaction produces extra carbon dioxide on top of what the baking powder was already generating on its own.
In mildly acidic batters, this bonus lift is usually welcome and already accounted for in well-tested recipes. The problem arises when a recipe is heavily acidic, think a buttermilk chocolate cake made with natural cocoa and a splash of vinegar. All that acid can push the flour to baking soda ratio out of balance, creating more gas than the batter can handle. The result looks a lot like the altitude problem: rapid rise followed by collapse, plus a soapy or metallic aftertaste from unreacted base.
You have two options when working with highly acidic batters:
- Reduce baking powder slightly. Drop by about 1/4 teaspoon per cup of flour when the recipe contains two or more acidic ingredients. This keeps total gas production in check.
- Substitute part of the baking powder with baking soda. Baking soda (sodium bicarbonate) requires acid to activate. By replacing a portion of your baking powder with a smaller amount of baking soda, you let the recipe's own acids do the leavening work more efficiently. The general conversion: 1/4 teaspoon baking soda replaces 1 teaspoon baking powder when sufficient acid is present.
Here is a simple decision framework to guide you:
- Recipe has no acidic ingredients (just milk, water, or neutral liquids): Use baking powder only, at the standard ratio.
- Recipe has one mild acid (a cup of buttermilk or a tablespoon of lemon juice): Keep baking powder at the standard amount. The recipe likely already accounts for the interaction.
- Recipe has multiple strong acids (buttermilk plus natural cocoa plus vinegar): Reduce baking powder by 1/4 teaspoon per cup of flour, or replace 1 teaspoon of baking powder with 1/4 teaspoon baking soda.
This is also relevant if you are wondering how to make self rising flour with baking soda instead of baking powder. The short answer: combine 1 cup flour with 1/4 teaspoon baking soda and 1/4 teaspoon salt, but only use this blend in recipes that already contain an acidic liquid like buttermilk or yogurt. Without that acid, the baking soda has nothing to react with and your baked goods will taste metallic and stay flat.
Understanding how to make self rising flour with baking soda gives you flexibility when your pantry runs low on baking powder, but it is not a universal swap. The baking soda flour ratio is roughly 1/4 teaspoon soda per cup of flour, compared to 1 to 1 1/2 teaspoons of baking powder for the same amount. That difference in strength, about three to four times more potent, is why a teaspoon of baking soda in place of a teaspoon baking powder would ruin your recipe.
Altitude and acidity rarely get discussed together, yet they can compound each other. A baker at 6,000 feet making a buttermilk quick bread faces both lower pressure and extra chemical lift. In that scenario, reduce leavening for altitude first, then evaluate whether the acid content calls for a further cut. Small, deliberate adjustments beat guessing every time.
Even with the right amount dialed in, the type of baking powder you reach for, single-acting versus double-acting, introduces yet another variable that shifts how your measurements translate into actual rise.
Single-Acting vs Double-Acting Baking Powder
The container in your pantry likely says "double-acting" somewhere on the label. Most bakers never think twice about that phrase, but it directly affects how much baking powder you need and how forgiving your timing can be.
Single-Acting Baking Powder and Timing
Single-acting baking powder produces all of its carbon dioxide the moment it contacts liquid. Every bubble forms during mixing, which means your batter starts losing lift the second you stop stirring. Wait too long to get it into the oven, over-mix, or pause to prep a pan, and a significant portion of that gas escapes into the air instead of staying trapped in your crumb.
This type is less common in home kitchens today but still appears in commercial bakeries and some international markets. It is also what you end up with if you make homemade baking powder from cream of tartar and baking soda. Because gas loss during handling is almost inevitable, many bakers compensate by increasing the amount by roughly 25 percent. If a recipe calls for 1 teaspoon baking powder (double-acting), you would use about 1 1/4 teaspoons of a single-acting product to achieve comparable rise.
Double-Acting Baking Powder for Reliable Results
Double-acting baking powder works in two phases. A small amount of gas releases when the powder meets liquid, giving your batter an initial lift. The majority of the reaction, however, happens when heat hits the batter in the oven. This two-stage design is far more forgiving. You can mix a batter, let it rest briefly, and still get a full rise because most of the leavening power is waiting for oven temperatures to trigger it.
Because double-acting is the standard on US grocery shelves, the baseline ratio of 1 to 1 1/2 teaspoons per cup of flour assumes you are using this type. If you pick up a single-acting variety while traveling or order one online for a specific recipe, remember to bump up your measurement to compensate for the faster gas release.
Converting Gram Measurements to Teaspoons
Metric recipes add another layer of confusion. If a European or Australian recipe lists baking powder in grams, here is a quick conversion to keep handy: 8g baking powder to tsp works out to approximately 1 3/4 teaspoons. And if you are wondering about 10 grams of baking powder to tablespoons, that equals roughly 2 1/4 teaspoons, or just under 1 tablespoon. These conversions assume standard double-acting powder with a typical density. Brands vary slightly, so when precision matters, a small kitchen scale removes all guesswork about how much baking powder you are actually adding.
Knowing which type you have and how to convert between measurement systems keeps your ratios accurate. But even the right amount of the right type can let you down if the powder itself has gone stale, a problem that reveals itself only after you have already committed ingredients to a bowl.
What Happens When You Use Too Much or Too Little
Getting the baking powder flour ratio right is not just about achieving a nice dome on your muffins. It is about avoiding a whole cascade of texture, flavor, and structural problems that no amount of frosting can hide. Most guides tell you the correct measurement and move on. Few explain what actually goes wrong when you miss the mark, and recognizing these failure signs is the fastest way to diagnose a bad batch and fix it next time.
Signs You Used Too Much Baking Powder
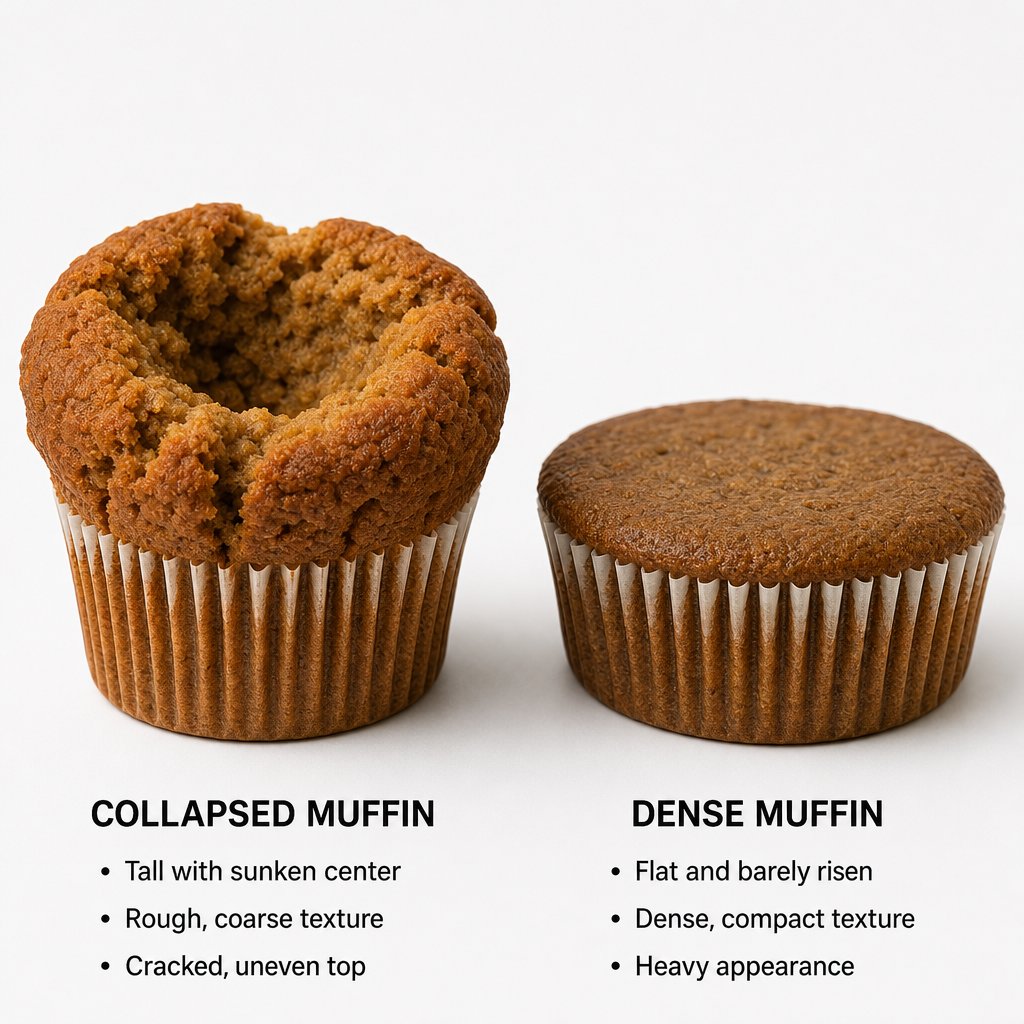
More lift sounds like a good thing, right? Not quite. Excess baking powder creates more carbon dioxide than your batter's structure can support. The result is a bake that rises aggressively, then collapses under its own overextended framework. Baking experts note that too much leavening agent causes a cake to rise too quickly, creating large air bubbles the structure cannot hold, leading to collapse as it cools.
Here is what to look for if you suspect you went too heavy on the leavening:
- Bitter, metallic aftertaste - Unreacted baking powder leaves an unpleasant chemical flavor that lingers on the tongue, especially noticeable in lighter bakes like vanilla cake or plain scones.
- Overly coarse, open crumb - Instead of a fine, even texture, you get large irregular holes throughout the interior, almost like Swiss cheese.
- Collapsed or sunken center - The batter over-expands in the first minutes of baking, then the stretched walls give way. You pull out a muffin or cake with a crater where the peak should be.
- Darkened or overly browned crust - Excess sodium bicarbonate (a component of baking powder) raises the batter's pH, which accelerates browning reactions. The outside looks done or even burnt while the inside remains underset.
- Dry, crumbly edges - Rapid expansion pushes moisture outward and evaporates it before the crumb can set evenly.
If you have ever wondered how much baking powder for muffins is too much, the answer becomes obvious the moment you taste that metallic bite. Even half a teaspoon over the ideal amount per cup of flour can push a standard muffin recipe into bitter territory.
Signs You Used Too Little Baking Powder
Under-leavened baked goods have their own distinct set of symptoms. Without enough gas production, the batter never expands properly and bakes into a dense, heavy mass. You will notice:
- Poor rise - Muffins stay flat-topped or barely clear the rim of the liner. Cakes come out noticeably shorter than expected.
- Dense, gummy interior - The crumb feels wet and heavy on the tongue, almost doughy, even though a toothpick comes out clean.
- Heavy mouthfeel - Each bite requires more chewing than it should. The lightness you expect from a quick bread or scone is completely absent.
- Pale top - Insufficient rise means less surface area is exposed to oven heat, resulting in a lighter crust color and less appealing appearance.
- Rubbery texture - Without gas pockets to break up the gluten network, the structure becomes chewy rather than tender.
Knowing how much baking powder in muffins creates the right texture versus a hockey puck comes down to respecting the flour baking powder ratio for your specific recipe. A dense blueberry muffin batter needs the full 1 1/2 teaspoons per cup, while skimping at 3/4 teaspoon leaves you with something closer to a doorstop.
Common Measurement Mistakes That Throw Off Ratios
Sometimes the recipe is fine and the ratio is correct on paper, but a simple measuring error throws everything off. These are the mistakes that trip up even experienced bakers:
- Packing the teaspoon instead of leveling. Baking powder should be spooned lightly into the measuring spoon, then swept flat with a straight edge. Dipping the spoon directly into the container and pressing it against the side can add 25 to 50 percent more product than intended.
- Confusing baking powder with baking soda. They look identical in a bowl, but baking soda is roughly three to four times stronger than baking powder. Using 1 teaspoon of baking soda where the recipe calls for 1 teaspoon of baking powder delivers a massive overdose of leavening plus a soapy, metallic flavor.
- Using tablespoons instead of teaspoons. One tablespoon equals three teaspoons. A single slip here triples your leavening and guarantees a collapsed, bitter result.
- Measuring over the mixing bowl. If powder spills directly into your batter, you cannot remove it. Always measure over the container or a separate surface.
The most critical reminder for anyone adjusting recipes: baking soda and baking powder are not interchangeable at a 1:1 ratio. If you need to substitute baking soda for baking powder, use only 1/4 to 1/3 the amount and make sure your recipe includes an acid source like buttermilk, yogurt, or lemon juice to activate it. Going the other direction, replacing baking soda with baking powder, requires tripling the quantity. Either swap changes the flavor profile and browning behavior of your final product, so treat it as a last resort rather than a casual substitution.
Measurement precision matters most when your baking powder is fresh and fully potent. But what happens when the container has been sitting in your cabinet for months, quietly losing strength with every exposure to humidity and air?
Testing Freshness and Adjusting for Older Baking Powder
A perfectly measured ratio means nothing if the baking powder itself is dead. Baking powder loses potency gradually, and the decline starts the moment you break the seal, not when the printed expiration date arrives. Heat, humidity, and a loosely closed lid all accelerate the breakdown. RecipeTin Eats notes that baking powder can go off even if it is not past its use-by date, making a quick activity test essential before committing ingredients to a recipe.
How to Test Baking Powder Freshness
This takes 10 seconds and saves you from a flat, wasted batch:
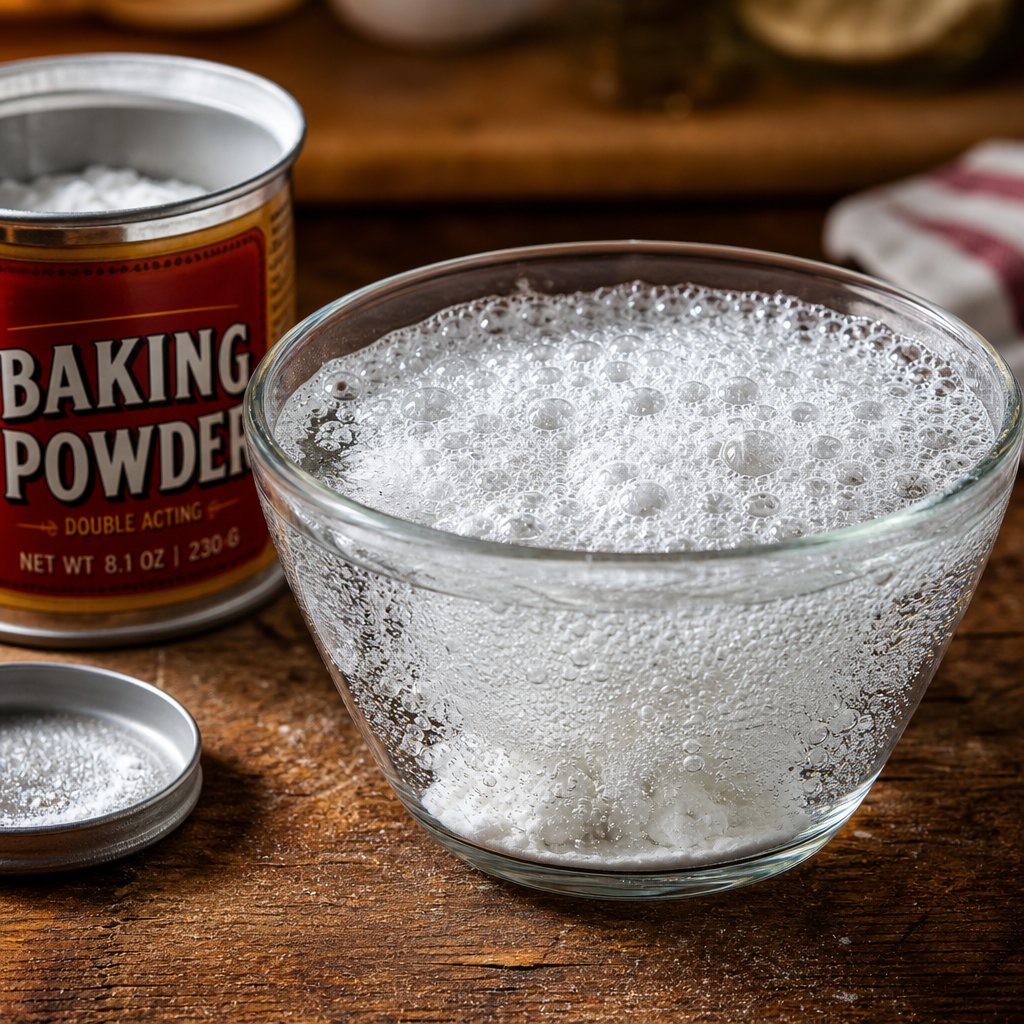
- Place 1/2 to 1 teaspoon of baking powder in a small bowl.
- Pour 1/4 to 1/3 cup of boiling or very hot water over it.
- Watch the reaction. Vigorous, immediate bubbling means the powder is still active and ready to use.
- Weak fizzing or no reaction at all means it has lost its leavening power. Time to replace it.
The bubbles will subside quickly once you stop pouring, so judge the reaction in those first few seconds. If you see energetic foaming, you are good to go. If the water just sits there looking flat, no amount of precise measuring will save your bake. Toss the container and grab a fresh one.
Food scientist Bryan Quoc Le also suggests placing a spoonful of baking powder in vinegar or lemon juice as an alternative test. The mixture should bubble vigorously. You can even heat a small amount in a dry pan on the stovetop and look for visible air bubbles rising to the surface of the powder.
Adjusting Amounts for Older Baking Powder
What if your baking powder still fizzes, but weakly? It has not completely died, just lost some strength. In professional kitchens, bakers compensate by increasing the amount of older baking powder by 25 to 50 percent. So if your recipe calls for 1 1/2 teaspoons per cup of flour, you would use closer to 2 teaspoons with a container that is past its prime but still partially active.
This is a stopgap, not a long-term solution. Partially spent baking powder produces inconsistent results because you are guessing at how much potency remains. For anything important, a celebration cake, a large batch of muffins, or a recipe you are testing for the first time, fresh baking powder is worth the small investment.
General shelf life expectations to keep in mind:
- Unopened containers remain effective for up to two years (check the printed date).
- Once opened, expect reliable performance for about 6 to 12 months under good storage conditions.
- After 12 months open, always test before using.
Proper storage extends that window significantly. Follow these practices to keep your baking powder at full strength as long as possible:
- Store in a cool, dry cabinet away from the stove, dishwasher, or any source of steam.
- Keep the lid tightly sealed after every use.
- Never dip a wet or damp spoon into the container, moisture triggers the chemical reaction inside the can.
- Avoid storing near strong-smelling spices, as baking powder can absorb odors.
- Write the date you opened the container on the lid so you are never guessing.
This freshness issue also applies to how much baking powder for self raising flour matters over time. Commercial self-rising flour contains pre-mixed leavening, and that leavening degrades on the shelf just like the powder in your can. A bag of self-rising flour that has been open for several months may no longer contain enough active baking powder to deliver a proper rise. That is exactly why homemade self-rising flour, mixed fresh from all-purpose flour and a new container of baking powder, often outperforms older store-bought versions.
If you are wondering how much baking powder is in self rising flour and whether it is still effective, the answer depends entirely on how long that bag has been sitting in your pantry. A freshly opened bag performs as expected. One that has been resealed and stored for six months or more may leave your biscuits flat and heavy, even though the flour itself is still fine. Making your own gives you control over leavening freshness every single time.
Freshness is the last piece of the home-baking puzzle. But for brands and businesses developing baking mixes at production scale, the challenge shifts from a single container's shelf life to maintaining consistent potency across thousands of units and months of warehouse storage.
Scaling Ratios for Commercial and Custom Formulations
A home baker who adds a quarter teaspoon too much baking powder to one cup of flour ends up with a slightly bitter muffin. Annoying, but fixable next time. A production facility that makes the same error across a 2,000-unit batch faces product recalls, wasted ingredients, and damaged brand reputation. The principles behind how much baking powder to 1 cup flour remain identical at scale, but the margin for error shrinks to nearly zero.
Brands developing custom baking blends, protein-enriched muffin mixes, or fortified pancake powders must lock in exact leavening ratios during product development and then replicate those ratios with absolute consistency run after run. The question shifts from "how much baking powder for 1 cup of flour?" to "how do we guarantee that ratio holds across 10,000 cups of flour processed in a single shift?"
Why Precision Matters at Production Scale
In your kitchen, you eyeball a level teaspoon and move on. In commercial formulation, that teaspoon becomes a percentage of total formula weight, measured to the hundredth of a gram. BAKERpedia's chemical leavening formulation guide outlines how professional bakers establish the exact amount of bicarbonate (base) required in a formula, then calculate the corresponding acid quantity using neutralizing values. This level of precision ensures every unit in a production run performs identically.
Several factors make commercial scaling more complex than simply multiplying a home recipe:
- Ingredient uniformity - Flour protein content varies between suppliers and even between harvests. Commercial producers test incoming flour lots and adjust leavening accordingly.
- Batch consistency - Mixing equipment, blending times, and environmental conditions (temperature, humidity on the production floor) all influence how evenly baking powder distributes through large volumes of dry mix.
- Shelf-stability of leavening agents - A retail baking mix may sit in a warehouse for months before reaching a consumer. Formulators must account for potency loss over the product's entire shelf life, often building in a controlled overage.
- Regulatory compliance - Maximum permitted levels of sodium, aluminum, and other leavening-related compounds vary by market. A formula approved for US retail may need reformulation for export to the EU or Asia.
Consider how much baking powder for 2 cups of flour matters in a home recipe: 2 1/2 to 3 teaspoons, and you move on. At production scale, that same ratio applied across a 500 kg batch means the difference between a few grams of leavening agent can determine whether an entire pallet of product passes or fails quality control. Small ratio errors do not just affect one muffin tin. They multiply across thousands of units, turning a minor miscalculation into a full batch rejection.
Partnering With Experienced Manufacturers for Custom Formulations
For nutrition brands, supplement importers, and private label sellers developing market-ready baking mixes or functional food products, the formulation challenge goes beyond knowing how much baking powder to one cup of flour. You need a manufacturing partner who understands powder blending at industrial precision, can maintain ratio consistency across production runs, and navigates regulatory requirements for your target markets.
This is where working with an experienced OEM/ODM manufacturer streamlines the path from recipe concept to retail shelf. Rather than investing in your own production infrastructure, you leverage a partner's existing equipment, quality systems, and formulation expertise. The same ratio precision discussed throughout this article, applied at commercial scale, becomes the manufacturer's responsibility to maintain batch after batch.
Companies like ZhuFeng specialize in OEM/ODM health food manufacturing with flexible product formats, including powder and granule formulations ideal for custom baking mixes, protein-fortified pancake blends, and functional food powders. Their scalable production and customized formulation services help brands launch market-ready products without building manufacturing capability from scratch.
Whether you are perfecting a single cup of self-rising flour at home or developing a commercial baking mix destined for thousands of retail shelves, the underlying science stays the same. Measure precisely, account for every variable, and never assume one ratio fits every situation. That principle, applied with care, is what separates flat disappointments from perfectly risen results at any scale.
Frequently Asked Questions About Baking Powder Ratios
1. How much baking powder do I need for 2 cups of flour?
For 2 cups of all-purpose flour, use 2 to 3 teaspoons of baking powder depending on your recipe's density. Light batters like pancakes work well at 2 teaspoons total, while heavier batters loaded with fruit or nuts benefit from the full 3 teaspoons. If you are making self-rising flour, the standard is 1 tablespoon (3 teaspoons) of baking powder plus 1/2 teaspoon of salt for 2 cups.
2. Can I use baking soda instead of baking powder in flour?
You can substitute baking soda for baking powder, but not at a 1:1 ratio. Baking soda is three to four times stronger, so use only 1/4 teaspoon of baking soda per cup of flour in place of 1 teaspoon of baking powder. This swap only works when your recipe contains an acidic ingredient like buttermilk, yogurt, or lemon juice, because baking soda needs acid to activate and produce carbon dioxide.
3. Why do my muffins taste bitter even though I followed the recipe?
A bitter or metallic aftertaste almost always signals too much baking powder. Common causes include using a heaping teaspoon instead of a level one, accidentally measuring with a tablespoon, or using baking soda when the recipe called for baking powder. Even half a teaspoon extra per cup of flour can push muffins into bitter territory. Always level your measuring spoon with a straight edge and double-check which leavening agent the recipe specifies.
4. How do I know if my baking powder is still good?
Drop 1/2 to 1 teaspoon of baking powder into 1/4 cup of hot water. If it bubbles vigorously and immediately, it is still active. Weak fizzing or no reaction means it has lost its leavening power and should be replaced. Opened containers typically remain effective for 6 to 12 months when stored in a cool, dry place with the lid tightly sealed. Writing the opening date on the container helps you track freshness.
5. Do I need to adjust baking powder when using whole wheat flour?
Yes. Whole wheat flour is heavier than all-purpose because it contains bran and germ, which add weight and cut through gluten strands. Increase baking powder by about 25 percent over what you would use with all-purpose flour. If your baseline is 1 1/4 teaspoons per cup, use 1 1/2 to 1 3/4 teaspoons per cup of whole wheat flour to achieve a comparable rise and avoid a dense, heavy crumb.