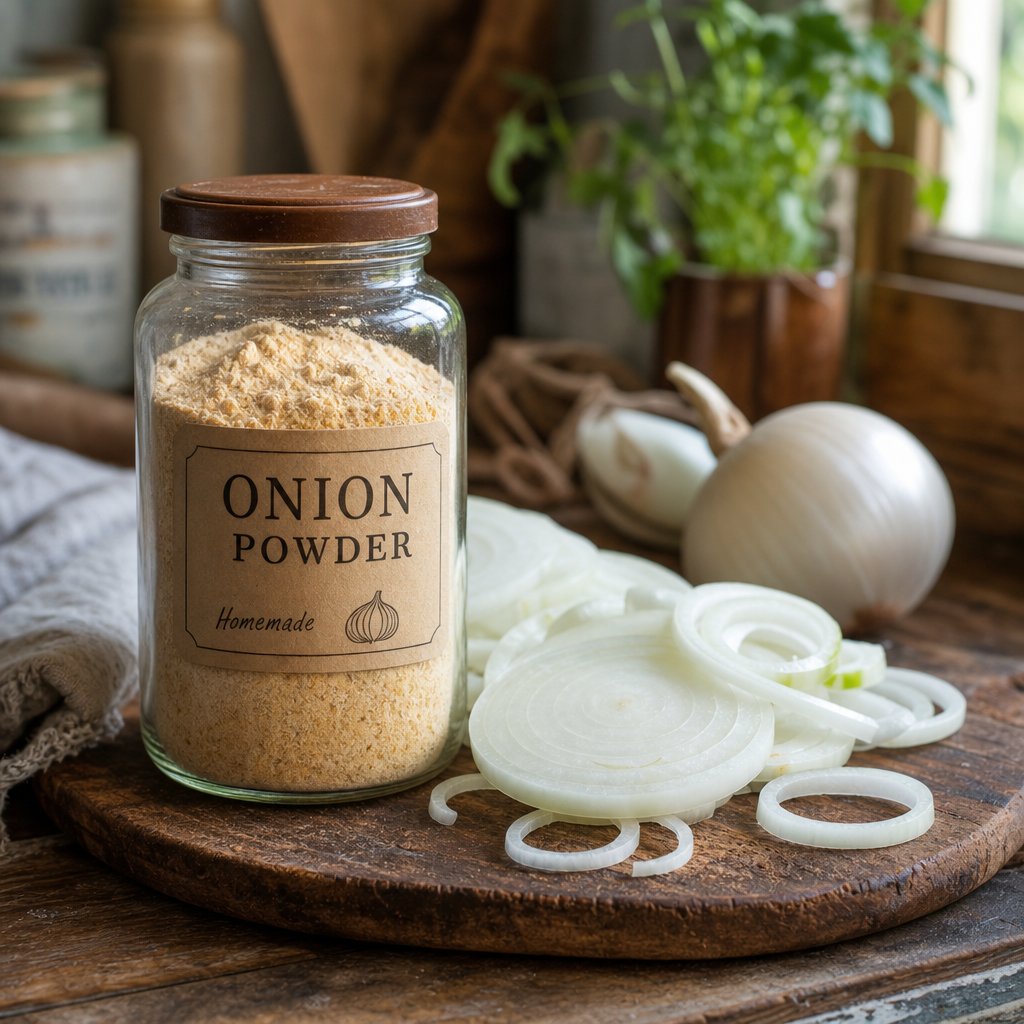
Why Making Your Own Onion Powder Is Worth the Effort
Ever read the ingredients on a jar of store-bought onion powder? Beyond the onion itself, you'll find mysterious anti-caking agents and fillers that have no business being in a single-ingredient spice. So what is onion powder at its core? It is nothing more than fresh onions, dehydrated until bone-dry and ground into a fine, aromatic dust. That simplicity is exactly why making it at home delivers a flavor that commercial brands cannot match.
Why Homemade Onion Powder Tastes Better
When you learn how to make onion powder yourself, you gain three immediate advantages. First, freshness. Store-bought powder may have sat in a warehouse for months before reaching the shelf, losing potency with every passing week. Homemade onion powder, ground from onions you dried yourself, carries a punch of savory depth that stale commercial versions simply lack. Second, purity. The ingredients in onion powder should begin and end with onions. No silicon dioxide, no calcium silicate. Third, cost. Buying onions in bulk during late summer or fall, when prices drop, lets you produce months of seasoning for a fraction of what you would spend jar by jar at the grocery store.
Understanding how to prepare onion powder also gives you full creative control. You choose the variety, the texture, and the intensity. Want a sweeter powder? Use sweet onions. Prefer something sharp and savory? Yellow onions deliver exactly that. This flexibility is something no store shelf can offer.
What You Need Before You Start
The equipment list is short, and you likely own most of it already:
- Food dehydrator or standard oven
- Sharp knife or mandoline slicer
- Blender, spice grinder, or coffee grinder dedicated to spices
- Airtight storage containers (mason jars work perfectly)
- Mesh strainer or fine sieve for consistent texture
This guide walks through every stage of the process, from picking the right onion variety to grinding, storing, and troubleshooting common problems. It covers all drying methods, including dehydrator, oven, and air-drying, with yield estimates so you can plan batch sizes with confidence. Whether you are preserving a garden harvest or taking advantage of bulk pricing, you will have everything you need to produce enough homemade onion powder to last for months.
The first decision that shapes your final product? Which onion you pull off the shelf.
Step 1 Pick the Right Onion Variety for Your Flavor Goals
Not all onions behave the same way once the moisture leaves them. Some concentrate into bold, savory powerhouses. Others mellow into something almost sweet. The variety you choose determines the flavor profile of your finished powder, how long the drying process takes, and which dishes it will complement best.
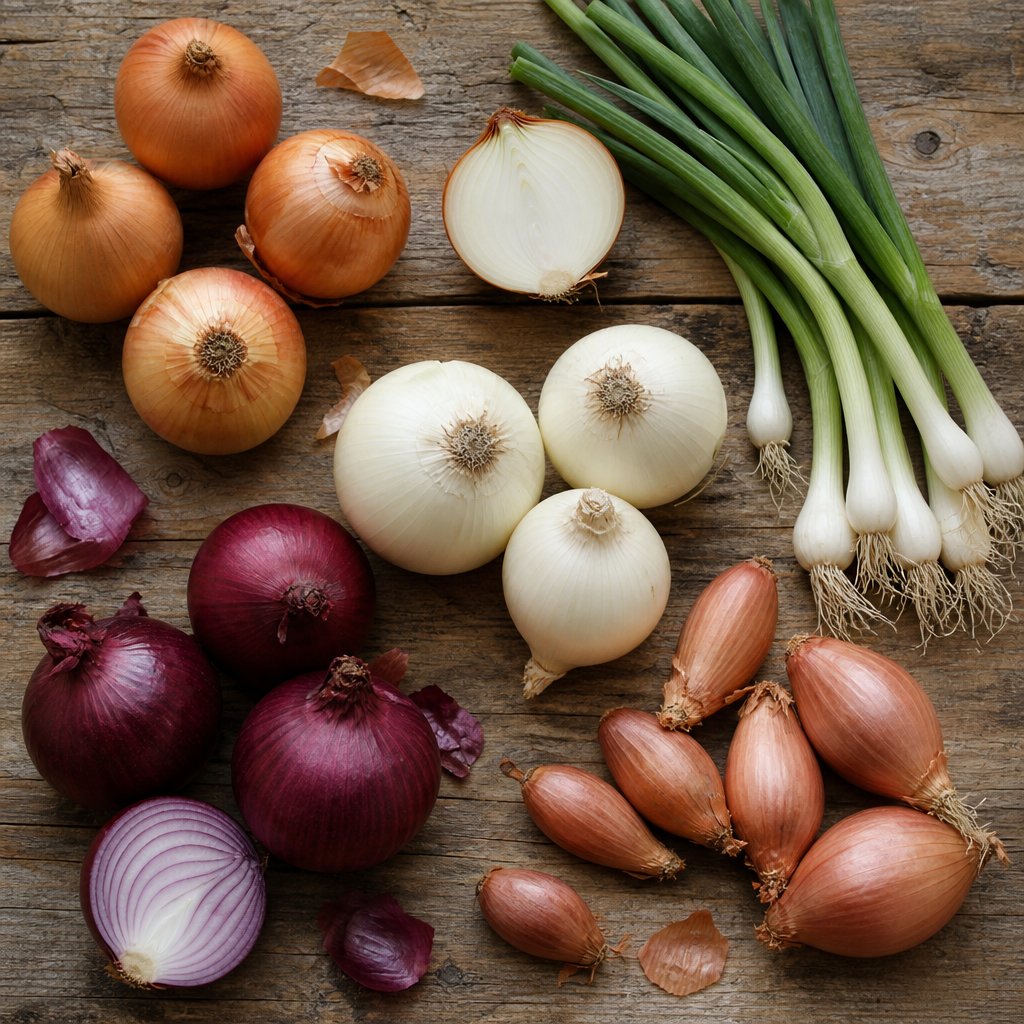
Best Onion Varieties for Powder
Imagine opening a jar of homemade powder and getting hit with a deep, complex aroma that store-bought versions never deliver. That experience starts here, with variety selection. Each type of onion brings a distinct personality to your dried onions, and understanding those differences helps you make intentional choices rather than just grabbing whatever is on sale.
Yellow onions are the workhorse of homemade onion powder. They have a strong savory flavor that intensifies during dehydration, a relatively low moisture content, and they perform consistently across all drying methods. If you are making your first batch of dehydrated onions, start here. Yellow onions deliver a versatile, all-purpose powder that works in everything from soups to dry rubs.
White onions carry a sharper, more assertive bite when fresh, but they mellow slightly once dried. Their clean flavor and neutral color make them a popular choice in commercial dehydration programs. You will notice that white onion powder has a brighter, more forward onion note compared to yellow, making it ideal for Mexican and Southwestern seasoning blends.
Red onions offer a milder heat with a subtle sweetness. Red onion powder adds a slightly different dimension to spice blends, though the vibrant purple color fades to a muted brownish tone during drying. Use red onion powder when you want a gentler onion presence in dips, salad dressings, or lighter dishes.
Sweet onions (like Vidalias) contain significantly more water and natural sugars than other varieties. This means longer drying times and a real risk of caramelization if your temperature creeps too high. The payoff is a mellow, almost buttery powder that works beautifully in baked goods and delicate sauces. Keep temperatures below 135°F to prevent scorching with these.
Shallots produce a concentrated, complex powder with subtle garlic undertones. They are smaller and drier than most onions, so they dehydrate efficiently. The resulting powder is refined enough for vinaigrettes, cream sauces, and egg dishes where a standard dried onion flavor might overpower.
Green onions (scallions) are a different category entirely. Dehydrating green onions gives you a delicate, herbal powder with mild onion flavor and a hint of fresh grassiness. If you want to know how to dehydrate green onions, the process is straightforward: separate the white bulb portions from the green tops, chop uniformly, and dry at 125°F for 3-8 hours. The resulting scallion powder works as a finishing seasoning, adding brightness that heavier onion powders cannot replicate.
How Variety Affects Flavor and Drying Time
Water content is the biggest variable between varieties. Sweet onions can contain up to 90% water, while yellow and white onions sit closer to 85-87%. That difference translates directly into hours on the dehydrator. Varieties with higher sugar content also carry a greater risk of browning or developing sticky spots on the tray, which is why temperature control matters more with sweet onions and shallots.
| Variety | Flavor Profile When Dried | Drying Difficulty | Best Use |
|---|---|---|---|
| Yellow Onion | Strong, savory, slightly sweet | Easy (moderate moisture) | All-purpose seasoning, soups, meats |
| White Onion | Sharp, clean, assertive | Easy (low moisture) | Mexican cuisine, dry rubs, bold blends |
| Red Onion | Mild, slightly sweet, gentle heat | Moderate (higher moisture) | Dips, dressings, lighter dishes |
| Sweet Onion (Vidalia) | Mellow, buttery, delicate | Difficult (high water and sugar) | Baked goods, cream sauces, snack mixes |
| Shallot | Complex, concentrated, garlic undertones | Easy (naturally drier) | Vinaigrettes, egg dishes, fine sauces |
| Green Onion (Scallion) | Herbal, mild, fresh brightness | Easy (thin, low density) | Finishing seasoning, ramen, rice dishes |
A practical approach for your first batch: stick with yellow onions for reliability, then experiment with single-variety batches as you get comfortable with the process. Once you have a few varieties on hand, mixing them creates custom seasoning blends with layered complexity that no single variety can achieve on its own. A blend of yellow and shallot powder, for example, gives you depth and nuance in one shake.
With your variety chosen, the next factor that shapes your results is how you handle the knife. Slice thickness controls everything from drying speed to whether your batch dries evenly or develops problematic moist spots in the center.
Step 2 Slice Onions to the Right Thickness
Slice thickness is the single biggest factor you can control before the dehydrator even turns on. Cut too thick and you end up with slices that feel crispy on the edges but hide moisture in the center, a recipe for mold once they go into storage. Cut too thin and oven-dried batches risk scorching before the interior pieces finish. The sweet spot sits right around 1/8 inch (3mm), and uniformity across the batch matters far more than hitting that number precisely.
How Thin to Slice for Even Drying
Start with basic prep: peel each onion, trim the root end and top, then slice into uniform rings or half-moons. Separate those rings before laying them on trays. This step feels tedious, but separated rings allow airflow around every surface, cutting drying time significantly and preventing the sticky clumps that form when layers trap steam between them.
Anything thicker than 1/4 inch creates problems. The outer edges dehydrate and become brittle while the center stays pliable and damp. Grinding those partially dried pieces produces a paste rather than powder, and storing them invites mold within days. On the other end, paper-thin slices (under 1/16 inch) dry in a fraction of the time but burn easily in ovens running at 170°F or above. Aim for that consistent 1/8-inch thickness across the entire batch and you will get even results regardless of your drying method.
Mandoline vs Knife and Which Gives Better Results
A mandoline slicer is the fastest path to uniform slices. Set it to 3mm, run each onion half across the blade, and every piece comes out identical. That consistency translates directly into even drying, no rotation guesswork, and a batch that finishes all at once rather than in stages.
No mandoline? A sharp chef's knife works fine. The technique: halve the onion through the root, lay it flat-side down, and slice across at a steady angle, using your knuckles as a guide. You will get slight variation in thickness, so check your trays an hour or two before expected finish time and pull thinner pieces that dry first.
Planning batch sizes helps avoid waste. The onion to onion powder ratio is dramatic: 1 medium onion to onion powder yields roughly 1.5 to 3 tablespoons, depending on variety and how finely you grind. Put another way, 1 onion equals how much onion powder? About a heaping tablespoon of fine powder. This onion powder conversion means you will need 8 to 10 medium onions to fill a standard spice jar. Knowing how much onion powder equals 1 medium onion lets you scale your prep to match exactly how much seasoning you want on the shelf.
With your onions sliced uniformly and rings separated, the next decision determines how long you will wait before grinding: which drying method fits your setup, your schedule, and your energy budget.
Step 3 Choose Your Drying Method and Follow Precise Settings
Three paths lead to the same destination: bone-dry onion slices ready for grinding. Each method carries its own tradeoffs in time, energy cost, and consistency. Your choice depends on what equipment you have, how quickly you need results, and whether you are willing to babysit the process or prefer a set-it-and-forget-it approach.
Here is how the three methods compare at a glance:
| Method | Temperature | Time Required | Energy Cost | Equipment Needed | Quality of Results |
|---|---|---|---|---|---|
| Food Dehydrator | 125-135°F (52-57°C) | 8-12 hours | Low | Dehydrator with adjustable thermostat | Most consistent and even |
| Oven | 170-200°F (77-93°C) | 3-6 hours | Higher | Standard oven, parchment paper, baking sheets | Good, but risk of scorching |
| Air Drying | Ambient (warm, dry climate) | 3-7 days | Zero | Mesh screens or bags, fan (optional) | Climate-dependent, uneven without airflow |
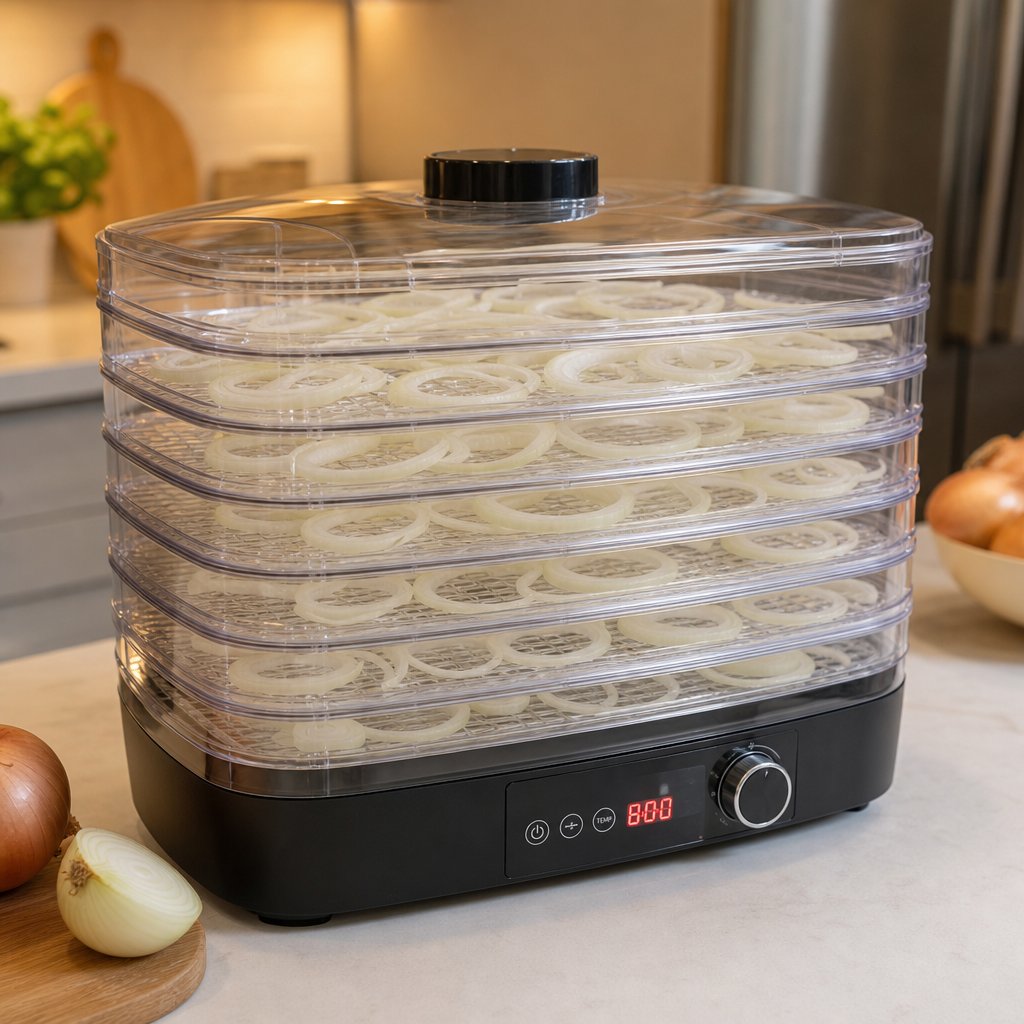
Dehydrator Method for Consistent Results
If you want to know how to dehydrate onions with the least amount of guesswork, a food dehydrator is the answer. Set the temperature to 125°F (52°C), spread your separated onion rings in a single layer across the trays, and walk away. The built-in fan circulates warm air evenly across every slice, which is why dehydrating onions this way produces the most uniform results.
A few details that make the difference between a good batch and a great one:
- Leave small gaps between pieces so air flows freely around each slice
- Rotate trays every 3-4 hours if your dehydrator heats from the bottom, moving lower trays to the top
- Check progress at the 8-hour mark for thin slices, though thicker cuts or high-sugar varieties may need the full 12 hours
- Expect a strong onion smell throughout the process, so run the dehydrator in a garage, porch, or well-ventilated room if possible
You will notice the slices shrink dramatically and turn translucent, then opaque and brittle as moisture leaves. Michigan State University Extension confirms that the finished dehydrated onion pieces should be crisp or brittle before storage. If any slice still bends without snapping, it needs more time.
Oven Drying When You Need It Done Today
No dehydrator? You can still dry onions effectively using your kitchen oven. Learning how to dehydrate onions in the oven requires a bit more attention, but the faster timeline appeals to anyone who wants finished product the same day.
Here is the process step by step:
- Preheat your oven to its lowest setting, ideally between 170-200°F (77-93°C)
- Line baking sheets with parchment paper and spread onion slices in a single layer
- Prop the oven door open with a wooden spoon to let moisture escape and prevent temperature spikes
- Stir and rotate trays every 45-60 minutes for even drying
- Pull thinner pieces as they finish and let thicker ones continue
The biggest risk with oven drying is scorching. Unlike a dehydrator's gentle, consistent airflow, ovens can develop hot spots that brown or cook the onions rather than simply removing moisture. If you notice any darkening, reduce the temperature immediately. A dry onion slice should remain pale, not golden or brown. Expect the full process to take 3-6 hours depending on slice thickness and your oven's accuracy at low temperatures.
Air Drying for Zero Energy Cost
How do you dehydrate onions without any electricity at all? Air drying works, but only under the right conditions. You need ambient humidity below 60%, consistent warmth, and good airflow. In arid climates like the American Southwest, this method is practical and free. In humid regions, it invites mold before the onions ever finish drying.
To air dry onions successfully:
- Spread slices on mesh screens or hang them in breathable mesh bags
- Place them in a warm, shaded area with natural air circulation, avoiding direct sunlight which can degrade flavor
- Position a fan nearby for indoor setups to keep air moving across the surfaces
- Allow 3-7 days depending on humidity and slice thickness
- Flip or stir pieces daily to prevent sticking and promote even drying
Air drying produces a perfectly usable dehydrated onion, but the extended timeline means more exposure to dust, insects, and fluctuating conditions. Cover trays with cheesecloth if drying outdoors. This method works best as a supplement, perhaps for small batches of green onion tops or shallots, rather than a primary approach for large-scale production.
Regardless of which method you choose, the real question is not how long you dry onions but how you know they are actually done. Pulling slices too early is the most common mistake in the entire process, and it leads to problems that no amount of grinding can fix.
Step 4 Test for Complete Dehydration Before Grinding
This is where most batches go wrong. You have spent hours drying your onions, the kitchen smells incredible, and the slices look done. But looking done and being done are two different things. Residual moisture hiding inside seemingly dry slices is the number one cause of moldy powder, clumpy jars, and wasted effort. Testing for complete dehydration is a skill, and it takes less than a minute to get right.
The Snap Test and Other Readiness Indicators
Pick up a cooled slice and bend it between your fingers. A fully dehydrated onion piece snaps cleanly in half, like a thin cracker. If it bends, flexes, or feels leathery in any way, it still holds moisture and needs more time. This snap test is the same method used in commercial production. Ever wondered how do they make onion powder in factories? The same fundamental principle applies: the onion must be completely brittle before it moves to the grinding stage.
Here is the critical detail most guides skip: always let slices cool to room temperature before testing. Warm onion pieces feel drier and more brittle than they actually are. Heat masks residual moisture, so a slice that snaps fresh off the dehydrator tray might turn pliable again once it cools. Pull a few sample pieces, set them on the counter for 5-10 minutes, then perform the snap test. If they still break cleanly with a satisfying crack, you are ready to grind.
Beyond the snap, look for these additional indicators:
- Texture feels papery and light, similar to a dried leaf
- No cool spots when you press a piece against your lip (cool areas signal trapped moisture)
- Slices have shrunk dramatically and appear translucent or pale rather than fleshy
- Pieces make a faint rattling sound when you shake the tray
The weight test offers a more precise confirmation. Fresh onions contain approximately 89% water, and for vegetables you need to drive out 95% of that water weight. In practical terms, fully dehydrated onion powder material loses roughly 85-90% of its original weight. If you started with 5 pounds of fresh sliced onions, expect around 8-10 ounces of dried material when properly finished. Weigh a sample before and after drying to verify: if the weight has not dropped by at least 85%, the batch needs more time.
What Happens If You Grind Too Early
Grinding onions that still carry internal moisture does not produce powder. It produces a sticky, clumping paste that jams your grinder and refuses to sift. Even a small amount of residual moisture, invisible to the eye, changes the outcome entirely. Understanding how onion powder is made means accepting that patience at this stage determines whether you end up with a silky, free-flowing powder or a frustrating mess.
The consequences extend beyond the grinding session. If you manage to force partially dried pieces into something resembling powder and store it in a jar, that trapped moisture creates an environment where mold thrives. Within days, you may notice off-smells, discoloration, or visible fuzzy growth. The entire batch becomes unusable.
When in doubt, err on the side of more drying time. An extra hour or two in the dehydrator costs almost nothing in energy but protects hours of prep work. Conditioning your dried onions for 5-7 days in a loosely sealed jar, shaking daily and watching for any signs of sticking or moisture buildup, adds another layer of insurance before you commit to grinding.
Once your slices pass the snap test at room temperature, feel uniformly papery, and show no signs of moisture during conditioning, you have earned the right to move to the grinder. The texture you choose at that stage, whether flakes, granules, or fine powder, opens up an entirely different set of decisions.
Step 5 Grind to Powder, Granules, or Flakes
Most people assume grinding is the easy part. Toss dried onions into a blender, hit the button, and collect your powder. But here is what separates a good batch from a great one: you can intentionally control the texture of your ground onion to match specific cooking applications. Flakes, granules, and fine powder each behave differently in recipes, and the grinding technique you use determines which one you get.
Grinding Equipment Compared
Your choice of grinding tool shapes both the texture and the batch size you can handle efficiently. Each option has strengths worth considering:
- Dedicated spice grinder — the best tool for producing fine, uniform onion powder in small batches. Electric blade grinders like the Cuisinart Electric Spice and Nut Grinder pulverize brittle onion slices in seconds and give you precise control over texture through pulse timing.
- High-speed blender — handles larger batches effectively, making it practical for processing several trays of dehydrated onion flakes at once. The tradeoff is less uniformity; you will likely need to sift the results and return oversized pieces for another pass.
- Coffee grinder — an affordable, accessible option that works well for small amounts. Designate one exclusively for spices, since onion oils cling to surfaces and will flavor your morning coffee for weeks.
- Mortar and pestle — labor-intensive but excellent for producing coarse granulated onion with a rustic, uneven texture. You get tactile control over exactly how fine the grind goes, which makes it ideal for onion granules destined for dry rubs and bread toppings.
If you process large harvests regularly, a dedicated spice grinder pays for itself quickly. For occasional batches, a coffee grinder handles the job without taking up extra cabinet space.
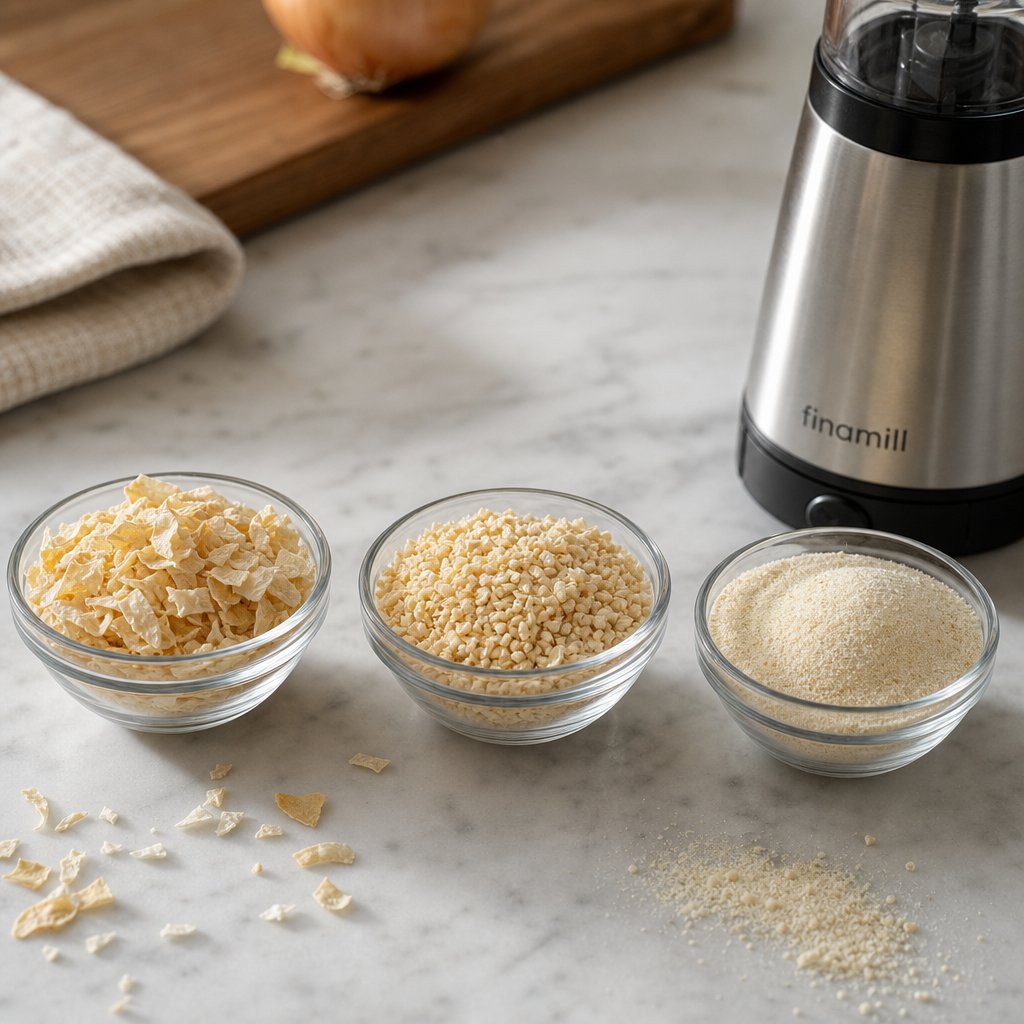
How to Get Flakes vs Granules vs Fine Powder
The difference between these three textures comes down to grind duration and sifting. You are not locked into one outcome per batch — you can produce all three from the same dried onions by controlling how long you grind and what you filter out.
Dehydrated onion flakes: These require the least processing. Simply break your dried slices into smaller pieces by hand or with 1-2 quick pulses in a grinder. The result should be flat, irregular chips roughly the size of a pinky nail. Flakes rehydrate well in soups, stews, and slow-cooked dishes where they have time to soften and release flavor gradually. You can also convert dried minced onion to onion powder later by grinding your stored flakes whenever you need a finer texture.
Granulated onion: Pulse your grinder 3-5 times in short, sharp bursts. Then pour the contents through a mesh strainer. What falls through is your finished granulated onion powder — coarse, sandy particles similar to cornmeal in texture. What stays in the strainer goes back for another round of pulses. Granulated onion dissolves slower in liquids than fine powder, which makes it the better choice for dry rubs, spice blends, and any application where you want flavor to release gradually rather than all at once.
Fine powder: Grind continuously for 20-30 seconds, then sift through a fine mesh strainer. Return any remaining chunks for another 15-20 second pass. Repeat until everything passes through the sieve. Fine ground onion integrates instantly into sauces, dressings, batters, and marinades. It disappears completely into the dish, delivering even onion flavor without any detectable texture.
One technique matters across all three textures: pulse in short bursts rather than holding the button down continuously. Extended grinding generates friction heat inside the chamber, and that heat degrades the volatile compounds responsible for onion's sharp, savory aroma. You will notice the difference — overheated powder smells flat and slightly burnt compared to cool-ground powder that retains its full pungency.
Understanding the relationship between granulated onion to onion powder also helps with recipe conversions. Since granules are coarser, they pack less densely into a measuring spoon. As a general rule, use about one-and-a-half times the volume of granulated onion when substituting for fine powder in a recipe. The flavor intensity is the same; only the particle size and dissolving speed differ.
With your preferred texture ground and sifted, the final challenge is keeping that powder fresh, free-flowing, and flavorful for months. Without commercial anti-caking agents, homemade powder demands smarter storage strategies than simply screwing on a lid.
Step 6 Store Your Powder to Maximize Shelf Life
You have spent hours slicing, drying, and grinding. The last thing you want is a jar of rock-hard clumps three weeks later. Homemade onion powder lacks the silicon dioxide and calcium silicate that keep commercial versions free-flowing, which means storage decisions matter far more for your DIY batch than they do for anything off a grocery shelf.
Best Containers for Long-Term Storage
Moisture is the enemy. Every time you open a container, ambient humidity sneaks in and gets absorbed by the powder's hygroscopic particles. Over time, that moisture bonds the fine grains together into solid clumps. So why does onion powder get hard? It is pulling water from the air and slowly rehydrating at a microscopic level.
The fix starts with your container choice:
- Airtight glass jars — mason jars or clamp-lid jars with rubber gaskets are ideal. Glass does not absorb odors, seals tightly, and lets you visually inspect the powder without opening the lid.
- Small containers over large ones — fill several small jars rather than one big one. Each time you open a jar, you expose the contents to humidity. A smaller jar means less total exposure over time.
- Food-safe desiccant packets or dry rice — drop a silica gel packet rated for food storage into each jar, or add a few grains of uncooked rice to the bottom. Both absorb ambient moisture and slow clumping significantly. Storing with rice at the bottom of the container is a simple trick that helps prevent hardening without affecting flavor.
- Cool, dark location — heat accelerates flavor degradation, and light breaks down the volatile compounds that give onion powder its punch. A pantry shelf away from the stove or a cabinet that does not receive direct sunlight works perfectly.
One strategy that extends freshness even further: store the bulk of your dried onion pieces whole and grind only what you need for the next month or two. Whole dehydrated slices resist moisture absorption better than powder because they have far less exposed surface area. Grinding in small batches as needed keeps each portion at peak potency.
How Long Homemade Onion Powder Lasts
Does onion powder go bad? Technically, dried spices do not spoil in a way that makes them unsafe, but they absolutely lose flavor over time. Properly stored onion powder homemade batches retain full aroma and potency for roughly 6-12 months. After that window, you will notice the scent fading, the color shifting from warm golden to pale beige, and the flavor becoming flat rather than sharp.
Signs your powder has degraded past its prime:
- Weak or absent aroma when you open the jar
- Color has faded noticeably from its original golden hue
- Clumping that does not break apart with a gentle shake or tap
- Stale or cardboard-like taste instead of pungent onion bite
Whole dried onion slices and flakes last even longer, often 1-2 years in airtight storage, because the reduced surface area slows oxidation. This is why the grind-as-you-go approach works so well for home cooks who do not burn through powder quickly.
For yield planning, keep this ratio in mind: approximately 5 pounds of fresh onions produces about 1 cup of finished powder. That single cup can last a household several months of regular cooking. Late summer and early fall, when onion prices drop and farmers markets overflow with bulk bags, is the ideal window for seasonal batch processing. Buy in volume, dedicate a weekend to slicing and drying, and you will have enough powder to carry you through winter and spring without spending another dollar on the store-bought version.
Even with perfect storage, things occasionally go sideways. Clumps form, batches taste off, or slices refuse to dry evenly. Knowing how to diagnose and fix those problems saves you from scrapping an entire batch.
Step 7 Troubleshoot Common Onion Powder Problems
Something went wrong with your batch. Maybe the powder clumped into a brick overnight, or the flavor tastes harsh and bitter instead of savory. Before you toss anything, know that nearly every DIY onion powder failure has a fixable cause. The table below covers the most common problems, what triggers them, and exactly how to recover.
| Problem | Cause | Solution |
|---|---|---|
| Powder clumps into a solid mass | Residual moisture trapped in the grind | Spread powder on a parchment-lined tray and re-dehydrate at 125°F for 1-2 hours, then regrind once cooled |
| Slices dry unevenly (crispy edges, soft centers) | Inconsistent slice thickness or overcrowded trays | Slice uniformly at 1/8 inch, separate all rings, and leave space between pieces for airflow |
| Burnt or scorched onions | Oven temperature too high or no ventilation | Reduce temperature to 170°F, crack the oven door wider, and rotate trays every 45 minutes |
| Onions will not crisp up | High ambient humidity preventing full dehydration | Switch to a dehydrator with a fan, extend drying time by 3-5 hours, or move equipment to a drier room |
| Bitter-tasting powder | Overheated during drying or grinding (above 140°F) | Keep drying temperature below 135°F and pulse the grinder in short bursts to prevent friction heat |
| Powder turns into paste during grinding | Onions not fully dehydrated before grinding | Return pieces to the dehydrator for 2-3 more hours until they snap cleanly, then regrind |
Fixing Clumpy or Moist Powder
Clumping is the most frequent complaint when you make onion powder at home. If your freshly ground batch feels sticky or compresses into a solid lump, moisture is still present. The fix is simple: spread the powder in a thin, even layer on a lined dehydrator tray and run it at 125°F for 1-2 hours. Let it cool completely, then grind a second time. Re-dehydrating clumpy powder is a standard recovery technique that saves the entire batch rather than wasting it.
For future prevention, always condition your dried slices for 24 hours in a sealed jar before grinding. Shake the jar several times and watch for condensation on the glass. Any fogging means the onions need more drying time. This single habit eliminates most clumping issues before they start.
Solving Uneven Drying and Burnt Edges
You pull a tray and find some pieces shatter at a touch while others still bend like rubber. This happens when slices vary in thickness or when pieces overlap and block airflow. The solution is upstream: use a mandoline for consistent cuts and separate every ring before loading trays.
Burnt edges are a different issue, and they show up most often for people learning how to make onion powder without a dehydrator. Ovens run hotter and less evenly than dedicated dehydrators, so scorching is a real risk. If you notice browning, drop the temperature immediately and prop the door open further. Rotate trays more frequently, pulling thinner pieces as they finish. Slightly golden edges are cosmetic, but dark brown or black spots introduce bitterness that carries through into the finished powder.
Why Your Powder Tastes Bitter
Bitter onion powder almost always traces back to heat damage. When drying temperatures exceed 140°F, the natural sugars in onions begin to caramelize unevenly, producing acrid compounds instead of the mellow sweetness you want. The same thing happens during grinding if you hold the button down too long. Friction inside the grinder chamber heats the powder, degrading volatile flavor compounds and leaving a harsh, flat taste behind.
The prevention is straightforward: how do you make onion powder that tastes clean and savory? Keep your dehydrator at 125-135°F, never higher. Pulse your grinder in 5-second bursts with pauses between them to let heat dissipate. If a batch already tastes bitter, there is no way to reverse the chemical change, but blending it with a fresh, properly dried batch dilutes the off-flavor enough to make it usable in heavily seasoned dishes like chili or barbecue rubs.
One more scenario worth addressing: if you are trying to make onion powder without a dehydrator and your oven's lowest setting still runs above 200°F, try the light-bulb method. Turn the oven off, switch on only the interior light, and let that gentle warmth dry thin slices over 12-24 hours. It is slower, but it eliminates the scorching risk entirely for ovens that simply cannot hold a low enough temperature.
How to make homemade onion powder successfully comes down to controlling two variables: moisture and heat. Master those, and every batch comes out consistent. With troubleshooting handled, the natural next question is what to do with all that powder beyond shaking it into a single recipe.
Step 8 Create Custom Blends and Scale Beyond the Kitchen
A jar of homemade onion powder is useful on its own, but it becomes something far more versatile when you start blending it with other spices. Custom onion seasoning mixes let you season entire meals with a single shake, and they make thoughtful gifts for anyone who cooks. Beyond personal use, some readers will inevitably wonder what it takes to turn a kitchen-tested recipe into a product on store shelves.
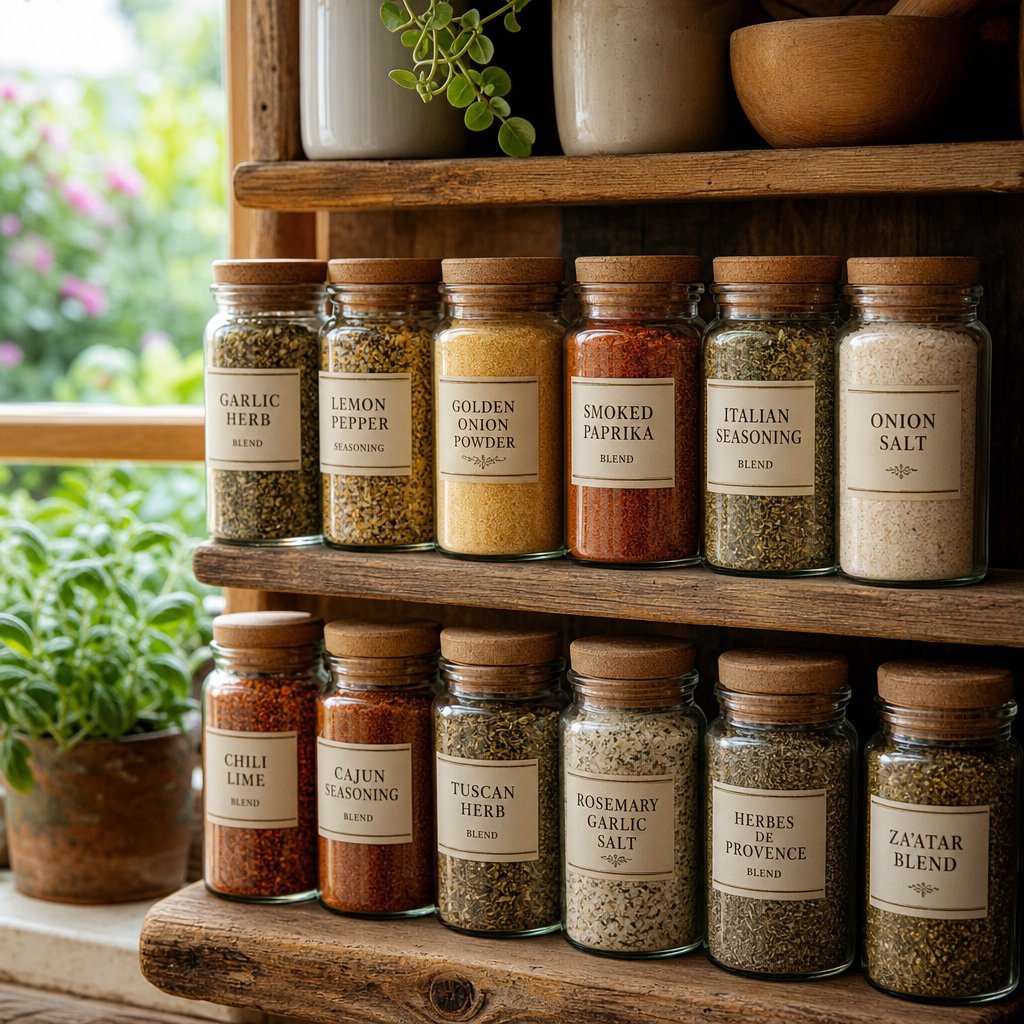
Custom Seasoning Blends to Make With Your Powder
Once you have a steady supply of homemade powder, building your own spice blends takes minutes. These three recipes cover the most common needs and scale easily for larger batches:
- Onion salt — Learning how to make onion salt from onion powder is as simple as mixing 3 parts salt to 1 part onion powder. Use kosher salt or sea salt for a cleaner flavor. This onion salt recipe contains no anti-caking agents, so store it in a tightly sealed jar and give it a quick shake before each use. Adjust the ratio to 2:1 if you prefer a stronger onion presence with less sodium.
- Onion garlic powder blend — Combine equal parts onion powder and garlic powder for a savory duo that works on virtually everything. This onion powder garlic powder combination is the backbone of countless dry rubs, marinades, and roasted vegetable recipes. Add a pinch of dried parsley for color if you plan to use it as a finishing spice.
- All-purpose seasoning — Mix 3 tablespoons onion powder, 4 tablespoons garlic powder, 3 tablespoons smoked paprika, 2 tablespoons kosher salt, and 2 tablespoons freshly ground black pepper. This all-purpose blend works on chicken, roasted vegetables, grilled meats, and even popcorn. It replaces the need for multiple jars and delivers layered flavor in seconds.
Wondering how to make onion salt with onion powder using different salt types? Sea salt adds mineral complexity, pink Himalayan salt contributes a subtle earthiness, and smoked salt creates a barbecue-forward onion spice that transforms grilled corn and roasted potatoes. Each variation gives you a distinct product from the same base ingredient.
Taking Onion Powder From Kitchen to Commercial Scale
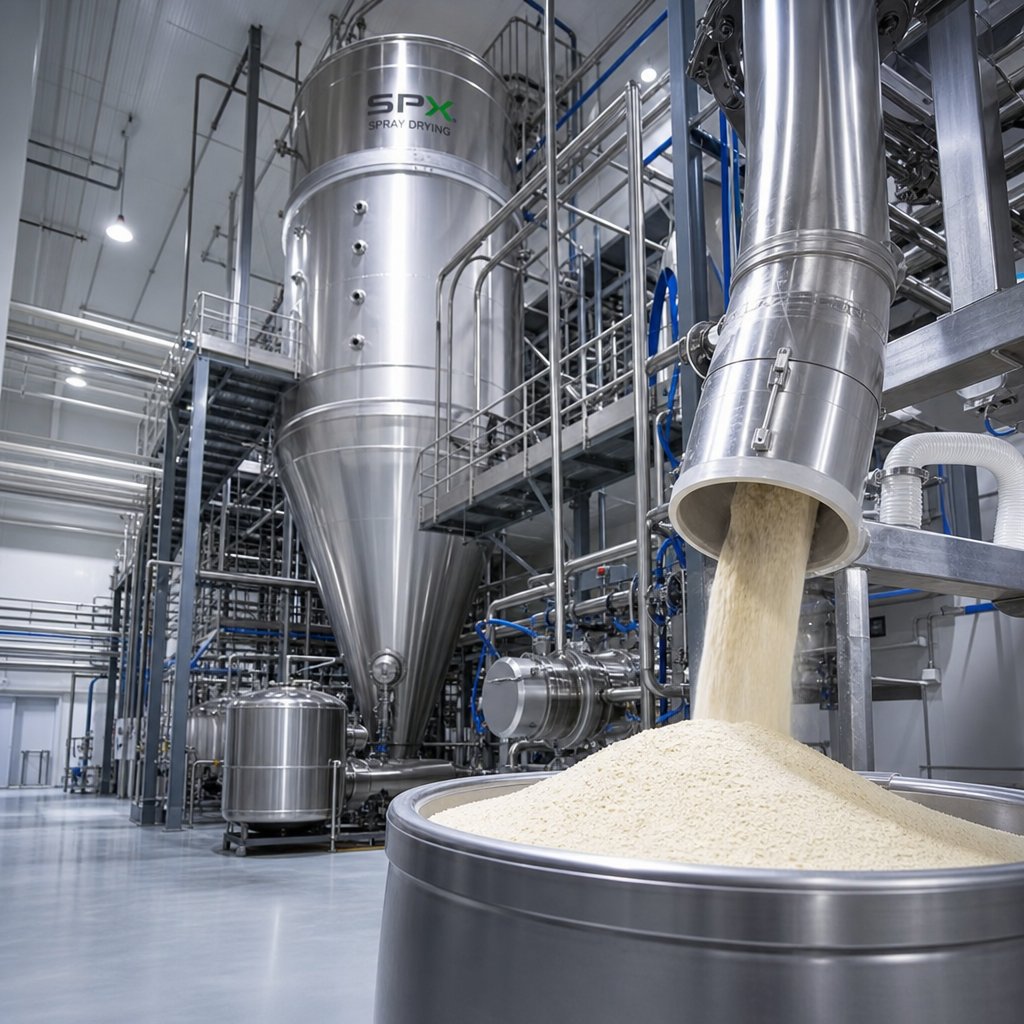
Some readers reach a point where friends, family, and farmers market customers start asking to buy their blends. Scaling from a home kitchen to commercial production is a significant leap. Professional onion powder manufacturing requires food-grade facilities with controlled environments, consistent particle sizing (often measured in mesh counts), and processes that meet food safety certifications.
In commercial settings, standardized production lines handle everything from automated peeling and slicing to continuous belt drying at precisely controlled temperatures between 60-70 degrees Celsius. The finished powder passes through vibrating screens for uniform particle size, metal detection for safety, and nitrogen-flushed packaging for extended shelf life. These steps ensure consistency across thousands of units, something a home kitchen simply cannot replicate.
For entrepreneurs interested in developing a commercial health food or supplement product that uses onion powder as a functional ingredient, OEM/ODM manufacturers offer a practical bridge between kitchen experimentation and market-ready production. Companies like ZhuFeng specialize in helping nutrition brands and private label sellers turn custom formulations into professionally produced health products. Their flexible formats, including powder and granule products, connect naturally to onion-based supplements or seasoning lines, with scalable production and proper certifications already in place.
Whether you keep your powder strictly personal or explore turning it into a product, the skills you have built through this process, controlling moisture, managing heat, and understanding how texture affects application, apply at every scale. A batch made with care in your kitchen uses the same principles that drive professional production. The only difference is volume.
Frequently Asked Questions About Making Onion Powder
1. How long does it take to make onion powder from scratch?
The total time depends on your drying method. Using a food dehydrator takes 8-12 hours at 125-135°F, oven drying runs 3-6 hours at 170-200°F, and air drying requires 3-7 days in a warm, low-humidity environment. Add roughly 30 minutes for slicing and 10-15 minutes for grinding and sifting. Most home cooks complete the entire process within a single day when using a dehydrator or oven.
2. How many onions do I need to make a jar of onion powder?
Approximately 5 pounds of fresh onions yields about 1 cup of finished powder, which is enough to fill a standard spice jar. A single medium onion produces only 1.5 to 3 tablespoons of powder because onions lose roughly 90% of their weight during dehydration. Plan on 8-10 medium onions if you want to fill one jar completely.
3. Can I make onion powder without a dehydrator?
Yes. Your oven works well when set to its lowest temperature (170-200°F) with the door propped open using a wooden spoon for ventilation. Rotate trays every 45-60 minutes and watch for scorching. Air drying is another option if you live in a dry climate with humidity below 60%. For ovens that cannot hold temperatures below 200°F, turning the oven off and using only the interior light provides gentle warmth that dries thin slices over 12-24 hours without burning.
4. Why does my homemade onion powder clump together?
Clumping happens when residual moisture remains in the powder or when humidity enters the jar during storage. To fix existing clumps, spread the powder on a lined tray and re-dehydrate at 125°F for 1-2 hours, then regrind after cooling. Prevent future clumping by conditioning dried slices in a sealed jar for 24 hours before grinding, adding a food-safe desiccant packet or a few grains of dry rice to storage containers, and using small jars to limit air exposure each time you open them.
5. How do I know when my onions are dry enough to grind?
Perform the snap test after slices have cooled to room temperature. A fully dehydrated piece breaks cleanly in half like a thin cracker. If it bends, flexes, or feels leathery, it needs more drying time. Additional indicators include a papery texture, no cool spots when pressed against your lip, and a weight loss of at least 85-90% compared to the fresh starting weight. Never test warm slices directly off the tray, as heat masks residual moisture.